1 Minute Lava Cake with Chocolate: Molten Perfection
- Time: Active 2 minutes, Passive 1 minutes, Total 3 minutes
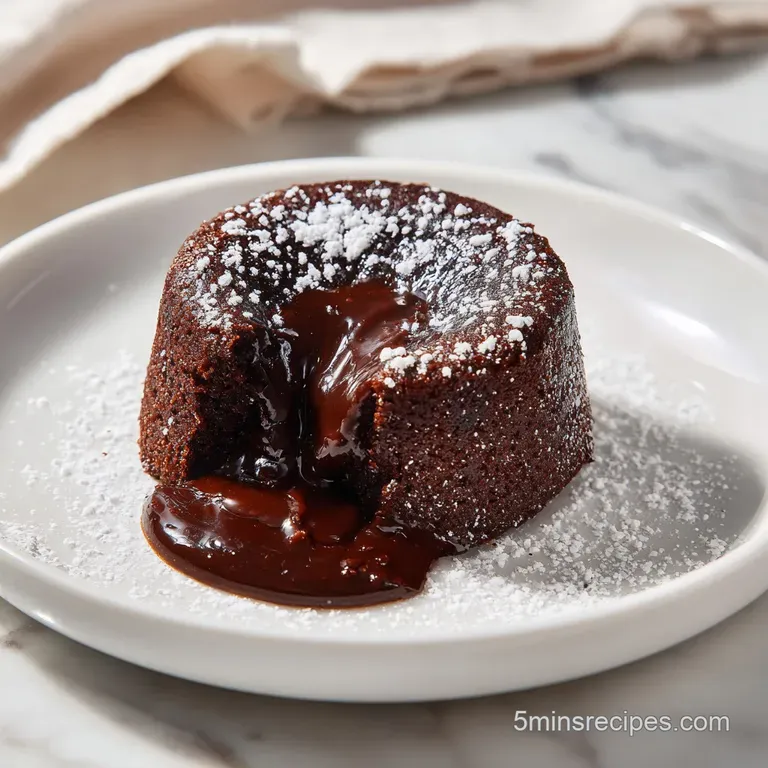
- Flavor/Texture Hook: Velvety chocolate crumb with a molten, liquid core
- Perfect for: Late night cravings, quick solo treats, or emergency dessert needs
- The Secret to Molten Centers
- Essential Recipe Specifications and Metrics
- Core Components for Deep Flavor
- Essential Tools for Rapid Baking
- Step-by-Step Method for Success
- Common Mistakes and Simple Fixes
- Creative Flavor Profiles to Explore
- Smart Storage and Leftover Management
- Dessert Pairings for Enhancing Flavor
- Decision Shortcut
- Recipe FAQs
- 📝 Recipe Card
The Secret to Molten Centers
The biggest hurdle with microwave baking is how heat is distributed. Unlike a conventional setup where heat moves from the outside in, a microwave vibrates water molecules throughout the food simultaneously. This often leads to overcooking and that dreaded rubbery texture.
Our solution is simple: we use a "physical plug" of chocolate.
- Density Gradient: By placing a solid ounce of chocolate in the center, we create a zone that requires more energy to melt than the surrounding batter does to set.
- Oil Based Moisture: Using neutral oil instead of butter ensures the cake stays soft even when it cools slightly, as oil remains liquid at room temperature.
- Dutch Process Magic: This specific cocoa powder is less acidic, which creates a darker, richer color and a smoother flavor profile that mimics high end patisserie.
Standing Time Physics
In microwave cooking, the "cook" doesn't stop when the timer beeps. The residual heat trapped in the sugar and fats continues to set the proteins in the flour. If you eat it immediately, the crumb might feel a bit wet.
If you wait exactly 60 seconds, the steam redistributes, and the texture transforms from "batter like" to "silky cake."
The Steam Trap
Because we are cooking in a deep mug, the steam is partially trapped. This acts like a mini pressure cooker, keeping the crumb hydrated. This is why using a 10-12 oz mug is vital - it provides enough headroom for the cake to rise without the steam escaping too quickly, which would dry out the edges.
| Method | Time | Texture | Best For |
|---|---|---|---|
| Microwave | 1 minute | Velvety & Molten | Instant gratification |
| Conventional | 15 minutes | Fudgy & Crusty | Dinner parties |
| Toaster Oven | 12 minutes | Crisp edges | Small batches |
We need to realize that the microwave is essentially a moisture evaporating machine. To combat this, we've increased the fat to flour ratio slightly compared to a traditional cake. This creates a barrier around the flour particles, preventing them from forming long gluten strands that would make the cake tough.
Essential Recipe Specifications and Metrics
Before you start whisking, let’s look at the numbers that make this work. These aren't just suggestions; they are the result of testing different microwave wattages and mug shapes. When you smell that first whiff of earthy cocoa, you’ll know you’re on the right track.
| Component | Science Role | Pro Secret |
|---|---|---|
| All Purpose Flour | Structure | Don't over measure; fluff the flour first |
| Dutch Process Cocoa | Flavor depth | Sift to avoid those tiny bitter lumps |
| Neutral Oil | Moisture retention | Use avocado or grapeseed for a clean taste |
| Dark Chocolate | Molten core | Use 60% cacao or higher for the best "flow" |
The aroma at this stage should be quite neutral, mostly the scent of dry flour and the deep, woodiness of the cocoa powder. Once the liquid hits, you'll start to notice the vanilla and the sweetness of the sugar blooming.
For another decadent treat, try my silky chocolate cream pie when you have more time to let things set in the fridge. But for right now, we are focusing on speed and that instant chocolate hit.
Core Components for Deep Flavor
The quality of your ingredients in a single serving dish matters more than in a giant cake because there’s nowhere for mediocre flavors to hide. Every gram counts toward that final velvety bite.
- 4 tbsp (32g) all purpose flour: This provides the backbone. Why this? Provides enough structure to hold the molten core without being heavy.
- 3 tbsp (38g) granulated sugar: Sweetness and moisture. Why this? Sugar liquifies when heated, contributing to the soft, tender crumb.
- 2 tbsp (10g) unsweetened Dutch processed cocoa powder: The flavor base. Why this? It’s treated with alkali to neutralize acidity, making it darker and richer.
- 1/4 tsp baking powder: The lifting agent. Why this? Ensures the cake rises rapidly in the 60 second window.
- 1 pinch fine sea salt: The flavor balancer. Why this? Salt intensifies the perception of chocolate on your tongue.
- 3 tbsp (45ml) whole milk: The hydration. Why this? The fat in whole milk adds a creamy mouthfeel that water can't match.
- 2 tbsp (30ml) neutral oil: The moisture lock. Why this? Oil keeps the cake from becoming a "puck" as it cools down.
- 1/4 tsp pure vanilla extract: The aromatic. Why this? Vanilla acts like a spotlight for chocolate, making it taste more "chocolatey."
- 1 oz (28g) high-quality dark chocolate: The lava. Why this? Real chocolate melts better than chips, creating a superior liquid center.
| Original Ingredient | Substitute | Why It Works |
|---|---|---|
| Whole Milk | Oat Milk (full fat) | Similar creamy texture. Note: Adds a slight toasted grain flavor. |
| Neutral Oil | Melted Coconut Oil | High fat content. Note: Will add a distinct coconut aroma to the cake. |
| Granulated Sugar | Brown Sugar | Adds moisture and a hint of molasses flavor. |
Using the right cocoa is non negotiable for me. If you use natural cocoa (like Hershey’s), the cake might be a bit paler and more acidic. Dutch process (like Rodelle or King Arthur) gives you that Oreo dark color and a mellow, chocolatey punch that is just incredible.
Essential Tools for Rapid Baking
You don't need a stand mixer or a heap of bowls for this. In fact, using too many tools just makes more mess, and the goal here is speed.
- 10-12 oz Microwave Safe Mug: This is your baking vessel. It needs to be large enough to allow for a 2 inch rise.
- Small Whisk or Fork: A fork is actually better for getting into the bottom "corners" of the mug to ensure no flour pockets remain.
- Measuring Spoons: Precision is key in small batch baking. A gram scale is even better if you have one.
- Microwave: Tested at 1100 watts. If your microwave is lower (700-800W), you may need an extra 15-20 seconds.
Chef's Tip: If your mug has straight sides rather than tapered ones, the cake will rise more evenly. Tapered mugs can sometimes cause the center to push up and out too quickly.
step-by-step Method for Success

- Whisk the dry base. In your 10-12 oz microwave safe mug, combine 4 tbsp flour, 3 tbsp sugar, 2 tbsp cocoa powder, 1/4 tsp baking powder, and a pinch of salt. Whisk vigorously until no large cocoa lumps remain and the mixture is a uniform dusty brown.
- Add the wet elements. Pour in 3 tbsp whole milk, 2 tbsp neutral oil, and 1/4 tsp vanilla extract.
- Emulsify the batter. Whisk with a fork, scraping the bottom edges carefully, until the batter is glossy, smooth, and resembles thick chocolate syrup. Note: Flour often hides in the bottom rim, so be thorough!
- Insert the core. Take your 1 oz of dark chocolate and press it directly into the center of the batter.
- Submerge the chocolate. Push it down slightly until it is just covered by batter but not touching the bottom of the mug.
- The Precision Zap. Place the mug in the center of the microwave. Cook on high power for 60 seconds.
- Watch the rise. Around the 45 second mark, you should smell the chocolate blooming. The cake will rise dramatically and then settle slightly.
- Check the surface. The top should look set but slightly shiny. It shouldn't look like wet batter, but it shouldn't look bone dry either.
- The Essential Rest. Remove the mug (careful, it's hot!) and let it sit undisturbed for 60 seconds. Note: This is when the "lava" truly liquefies and the crumb finishes setting.
- Serve. Dust with powdered sugar or add a scoop of ice cream while it's still warm.
If you’re in the mood for a bigger baking project after this quick fix, my Brownie in 45 Minutes recipe is a great next step for a crowd, though it takes a bit longer than a minute!
Common Mistakes and Simple Fixes
The most frequent complaint I hear is that the cake turned out like a "sponge ball." This is almost always due to overcooking. Microwave minutes are not like oven minutes; five extra seconds can be the difference between molten bliss and a rubbery disaster.
Why the Cake is Rubbery
This happens when the proteins in the flour and the milk are over agitated or over heated. If you whisk too long after adding the liquid, you develop gluten. If you cook it for 90 seconds instead of 60, you've essentially dehydrated the structure.
The Missing Lava Problem
If you break into the cake and it's solid all the way through, your chocolate piece was likely too small, or you pushed it all the way to the bottom. When the chocolate touches the bottom of the mug, it receives direct heat from the turntable and can actually overcook or integrate into the batter rather than staying as a distinct molten pool.
| Problem | Root Cause | Solution |
|---|---|---|
| Overflowing Mug | Mug too small or too much baking powder | Use a 12 oz mug and level your measuring spoons. |
| Dry, Crumbly Edges | Overcooked | Reduce microwave time by 5-10 seconds next time. |
| Grainy Texture | Sugar didn't dissolve | Whisk the wet and dry ingredients more thoroughly. |
Common Mistakes Checklist
- ✓ Never skip the salt; it’s the difference between "sweet" and "complex."
- ✓ Don't use a mug smaller than 10 oz or you'll be cleaning chocolate off your microwave floor.
- ✓ Use a solid piece of chocolate rather than chips; chips contain stabilizers that prevent them from melting into a smooth liquid.
- ✓ Let the cake rest for the full 60 seconds. If you dive in early, the "lava" will be thick and the cake will be gummy.
- ✓ Check your microwave wattage. If it's a "dorm style" low wattage unit, you'll need more time.
Creative Flavor Profiles to Explore
Once you've mastered the basic version, you can start playing with the aromatics and the core.
Salted Caramel Variation
Instead of a piece of dark chocolate, drop a large, soft caramel candy (like a Kraft caramel) and a generous pinch of flaky sea salt into the center. The caramel will melt into a stretchy, golden "lava" that pairs beautifully with the chocolate cake.
The Nut Butter Swirl
Drop a tablespoon of creamy peanut butter or almond butter into the center. This creates a denser, more "fudge like" core that is incredibly rich. If you do this, I recommend adding an extra teaspoon of milk to the batter to keep it light.
Espresso Infusion
Add 1/2 teaspoon of instant espresso powder to the dry ingredients. Coffee doesn't make the cake taste like coffee; it simply intensifies the chocolate notes, making them taste darker and more "grown up."
Scaling the Recipe
- For Two: Do not just double the ingredients in one giant mug. The microwave won't be able to penetrate the center of a double sized mug effectively. Instead, mix a double batch in a bowl, then divide it into two separate mugs and microwave them one at a time.
- The Dry Mix Batch: You can whisk together the flour, sugar, cocoa, baking powder, and salt for 10 servings and keep it in a mason jar. When the craving hits, just scoop out 9 tablespoons of the mix and add your wet ingredients.
Smart Storage and Leftover Management
This cake is designed to be eaten immediately. Because microwave cakes lack the traditional "crust" that protects an oven baked cake, they go stale and hard very quickly.
Storage: If you absolutely can't finish it, cover the mug with plastic wrap and keep it at room temperature for up to 12 hours. Do not refrigerate it, as the cold will turn the oil based crumb into a brick.
Reheating: To revive a cold mug cake, add a teaspoon of water to the top and microwave for 10-15 seconds. The steam will help soften the crumb, but it will never be quite as good as the first time.
Zero Waste Tip: If you have leftover dark chocolate bars that have "bloomed" (turned white/dusty on the outside), don't throw them away! Blooming is just the cocoa butter separating. Once it melts inside this lava cake, it will be perfectly smooth and velvety again.
Also, if you have a tiny bit of leftover coffee in the pot, use that instead of the milk for a "Mocha Lava Cake."
Dessert Pairings for Enhancing Flavor
While this 1 Minute Lava Cake with Chocolate is a star on its own, a few additions can take it from a quick snack to a legitimate dessert experience.
The classic choice is a scoop of high-quality vanilla bean ice cream. The contrast between the hot, molten chocolate and the freezing cold cream is a sensory delight. As the ice cream melts, it creates a "creme anglaise" effect that mingles with the chocolate lava.
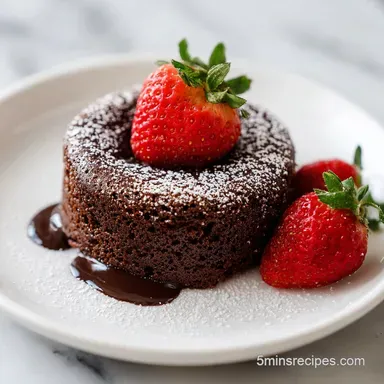
If you want something lighter, try a dollop of unsweetened whipped cream and a few fresh raspberries. The acidity of the berries cuts through the intense fat and sugar of the cake, refreshing your palate between bites.
For a crunch factor, a sprinkle of toasted hazelnuts or crushed pretzels adds a wonderful "shatter" to the otherwise soft and velvety texture.
Honestly, don't even bother with low-fat versions or skipping the sugar. This is a treat meant for indulgence. The science of the microwave requires that fat and sugar to keep the structure soft. If you try to make it "healthy," you'll likely end up with that rubbery puck we discussed earlier.
Trust me on this go for the full fat milk and the good chocolate. You’re only making one, so make it count!
Decision Shortcut
- If you want extra gooey lava, use two pieces of chocolate instead of one.
- If you want a brownie like texture, reduce the milk by 1/2 tablespoon.
- If you want it extra dark, replace 1 tablespoon of the flour with an extra tablespoon of cocoa powder.
The aroma of this cake as it sits for that final resting minute is enough to make anyone lose their patience, but stay strong. That 60 second wait is the final "cook" that ensures your lava is liquid and your cake is tender. Enjoy your instant chocolate masterpiece!

Recipe FAQs
How to ensure the center stays molten?
Submerge your chocolate piece just below the surface of the batter. Ensure it does not touch the bottom of the mug so it melts evenly without scorching against the ceramic base.
Is it true I should check the cake doneness by visual cues rather than a timer?
No, this is a common misconception. While visual cues are helpful, the 60-second timing is precise; look for a set but slightly shiny top to verify the internal texture is perfect.
How to avoid a rubbery, sponge like texture?
Avoid overcooking by stopping at exactly 60 seconds. If you enjoyed mastering the rapid heat control used here, you will find that the same sensitivity to microwave timing is essential for maintaining a moist crumb in other quick desserts.
How to get the smoothest batter consistency?
Whisk vigorously until the mixture is glossy and resembles thick chocolate syrup. Paying close attention to the bottom edges of the mug ensures all dry ingredients are fully hydrated and emulsified.
Is resting the cake after microwaving necessary?
Yes, the 60-second rest is vital. This period allows residual steam to redistribute throughout the cake and ensures the chocolate core reaches its ideal liquid, molten consistency.
How to prevent cocoa powder lumps in the mug?
Whisk the dry ingredients thoroughly before adding any liquid. This creates a uniform base, making it much easier to achieve a smooth, lump free batter once the milk and oil are introduced.
Is it required to use Dutch processed cocoa powder?
Yes, it is highly recommended for the best results. Dutch processed cocoa provides a deeper color and a smoother, less acidic chocolate flavor that balances perfectly with the sugar and whole milk.
1 Minute Lava Cake
Ingredients:
Instructions:
Nutrition Facts:
| Calories | 715 kcal |
|---|---|
| Protein | 8.2 g |
| Fat | 42.2 g |
| Carbs | 83.5 g |
| Fiber | 5.4 g |
| Sugar | 45.1 g |
| Sodium | 185 mg |
