Homemade Dill Pickles: Massive Crunch
- Time: Active 2 hours 45 mins, Passive 15 mins, Total 3 hours
- Flavor/Texture Hook: Sharp, garlicky, with a loud shatter
- Perfect for: High protein snacks and summer BBQs
- Bold Flavor and Crunch: Homemade Dill Pickles
- The Tannin Crunch Shield
- Recipe Specs and Success Metrics
- Shopping List and Essential Ingredients
- Required Equipment for Canning
- The Step-by-Step Cooking Process
- Pro Tips and Common Pitfalls
- Easy Dietary Adaptation Ideas
- Adjusting for Large Batch Cooking
- Keeping Your Jars Fresh
- Creative Serving and Snack Ideas
- Debunking Common Kitchen Myths
- High in Sodium
- Dill Pickle FAQs
- 📝 Recipe Card
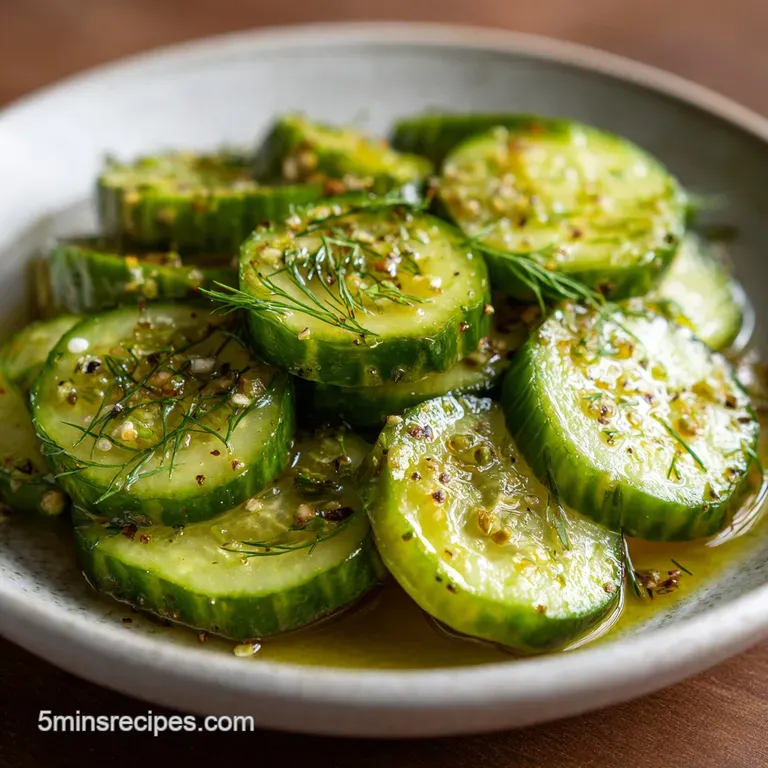
Bold Flavor and Crunch: Homemade Dill Pickles
The first time I tried making pickles, I ended up with jars of gray, mushy cucumbers that tasted like soggy disappointment. My kitchen smelled like a vinegar factory had exploded, and honestly, I almost gave up on the whole idea. But then I learned the secret of the tannin, and everything changed for my snack game.
Now, every time I pop a lid, that sharp, herb heavy aroma hits my nose and I know I'm in for something special. There's nothing like the "thwack" of a knife through a fresh Kirby or the sound of a pickle literally shattering between your teeth.
If you're a snack obsessed cook like me, you'll love this bold, punchy version.
We're going for a fusion of old school techniques and modern, bold aromatics. I've added a bit of red pepper for a kick that wakes up your palate. Trust me, once you master the crunch, you'll never look at a store-bought jar the same way again. Let's crack on and get these jars filled.
The Tannin Crunch Shield
Pectin Preservation: Tannins from grape leaves or black tea bags prevent enzymes from breaking down the cucumber's cell walls. This ensures the fruit stays rigid and snappy even after the heat of processing.
| Method | Time | Texture | Best For |
|---|---|---|---|
| Quick Fridge | 24 hours | Crisp but raw | Immediate snacking |
| Water Bath | 3 weeks | Deeply infused | Long term storage |
| Low Temp Pasteurized | 4 weeks | Maximum shatter | Professional results |
Finding the right balance of acid and water is vital for safety, but the texture is all about the prep. If you love tangy sides, you might also enjoy my Marinated Cucumbers in recipe. It's a faster way to get that vinegar fix while your jars are aging.
Recipe Specs and Success Metrics
| Ingredient | Science Role | Pro Secret |
|---|---|---|
| Pickling Salt | Draws out moisture | Avoid table salt with anti caking agents to keep brine clear |
| White Vinegar (5%) | Preservation acid | Always check the label for 5% acidity to ensure safety |
| Garlic Cloves | Antimicrobial flavor | Smash them to release all the pungent sulfur compounds |
I've learned the hard way that using the wrong salt turns your beautiful brine into a cloudy mess. Stick to the pickling or kosher varieties to keep things looking sharp and professional.
Shopping List and Essential Ingredients
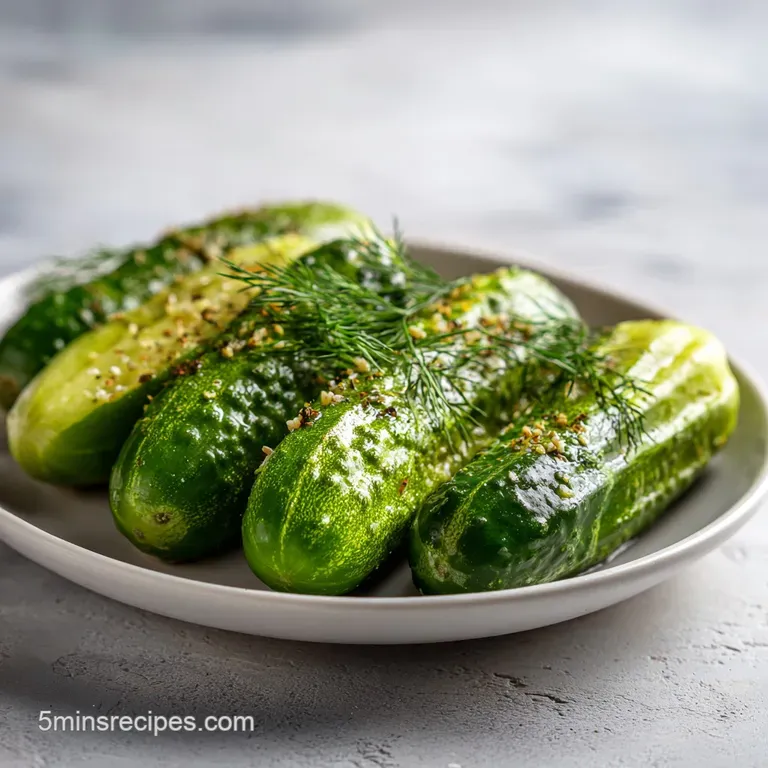
- 3.6 kg pickling cucumbers (Kirby or Persian) Why this? They have thick skins and low water content for better crunch.
- 1 large bunch fresh dill Why this? Provides the signature earthy, fresh aroma that defines the dish.
- 7 grape leaves or black tea bags Why this? Essential tannins keep the cucumbers from turning mushy.
- 1.9 liters white distilled vinegar (5% acidity)
- 1.9 liters filtered water
- 100 g pickling salt
- 14 garlic cloves, peeled and smashed
- 2 tablespoons yellow mustard seeds
- 2 tablespoons whole black peppercorns
- 1 teaspoon red pepper flakes
If you can't find grape leaves, black tea is a brilliant substitute. It adds the same tannins without changing the flavor profile much. Just don't skip this step if you want that loud "snap" when you bite in.
Required Equipment for Canning
You don't need a professional laboratory, but a few basics make this much easier. You'll want a large water bath canner or a very deep stockpot. Grab a jar lifter too - unless you enjoy burning your fingers, which I definitely don't recommend.
A wide mouth funnel is a lifter saver for getting the brine into the jars without making a sticky mess. Also, make sure your jars are sterilized and your lids are fresh. Reusing old lids is a recipe for a failed seal, which is just a waste of good produce.
The step-by-step Cooking Process
- Wash the 3.6 kg pickling cucumbers in ice cold water. Note: This firms up the flesh before they ever see the heat.
- Trim the blossom end (the tip opposite the stem) off every cucumber. Note: This end contains enzymes that cause softening.
- Combine 1.9 liters white distilled vinegar, 1.9 liters filtered water, and 100 g pickling salt in a pot.
- Boil the brine until the salt is completely dissolved and the liquid is clear.
- Place one grape leaf or tea bag and 2 garlic cloves into each sterilized jar.
- Pack the cucumbers tightly into the jars, leaving 1/2 inch of headspace at the top.
- Add the mustard seeds, peppercorns, and red pepper flakes evenly across the jars.
- Pour the hot brine over the cucumbers until they are fully submerged but the headspace remains.
- Remove air bubbles by sliding a clean spatula down the sides.
- Process the sealed jars in a boiling water bath for 15 minutes until the lids ping and seal as they cool.
Chef's Tip: Freeze your garlic cloves for 10 minutes before smashing. It makes the skins slip off instantly and helps keep the garlic from turning blue in the acidic brine.
Pro Tips and Common Pitfalls
Why Your Pickles Turn Mushy
If your pickles lack that "shatter" factor, it's usually because the blossom end wasn't trimmed or the water wasn't cold enough during the initial soak. Those enzymes are tiny but powerful. Also, over processing in the water bath can cook the cucumber, turning it into a vegetable rather than a snack.
| Problem | Root Cause | Solution |
|---|---|---|
| Soft Texture | Blossom end left on | Slice 1/16th inch off the blossom end before packing |
| Cloudy Brine | Impure salt | Use only pickling or kosher salt without additives |
| Hollow Centers | Delayed pickling | Process cucumbers within 24 hours of being picked |
If you're looking for a different vibe for your cucumbers, try a Tuna Salad in recipe where you can chop these up for an incredible crunch.
Common Mistakes Checklist
- ✓ Never use waxed cucumbers; the brine won't penetrate the skin.
- ✓ Always use filtered water to avoid chlorine smells in your jars.
- ✓ Don't skip the 1/2 inch headspace - it's crucial for a proper vacuum seal.
- ✓ Use fresh dill heads if possible, as the seeds provide a deeper flavor than the fronds.
Easy Dietary Adaptation Ideas
These are naturally low calorie and vegan, which makes them the perfect bold snack for almost anyone. If you're watching your sodium, you can reduce the salt by 10%, but be aware that this might slightly soften the texture and will reduce the shelf life once opened.
For a spicy fusion twist, I love adding a few slices of fresh ginger and a teaspoon of gochugaru (Korean chili flakes). It gives the brine a vibrant red tint and a complex, warm heat that pairs perfectly with Asian style fried chicken.
Adjusting for Large Batch Cooking
If you want to double this recipe, keep the 1:1 ratio of vinegar to water. However, I suggest only increasing the spices like red pepper flakes by 1.5x so the heat doesn't become overwhelming. Work in batches for the water bath processing to ensure every jar gets a consistent temperature.
For small batches, you can easily halve everything. If you're only making one jar, just do a "fridge" version and skip the water bath processing entirely. They'll last about a month in the refrigerator and stay incredibly crisp.
Keeping Your Jars Fresh
Store your processed jars in a cool, dark place like a pantry or basement. They'll stay good for up to 1 year if the seal remains intact. Once you pop that lid and hear the satisfying "whoosh" of air, keep them in the fridge. They’ll stay snappy for about 3 to 4 months in the refrigerator.
Don't throw away that leftover brine! It's liquid gold. Use it to marinate chicken, dash it into a bloody mary, or use it to quick pickle some thinly sliced red onions for a zesty taco topping.
Creative Serving and Snack Ideas
I'm all about the bold snack life. These pickles are amazing on their own, but they really shine when paired with something rich. Try serving them alongside a heavy dish like a Bisquick Impossible Cheeseburger Pie recipe to cut through the fat with that sharp acidity.
If you're feeling adventurous, try a "pickle back" shot or chop them finely into a tartar sauce for a fresh, zingy flavor. They also work wonders when sliced thin and added to a grilled cheese sandwich for an unexpected crunch and tang.
Debunking Common Kitchen Myths
One big myth is that you must use "pickling" vinegar. Standard white distilled vinegar is perfectly fine as long as it's 5% acidity. Another one is that the "blue garlic" means the batch is spoiled. It's actually just a chemical reaction between the garlic's sulfur and the vinegar's acid - it's totally safe to eat!
Finally, don't believe that you can't use dried dill. While fresh is better for aroma, dried dill seeds will still give you that classic flavor if you're in a pinch.

High in Sodium
923 mg mg of sodium per serving (40% % of daily value)
The American Heart Association recommends limiting sodium intake to about 2,300mg per day for optimal health.
Simple Swaps for Lower Sodium Pickles
-
Reduce Pickling Salt-25%
Carefully measure and reduce the pickling salt by 25%. Start with 75g instead of 100g and taste brine to ensure optimal flavour while reducing sodium. Remember that salt is crucial for both flavor and preservation.
-
Adjust Brine Ratio-15%
Increase the ratio of water to vinegar slightly. Try using 2.1 liters of water and 1.7 liters of vinegar to dilute the brine without significantly affecting the pickling process. This can help lower the overall sodium concentration.
-
Enhance Flavor with Herbs
Increase the amount of fresh dill, garlic, mustard seeds, peppercorns, and red pepper flakes. These spices add robust flavors that can compensate for the reduction in saltiness, making the pickles taste just as delicious.
-
Experiment with Acidity-5%
Try using a milder vinegar, like apple cider vinegar, in combination with the white distilled vinegar. Dilute white vinegar with a small portion of apple cider vinegar (e.g., 20% cider vinegar, 80% white vinegar) for a less harsh and slightly sweeter profile, reducing the need for high sodium.
Dill Pickle FAQs
What is a dill pickle?
It is a cucumber preserved in a brine flavored heavily with dill and vinegar. This pickling process uses salt, vinegar, and usually fresh dill heads or seeds to cure the cucumber, resulting in a sour, sharp, and crunchy snack.
Are dill pickles good for you?
Yes, in moderation, they offer some health benefits. They contain probiotics if they are naturally fermented (not just quick pickled in vinegar) and the vinegar can help stabilize blood sugar levels.
What is the secret to crisp dill pickles?
Include a source of tannins in the jar, such as grape leaves or black tea bags. Tannins inhibit the enzymes that cause cucumbers to soften, which is why mastering sensory doneness cues here is crucial for maximum shatter.
Why do athletes eat dill pickles?
They rapidly replenish electrolytes lost through sweat, particularly sodium. The vinegar brine also contains acetic acid, which some studies suggest may help reduce nighttime muscle cramping.
Why did my homemade dill pickles turn out soft instead of crunchy?
You likely did not remove the blossom end of the cucumber or you over processed them with heat. The enzymes causing softness concentrate at the blossom end, and excessive heat in the water bath cooks the pectin, ruining the texture.
Can I use regular table salt instead of pickling salt in the brine?
No, using standard table salt is not recommended for clear brines. Table salt contains anti caking agents that will turn your brine cloudy, obscuring the clear look you want in a well made jar.
What is the best way to use leftover pickle brine?
Use it as a sharp, acidic flavor booster in other preparations. You can use the brine to thin out a rich dip or to marinate proteins, much like the acid used to tenderize the cucumbers here, which is a similar principle applied in our Cucumber Sandwiches With recipe for added zest.
Best Dill Pickles Recipe

Ingredients:
Instructions:
Nutrition Facts:
| Calories | 23 kcal |
|---|---|
| Protein | 0.6 g |
| Fat | 0.2 g |
| Carbs | 3.2 g |
| Fiber | 0.9 g |
| Sugar | 1.6 g |
| Sodium | 923 mg |
