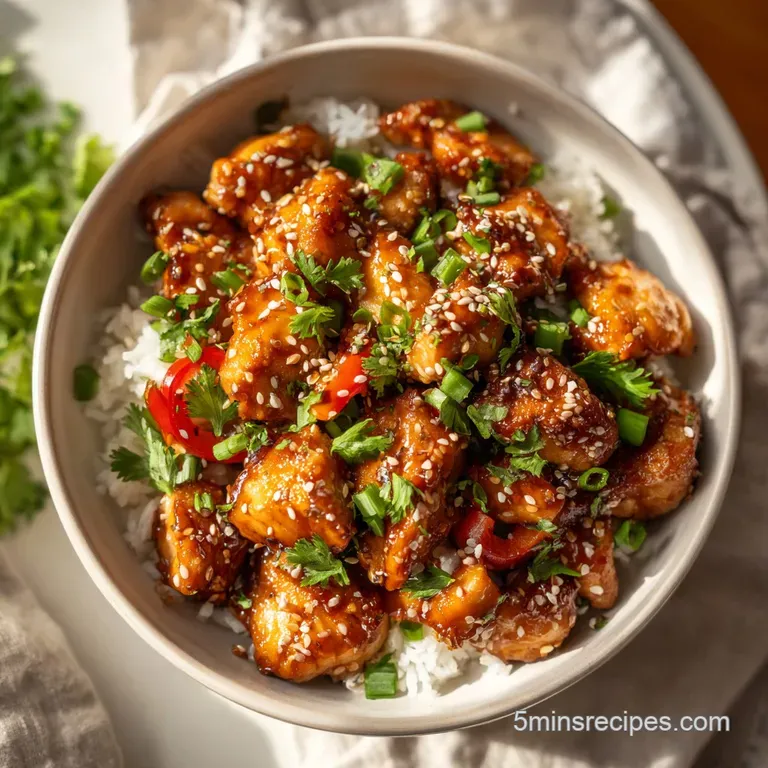
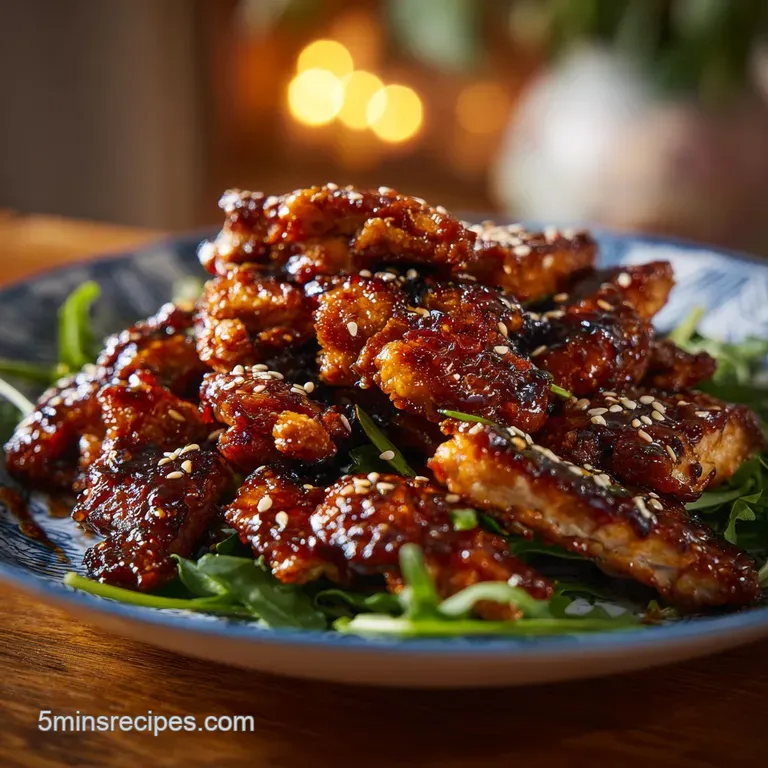
Homemade Teriyaki Chicken: Crispy and Glazed
- Time: Active 10 minutes, Passive 10 minutes, Total 20 minutes
- Flavor/Texture Hook: Velvety umami glaze with a crispy, seared bite
- Perfect for: High energy weeknight dinners or a bold meal prep win
- Create a Bold and Fun Teriyaki Chicken
- Essential Time and Temperature Data Points
- The Elements of a Balanced Glaze
- Essential Gear for a Quick Sear
- Detailed Steps for the Boldest Result
- Fixing Common Texture and Glaze Problems
- Simple Swaps for Every Dietary Need
- Saving and Reheating Your Leftovers
- Bold Pairings for a Fusion Feast
- CRITICAL: Very High in Sodium
- Recipe FAQs
- 📝 Recipe Card
Create a Bold and Fun Teriyaki Chicken
Listen, forget everything you have been told about needing a 24 hour marinade to get flavor into poultry. That is a total myth that keeps too many people stuck in the "order takeout" cycle.
If you have ever tried a homemade version and ended up with a grey, boiled looking mess floating in a pool of watery soy sauce, I promise you it is not your fault it is just the method you were using.
Real flavor doesn't happen while the meat sits in the fridge; it happens when the heat hits the pan and the sugars start to dance.
Right then, imagine the sound of 1.5 lbs of chicken pieces hitting a hot skillet that sharp, aggressive sizzle that means a golden crust is forming. Within minutes, your kitchen smells like toasted ginger and sweet garlic, a scent so bold it basically forces you to stand over the stove with a fork ready.
We are aiming for that specific Asian fusion vibe where the sauce isn't just a liquid but a thick, glossy lacquer that coats every single nook and cranny.
We’ve all made the mistake of dumping too much liquid into a cold pan and hoping for the best. But today, we are doing things differently to ensure that velvety finish every single time. It's brilliant how a few simple pantry staples can transform into something that tastes this expensive.
Let’s crack on and get this on your table in 20 minutes flat.
Essential Time and Temperature Data Points
This recipe works because we are leveraging over high heat physics to create a crust before the meat dries out. By cutting the chicken into 1 inch pieces, we maximize the surface area for the sauce to grab onto, ensuring every bite is a flavor bomb.
It’s all about that sweet and savory tension that makes fusion food so addictive.
- Starch Grip
- The cornstarch creates a microscopic barrier that protects the meat from the harsh heat while giving the sauce a textured surface to latch onto.
- Sugar Glazing
- As the brown sugar and mirin reduce, they undergo a rapid caramelization that turns a thin liquid into a shimmering, sticky syrup.
- Thigh Advantage
- Using thighs instead of breasts provides enough intramuscular fat to stay juicy even during the over high heat reduction phase.
| Method | Total Time | Texture | Best For |
|---|---|---|---|
| This Skillet Method | 20 minutes | Crispy edges, thick glaze | Busy weeknights |
| Slow Cooker | 4 hours | Shredded, very soft | Hands off prep |
| Traditional Grill | 35 minutes | Smoky, charred skin | Weekend BBQ |
Choosing the right approach depends on your mood, but for that snack like, addictive crunch, the skillet is king. It allows for immediate feedback you can see the sauce thickening in real time and pull it off the heat at the exact moment it hits that "shimmering" stage.
| Ingredient Component | Science Role | Pro Secret |
|---|---|---|
| Cornstarch | Moisture barrier and thickener | Toss until invisible to avoid clumps |
| Mirin | Adds shine and acidity | Do not skip; it provides the "glow" |
| Chicken Thighs | Fat content for flavor | Pat them bone dry for a better sear |
The Elements of a Balanced Glaze
Before you start, make sure you have your flavor map ready. We are looking for a balance of salty soy, sweet brown sugar, and the bright, zingy punch of fresh ginger and garlic. If you are out of fresh ginger, don't even bother with the dried powder; it just doesn't have the same bold kick.
- 1.5 lbs chicken thighs: boneless, skinless, cut into 1 inch pieces Why this? Stays juicier than breasts under high heat.
- 1 tbsp neutral oil: for searing Why this? High smoke point prevents bitter, burnt tastes.
- 0.5 tsp kosher salt: for seasoning Why this? Enhances the natural chicken flavor before glazing.
- 1 tbsp cornstarch: for coating Why this? The secret to a thick, "grip tight" sauce.
- 0.5 cup low sodium soy sauce: the umami base Why this? Control the salt levels effectively.
- 0.25 cup brown sugar: packed Why this? Molasses notes add deep, rich color.
- 0.25 cup mirin: Japanese rice wine Why this? Essential for that professional glossy finish.
- 1 tbsp fresh ginger: grated Why this? Provides a sharp, spicy contrast to the sugar.
- 2 cloves garlic: minced Why this? Fresh garlic is non negotiable for fusion aromatics.
- 1 tsp toasted sesame oil: for finish Why this? Adds a deep, nutty aroma at the end.
- 1 tsp toasted sesame seeds: garnish Why this? Adds a tiny, nutty "shatter" to every bite.
- 2 green onions: sliced Why this? Freshness and color to break up the rich glaze.
Chef's Tip: If you find yourself frequently making chicken dishes, try swapping the protein occasionally. I sometimes use this same sauce logic for Garlic herb chicken tenderloins when I want a slightly different texture profile, though thighs remain the gold standard for teriyaki.
Essential Gear for a Quick Sear
You don't need a kitchen full of gadgets, but a large non stick skillet is your best friend here. It allows the sugars in the sauce to reduce without becoming a permanent part of your pan.
A cast iron skillet also works beautifully if you want a more aggressive, charred crust, but you’ll need to be more vigilant about stirring so the sugar doesn't burn.
Grab a microplane for that ginger it turns it into a pulp that dissolves perfectly into the sauce. If you chop it with a knife, you might end up with woody bits that ruin the velvety texture of the glaze.
Also, a pair of tongs is way better than a spatula for flipping those individual 1 inch pieces; you want precision here.
Detailed Steps for the Boldest Result
1. The Bold Foundation
Whisk together the 0.5 cup low sodium soy sauce, 0.25 cup brown sugar, 0.25 cup mirin, grated ginger, minced garlic, and toasted sesame oil in a small bowl. Whisk vigorously until the sugar is mostly dissolved and the aromatics are well distributed.
Note: Dissolving the sugar now prevents a gritty sauce later.
2. Prepare the Protein
Pat the chicken pieces bone dry with paper towels to ensure a good sear. In a medium bowl, toss the chicken with 0.5 tsp kosher salt and 1 tbsp cornstarch. Ensure every piece is lightly and evenly coated. Note: Excess starch will make the sauce gummy, so shake off any extra.
3. The over High heat Sear
Heat 1 tbsp neutral oil in your large skillet over medium high heat until it shimmers. Add the chicken in a single layer, making sure not to overcrowd the pan. Let it sear undisturbed for 3-4 minutes until a deep golden crust forms.
4. The Flip
Flip the pieces using tongs and cook for an additional 2 minutes. We aren't looking to cook it all the way through yet; we just want color and texture on the outside.
5. The Glaze Reduction
Reduce the heat to medium and pour the sauce mixture over the chicken. It will bubble immediately. Toss constantly for 3-5 minutes until the liquid reduces into a thick, shimmering glaze that clings to every piece.
6. The Final Check
Continue cooking until the chicken reaches an internal temperature of 165°F. You will see the sauce transform from a watery liquid to a dark, glossy lacquer.
7. The Final Garnish
Remove from the heat immediately to prevent the sugar from burning. Transfer to a serving bowl or plate.
8. Add Texture
Sprinkle with the toasted sesame seeds and sliced green onions. The green of the onions against the dark glaze is what makes this dish look as bold as it tastes.
Fixing Common Texture and Glaze Problems
If your sauce is looking a bit thin, don't panic. This usually happens if the pan wasn't hot enough or if the chicken released too much moisture. Just turn the heat up slightly and keep stirring. The cornstarch on the chicken will eventually mingle with the sauce and tighten everything up.
Why Your Sauce Is Runny
If you find the liquid isn't clinging, it’s likely a temperature issue. The sauce needs to reach a simmer to activate the thickening power of the cornstarch and the sugar reduction. Give it another minute or two on medium high heat, stirring constantly.
| Problem | Root Cause | Solution |
|---|---|---|
| Gummy Sauce | Too much cornstarch used | Add a splash of water or mirin to thin it |
| Burnt Garlic | Heat was too high too early | Add aromatics to the liquid sauce, not the dry pan |
| Dry Chicken | Pieces cut too small | Keep them at 1 inch and use a meat thermometer |
When you are aiming for a spicy fusion kick, you might be tempted to add chili flakes. If things get too spicy, check out my tips for Bang Bang Chicken to see how a creamy element can balance out high heat.
Common Mistakes Checklist
- ✓ Pat chicken completely dry (moisture is the enemy of a good sear).
- ✓ Don't skip the mirin (it provides the essential shine and acidity).
- ✓ Avoid overcrowding the pan (work in batches if your skillet is small).
- ✓ Use low sodium soy (regular soy sauce becomes way too salty when reduced).
Simple Swaps for Every Dietary Need
While the classic recipe is a winner, sometimes you have to work with what is in the pantry. If you are out of brown sugar, honey works, though the flavor will be more floral and less "caramel like." If you need a healthy teriyaki chicken option, you can swap the sugar for a monk fruit sweetener, but be aware it won't glaze as thickly as real sugar.
| Original Ingredient | Substitute | Why It Works |
|---|---|---|
| Mirin | Rice vinegar + 1 tsp sugar | Mimics the acidity and sweetness. Note: Slightly less shine. |
| Brown Sugar | Honey or Maple Syrup | Provides sweetness. Note: Honey burns faster; watch the heat. |
| Soy Sauce | Tamari (GF) or Liquid Aminos | Similar salty umami. Note: Liquid aminos are less intense. |
For Thin or Runny Sauce
If you find the sauce just isn't thickening because you accidentally added too much liquid, mix a tiny bit of extra cornstarch with cold water (a slurry) and whisk it in. This is a "break glass in case of emergency" move, as it can make the sauce a bit duller, but it beats having a watery dinner.
For Overly Salty Results
Reduced sauces concentrate salt. If it tastes like a salt lick, add a squeeze of fresh lime juice or an extra teaspoon of sugar. The acidity or sweetness will help mask the sodium without diluting the texture we worked so hard to build.
Saving and Reheating Your Leftovers
This dish is a meal prep legend. Because we used chicken thighs, the meat stays tender even after a trip to the microwave. Store it in an airtight container in the fridge for up to 3 days. Any longer and the green onions will turn into sad little ribbons, so maybe keep those fresh if you're planning ahead.
For freezing, this Teriyaki Chicken holds up for about 2 months. I recommend freezing it in individual portions with plenty of the extra glaze. When you're ready to eat, let it thaw in the fridge overnight. Reheat it in a skillet with a tiny splash of water to loosen the sauce back up to that shimmering state.
Zero Waste Tip: Don't throw away those green onion roots! Put them in a jar of water on your windowsill, and they will literally grow back in a week. Also, if you have leftover ginger, peel it and throw it in the freezer; it's actually easier to grate when it's frozen solid.
Bold Pairings for a Fusion Feast
To keep the Asian fusion theme going, serve this over a bed of fluffy jasmine rice or even some quick fried noodles. The rice acts like a sponge for all that extra glaze, which is honestly the best part.
If you want to keep it lighter, a crunchy slaw with a sesame lime dressing provides a brilliant texture contrast to the soft, glazed chicken.
- The Classic Bowl: Steamed broccoli and white rice. Simple, clean, and lets the chicken shine.
- The Low Carb Crunch: Serve in large butter lettuce cups with extra shredded carrots.
- Fusion Tacos: Put the chicken in flour tortillas with a bit of spicy mayo and pickled red onions.
There is something so satisfying about mastering a dish that people usually only eat out. Once you see that sauce bubble down into a dark, rich lacquer, you'll never go back to the bottled stuff. It’s fast, it’s bold, and it’s exactly the kind of "snackable" meal that makes cooking fun again.
Trust me on this that first bite with the sesame seeds shattering against the velvety sauce is everything.

CRITICAL: Very High in Sodium
1485 mg 1485 mg of sodium per serving (65% 65% of daily value)
The American Heart Association recommends limiting sodium intake to no more than 2,300mg per day, with an ideal limit of less than 1,500mg for most adults.
Tips to Reduce Sodium in Your Chicken Dish
-
Halve the Soy Sauce-25%
The low-sodium soy sauce is the primary sodium contributor. Reduce it to 1/4 cup (or even less) and compensate with a splash of water or unsalted broth.
-
Omit Added Salt-15%
The recipe calls for 0.5 tsp of kosher salt. Given the high sodium from the soy sauce, you can likely omit this entirely without sacrificing flavor.
-
Reduce Sugar-10%
While not a direct sodium source, reducing the brown sugar can help balance the flavor profile when you decrease the salty soy sauce, allowing you to use less overall.
-
Boost Herbs and Spices
Enhance the dish's flavor using fresh or dried herbs, garlic, ginger, and chili flakes. This adds complexity without adding sodium.
-
Use 'No Salt Added' Alternatives-20%
If you find the soy sauce reduction impacts flavor too much, consider using a 'no salt added' soy sauce alternative or a blend of coconut aminos and a tiny pinch of salt.
Recipe FAQs
What is the secret to perfect teriyaki chicken?
The secret is the cornstarch coating and the reduction technique. Tossing chicken in cornstarch before searing creates a protective crust that thickens the sauce instantly as it glazes, ensuring a velvet like consistency that clings to the meat.
What are the ingredients of teriyaki chicken?
You only need ten pantry friendly items. Use 1.5 lbs chicken thighs, 1 tbsp neutral oil, 0.5 tsp kosher salt, 1 tbsp cornstarch, 0.5 cup low-sodium soy sauce, 0.25 cup brown sugar, 0.25 cup mirin, 1 tbsp fresh ginger, 2 cloves minced garlic, 1 tsp toasted sesame oil, plus sesame seeds and green onions
for garnish.
Do you put teriyaki sauce on chicken before or after cooking?
Always add the sauce after searing the chicken. You must sear the chicken in neutral oil for 3-4 minutes per side first to develop a crust, then reduce the heat and add the sauce to glaze during the final 3-5 minutes of cooking.
Does teriyaki chicken need to be marinated?
No, this is a common misconception. You do not need to marinate the chicken for hours; the bold flavors of ginger, garlic, and soy sauce bloom rapidly when the liquid reduces into a glaze directly in the skillet.
How to ensure the chicken is cooked through?
Monitor the internal temperature until it reaches exactly 165°F. Using an instant read thermometer is the most reliable way to ensure safety without overcooking the meat. If you enjoyed mastering these sensory cues here, try applying the same precision to our with Zesty Pan Sauce recipe.
How to fix watery or thin teriyaki sauce?
Continue to reduce the sauce over medium heat until it coats the back of a spoon. Constant tossing helps the cornstarch already on the chicken integrate with the sugars, thickening the mixture into a glossy lacquer.
How to prevent the garlic and ginger from burning?
Whisk the aromatics into the liquid sauce mixture before adding it to the pan. This prevents the small garlic and ginger pieces from scorching in the high heat of the skillet before the chicken is fully seared.
Easy Homemade Teriyaki Chicken

Ingredients:
Instructions:
Nutrition Facts:
| Calories | 412 kcal |
|---|---|
| Protein | 34.6 g |
| Fat | 18.2 g |
| Carbs | 23.4 g |
| Fiber | 0.4 g |
| Sugar | 18.1 g |
| Sodium | 1485 mg |
