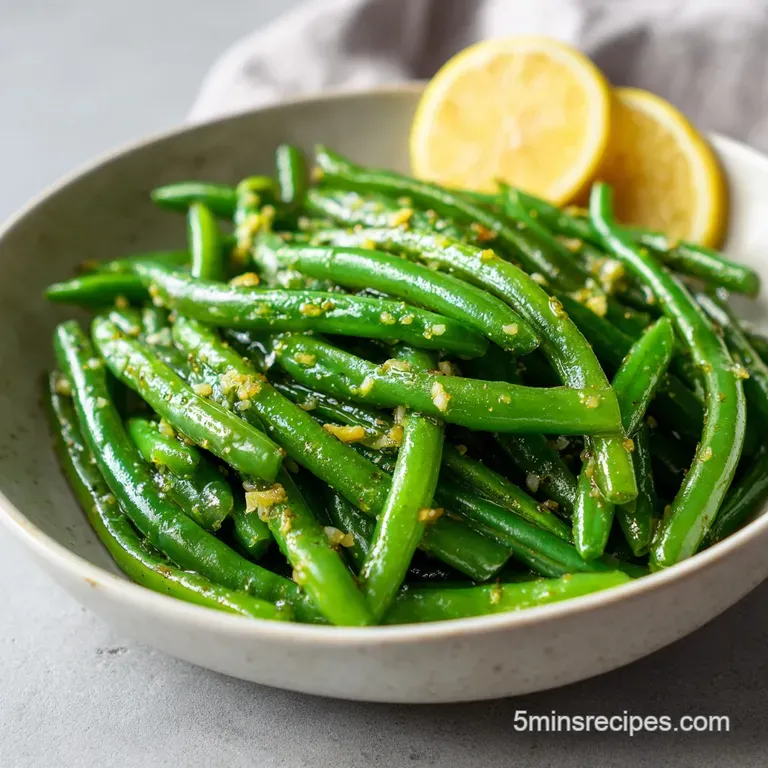
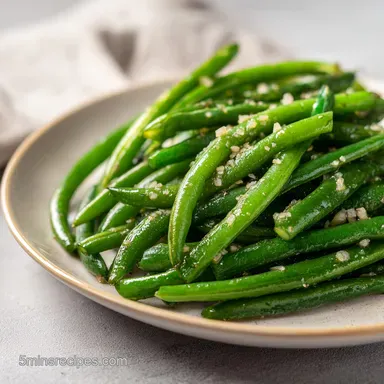
Garlic Butter Green Beans: Vibrant and Crispy
- Time:5 minutes prep + 10 minutes cook = 15 minutes total
- Flavor/Texture Hook: Snappy green beans with nutty browned butter and toasted garlic
- Perfect for: High speed weeknight dinners or impressive holiday side dishes
- Vibrant & Snappy: The Ultimate Easy Garlic Green Beans Side Dish
- The Secret Trick Behind the Crisp Tender Texture
- Scientific Breakdown of Our Primary Flavor Components
- The Essential Building Blocks for Success
- Equipment Needed for Professional Results
- How to Execute the Perfect Sear
- Mastering the Troubleshooting Process
- Scaling the Recipe for Larger Crowds
- Kitchen Truths and Misconceptions
- Preservation Secrets and Zero Waste
- What to Serve This With
- Recipe FAQs
- 📝 Recipe Card
Vibrant & Snappy: The Ultimate Easy Garlic Green Beans Side Dish
Most home cooks treat green beans as an afterthought, tossing them into a pot of boiling water until they resemble wet shoelaces. I used to be one of them. My early attempts resulted in a pile of olive drab mush that had lost all its structural integrity and flavor.
It’s a common frustration: you want that bright, restaurant style "snap," but you end up with something that looks like it came out of a dusty can from the 1970s.
This specific method for Garlic Butter Green Beans is the targeted fix for that exact problem. We aren't just boiling them; we are using a chef inspired "blanch and sear" technique. This allows the center of the bean to cook through while the exterior gets a quick, blistered char in a heavy skillet.
The result is a vegetable that actually holds its own on the plate rather than slumping into the mashed potatoes.
We’re going to move fast here because, in a professional kitchen, speed is everything. We have exactly 15 minutes to take raw, stringy pods and turn them into a buttery, garlic infused side dish that people will actually reach for seconds of.
Expect a massive flavor payoff from very humble ingredients, provided you follow the timing to the second.
The Secret Trick Behind the Crisp Tender Texture
Chlorophyll Stabilization: The heavy salt in the boiling water and the immediate ice bath "locks" the green pigment in place, preventing the beans from turning grey.
Surface Moisture Removal: Drying the beans thoroughly after the ice bath is essential; it prevents steaming and allows for a rapid, over high heat sear.
Temperature Control: Using a splash of neutral oil for the initial sear handles high heat, while adding butter at the end prevents the milk solids from burning.
| Method | Total Time | Final Texture | Best For |
|---|---|---|---|
| Blanch & Sear | 15 minutes | Snappy & Charred | Maximum flavor and color |
| Steam Only | 8 minutes | Soft & Uniform | Quick health conscious meals |
| Oven Roast | 25 minutes | Shriveled & Sweet | Deep caramelization lovers |
| Slow Cooker | 4 hours | Meltingly Tender | Southern style traditionalists |
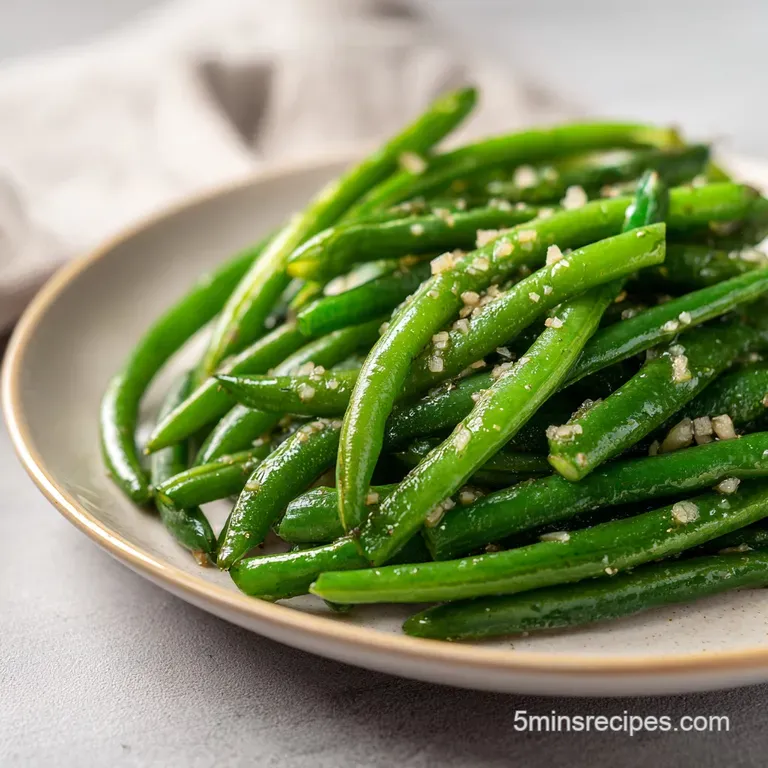
The difference between a good dish and a great one often comes down to how you handle your aromatics. In this recipe, we sliver the garlic rather than mincing it. When you mince garlic, it releases more sulfurous compounds and burns in seconds.
Slivers, however, provide little golden nuggets of toasted flavor that contrast beautifully with the "shatter" of a perfectly cooked bean.
Scientific Breakdown of Our Primary Flavor Components
| Component | Science Role | Pro Secret |
|---|---|---|
| Sea Salt | Seasoning & Texture | Heavily salting the blanching water seasons the beans from the inside out. |
| Unsalted Butter | Fat & Emulsion | Choosing unsalted allows you to control the final seasoning without making the dish a salt bomb. |
| Slivered Garlic | Aromatic Depth | Thin slices toast more evenly than a fine mince, providing a nutty, mellow sweetness. |
| Lemon Juice | Acidic Balance | A quick hit of acid at the end "wakes up" the heavy fats and cuts through the butter. |
Understanding how these elements interact is what separates a cook from a chef. When we hit the pan with that lemon juice at the very end, we aren't just adding flavor; we are balancing the pH of the dish. This makes the green colors pop even more and prevents the butter from feeling too greasy on the palate.
The Essential Building Blocks for Success
- 1 lb fresh green beans: Look for pods that "snap" loudly when bent. Why this? Old beans are fibrous and will never become tender regardless of cook time.
- 2 quarts water: Sufficient volume prevents the temperature from dropping too far when beans are added.
- 1 tbsp sea salt: Used for the blanching water to season deeply.
- 2 tbsp unsalted butter: Provides the velvety mouthfeel and nutty finish. Why this? Real butter is non negotiable for the flavor profile.
- 4 cloves garlic: Slivers are better than a paste here.
- 1/2 tsp red pepper flakes: Adds a background hum of heat.
- 1/2 tsp kosher salt: For the final seasoning adjustment.
- 1/4 tsp cracked black pepper: Freshly cracked offers more floral notes than pre ground.
- 1 tsp fresh lemon juice: Brightens the entire profile.
- 2 tbsp fresh parsley: Adds a hit of grassy freshness.
- 1 tsp neutral oil: Has a higher smoke point than butter for the initial sear.
| Original Ingredient | Substitute | Why It Works |
|---|---|---|
| Unsalted Butter | Ghee | Higher smoke point and same rich flavor. Note: Adds a slightly toasted, nuttier aroma. |
| Fresh Green Beans | Frozen Whole Beans | Flash frozen at peak. Note: Skip the blanching step; go straight to the sear. |
| Sea Salt | Table Salt | Use half the volume as table salt is denser and saltier per teaspoon. |
If you find yourself missing a fresh lemon, don't reach for the bottled stuff. A tiny splash of white wine vinegar or even apple cider vinegar can provide that necessary acidic lift. It won't have the same citrus aroma, but it will fulfill the chemical requirement of balancing the fats.
Equipment Needed for Professional Results
You don’t need a specialized "green bean pan," but a heavy bottomed skillet is your best friend here. A cast iron skillet (like a Lodge) or a heavy stainless steel pan is ideal because they hold onto heat.
When you drop cold beans into a thin, cheap pan, the temperature plummets, and instead of searing, the beans start to leak water and steam.
You will also need a large pot for the blanching phase and a massive bowl filled with ice and water. This "ice bath" is the step most home cooks skip because it feels like extra dishes.
Trust me, it’s the difference between a side dish that looks professional and one that looks like it’s been sitting on a buffet line for three hours. A pair of sturdy tongs and a clean kitchen towel for drying are the only other tools required.
How to Execute the Perfect Sear
- Bring 2 quarts of water to a rolling boil in a large pot and add 1 tablespoon of sea salt. Note: This ensures the beans are seasoned through the core.
- Drop the trimmed green beans into the boiling water and cook for exactly 3 minutes.
- While beans boil, prepare an ice bath in a large bowl. Drain the beans and immediately plunge them into the ice water until completely cold to the touch.
- Drain the cooled beans and pat them completely dry with a clean kitchen towel. Note: Water is the enemy of a good sear; any moisture left will cause steaming.
- Heat a heavy bottomed skillet over medium high heat with 1 teaspoon of neutral oil.
- Once the oil is shimmering, add the beans and sear for 2-3 minutes until micro char marks appear.
- Reduce the heat to medium and add the 2 tablespoons of unsalted butter, slivered garlic, and red pepper flakes.
- Sauté for 1-2 minutes until the garlic turns a pale golden brown and the butter smells nutty.
- Remove the skillet from the heat immediately to prevent the garlic from burning.
- Season with kosher salt, black pepper, lemon juice, and fresh parsley, then toss and serve.
The most critical moment is the transition between the over high heat sear and adding the butter. If the pan is screaming hot when the butter hits, the milk solids will turn black and bitter before the garlic has a chance to cook.
Dropping the heat just a touch or even pulling the pan off the burner for ten seconds makes a world of difference.
Mastering the Troubleshooting Process
If your beans come out looking dull and wrinkled, you likely overcooked them during the blanching stage. Three minutes is the sweet spot for standard sized beans. If you are using very thin Haricots Verts, you might only need 90 seconds.
Always set a timer; "eyeballing it" is how we end up with the soggy mess we're trying to avoid.
Another common issue is the garlic burning. If the slivers turn dark brown or black, they will taste incredibly bitter and ruin the entire batch. If this happens, honestly, it's better to wipe out the pan and start the butter/garlic phase over than to try and save it.
Why Your Beans Lost Their Snap
This usually happens because the ice bath wasn't cold enough or the beans weren't left in long enough. The core of the bean holds a lot of residual heat. If you only dip them for a few seconds, the "carryover cooking" will continue once you pull them out, leading to a mushy texture.
| Problem | Root Cause | Solution |
|---|---|---|
| Greasy Beans | Pan wasn't hot enough | Ensure oil is shimmering before adding beans to sear quickly. |
| Bitter Aftertaste | Burnt garlic slivers | Add garlic only after reducing heat and sauté only until golden. |
| Leaking Water | Beans weren't dried | Pat beans with a towel until no moisture remains before searing. |
Common Mistakes Checklist
- ✓ Never crowd the pan; if doubling the recipe, sear in two separate batches.
- ✓ Don't skip the salt in the boiling water; it’s your only chance to season the interior.
- ✓ Use a neutral oil (like canola or avocado) for the sear; extra virgin olive oil can smoke too much.
- ✓ Only add the lemon juice at the very end; adding it too early can turn the beans olive grey.
- ✓ Ensure the water is at a "rolling boil" before adding beans to minimize temperature drop.
Scaling the Recipe for Larger Crowds
If you are cooking for a holiday gathering and need to double or triple this, the blanching process stays mostly the same, though you may need a larger pot. The real challenge is the sear. You cannot cram two pounds of beans into a single skillet and expect a sear; they will just steam and turn grey.
Work in batches, keeping the finished beans in a low oven (200°F) while you finish the rest.
When scaling down for a solo dinner, don't just use half an egg or half a lemon. Use the full amount of aromatics for more punch, but reduce the butter and oil proportionally. Smaller batches are actually easier to control because you can move the beans around the pan more effectively. For another great vegetable side, you can also check out my roasted carrots and potatoes which handle scaling very well.
Kitchen Truths and Misconceptions
One major misconception is that you need to "snap" every bean by hand. While it's therapeutic, you can simply line up a handful of beans on a cutting board and trim the stem ends off with one swift knife stroke. It saves ten minutes of prep time without sacrificing a bit of quality.
Just make sure you only remove the tough stem end, not the curly "tail" at the other side, which is perfectly edible and looks elegant.
Another myth is that you can't use frozen beans for a high-quality side dish. While fresh is preferred for the best "snap," high-quality frozen whole green beans can be excellent. The trick is to thaw them and dry them exceptionally well.
Since they are already blanched before freezing, you can skip the boiling water step entirely and go straight to the skillet.
Preservation Secrets and Zero Waste
Fresh green beans should be stored in the refrigerator in a breathable bag or a container lined with a paper towel. They typically last about 5 to 7 days before they start to develop brown spots. If you’ve already cooked them, they will stay good in an airtight container for up to 4 days.
When reheating, avoid the microwave if possible; a quick 2 minute toss in a hot skillet with a tiny knob of butter will bring back most of that original texture.
For zero waste cooking, don't toss the trimmed ends into the trash. If you have a bag in the freezer for vegetable scrap stock, those bean ends add a nice earthiness to the broth. Also, if you find yourself with a handful of leftover cooked beans, chop them up and throw them into a morning frittata or a cold grain salad the next day.
They add a great textural contrast to softer ingredients.
What to Serve This With
These Garlic Butter Green Beans are the ultimate utility player in the kitchen. They have enough personality to stand up to a heavy steak but are light enough to serve alongside a delicate piece of white fish. The toasted garlic and red pepper flakes provide a bridge to many different cuisines.
If you are looking for a protein heavy pairing that shares a similar flavor profile, try serving these with a steak bites recipe. The garlic and butter theme carries through both dishes perfectly. They also work beautifully with roasted chicken, grilled pork chops, or even as a bright side to a heavy pasta dish like fettuccine alfredo. The acidity from the lemon juice acts as a palate cleanser between bites of richer, heavier foods.

Recipe FAQs
How to cook green beans in garlic butter?
Boil trimmed beans in salted water for exactly 3 minutes, then shock in an ice bath to lock in color. Sear dry beans in a heavy bottomed skillet with neutral oil until charred, then reduce heat to stir in unsalted butter, slivered garlic, and red pepper flakes until fragrant.
Are green beans okay for diabetics?
Yes. Green beans have a low glycemic index and are a fiber rich, non-starchy vegetable, making them an excellent choice for blood sugar management.
Are green beans good for magnesium?
Yes. They provide a respectable amount of magnesium, which contributes to bone health and metabolic function as part of a balanced diet.
How to cook beans for diabetics?
Prioritize steaming or quick searing methods to keep the vegetable crisp and nutrient dense. If you enjoyed the technique of balancing aromatics in this dish, see how we apply the same flavor layering in our garlic and herb soup recipe.
Is it true I must boil the beans for longer than 3 minutes to make them tender?
No, this is a common misconception. Boiling for more than 3 minutes results in mushy, overcooked beans; the final sear in the skillet provides the perfect texture contrast.
Why do my green beans turn grey instead of bright green?
Adding lemon juice too early is the culprit. The acid in the lemon juice reacts with the chlorophyll in the beans, causing them to turn an unappealing olive grey if added before the final serving step.
Should I crowd the pan to cook all the beans at once?
No, never crowd the pan. Overloading the skillet causes the beans to steam rather than sear, preventing the development of those essential micro char marks that provide deep flavor.
Garlic Butter Green Beans
Ingredients:
Instructions:
Nutrition Facts:
| Calories | 99 kcal |
|---|---|
| Protein | 2.1 g |
| Fat | 7.2 g |
| Carbs | 8.8 g |
| Fiber | 3.1 g |
| Sugar | 3.8 g |
| Sodium | 315 mg |
