Vanilla Extract Recipe with Vanilla Beans Made at Home
- Time: Active 10 minutes, Passive 8 weeks, Total 8 weeks 10 mins
- Flavor/Texture Hook: Velvety, floral, and deeply woody
- Perfect for: Home bakers, holiday gifting, and long-term pantry stocking
- Vanilla Extract Recipe with Vanilla Beans made at home
- Why You Will Love This Fragrant Homemade Extract
- Precise Recipe Specs for the Best Kitchen Results
- Simple Ingredients You Need for This Aromatic Project
- Essential Equipment for Bottling Your Homemade Vanilla Liquid
- Component Deep Dive
- The Step-by-Step Process for Crafting Your Custom Extract
- Solving Common Infusion Issues
- Adjusting for Larger Batches
- Debunking Cold Infusion Myths
- Maintenance and Waste Reduction
- Flavorful Serving Suggestions for Your Pure Vanilla Extract
- Recipe FAQs
- 📝 Recipe Card
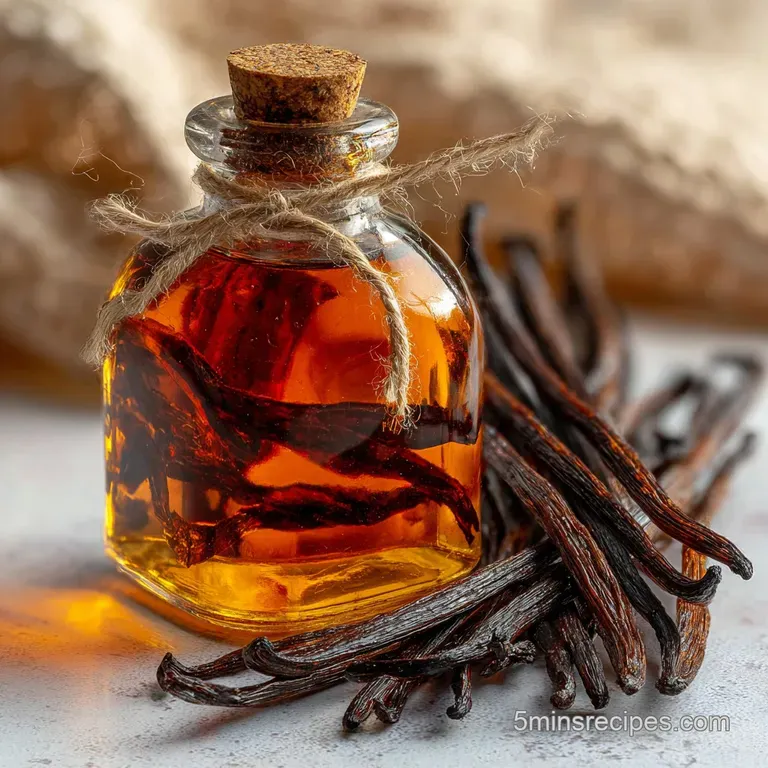
Vanilla Extract Recipe with Vanilla Beans made at home
The first time I sliced into a Grade B vanilla bean, the aroma hit me like a physical wave. It wasn't the flat, sugary scent you find in those plastic grocery store bottles; it was earthy, slightly smoky, and intensely floral.
Discover how simple it is to create your own fragrant Vanilla Extract Recipe with Vanilla Beans made at home. I spent years buying the expensive stuff, thinking there was some hidden laboratory secret to it, but the reality is much more satisfying and smells infinitely better.
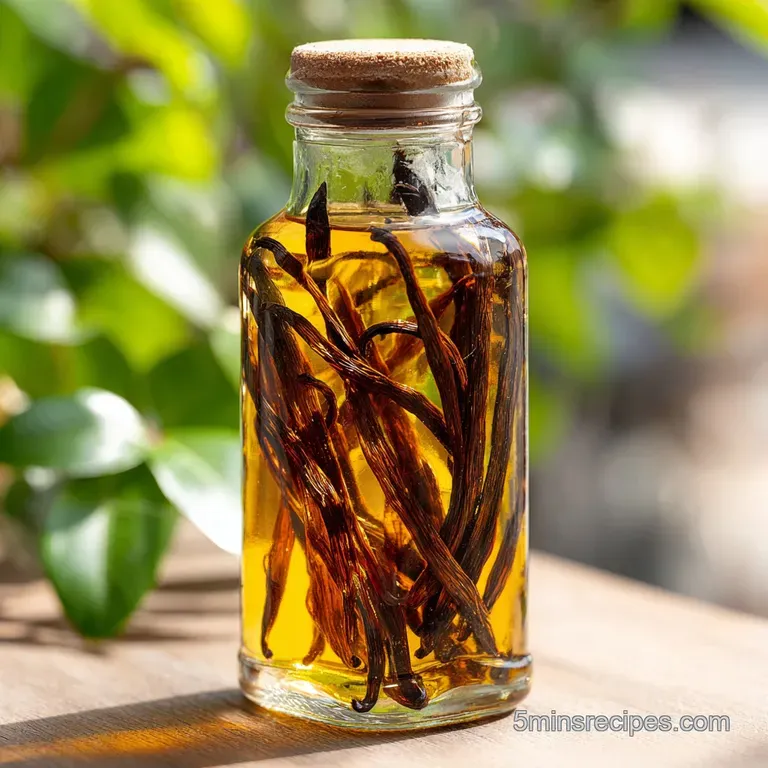
You’re essentially making a botanical infusion that evolves over time. When you start, it’s just vodka with a few pods floating around, smelling mostly like a Friday night cocktail.
But as the weeks pass, the liquid darkens into a rich, mahogany hue, and the harsh bite of the alcohol softens into a velvety backdrop for the vanillin. It’s one of those kitchen projects that rewards the patient soul with a flavor profile that can't be replicated by anything synthetic.
We've all been there staring at the tiny, overpriced jars in the baking aisle and wondering if there's a better way. This method is that way. It gives you complete control over the intensity and the quality of the beans, ensuring your cakes, cookies, and custards have that unmistakable "speckled" gourmet look and a depth of flavor that lingers on the palate long after the first bite.
Why You Will Love This Fragrant Homemade Extract
Making this at home is a revelation for anyone who loves simple sweet treats. It allows you to skip the corn syrup and additives found in commercial versions, leaving you with nothing but pure, concentrated flavor. If you've ever tried a Strawberry Breakfast Recipe with a hint of real vanilla, you know how it transforms the entire meal from basic to brilliant.
- Solvent Efficiency: Ethanol acts as a natural carrier, drawing out over 250 organic flavor compounds from the beans that water alone couldn't touch.
- Economic Value: While the upfront cost of beans seems high, you’ll produce nearly triple the amount of extract for the same price as a premium store-bought bottle.
- Perpetual Cycle: This is a "living" recipe where you can continuously add new beans and top off the alcohol, creating a library of flavor that lasts for years.
- Aromatic Complexity: Unlike heat processed extracts, the cold steep method preserves delicate floral notes that typically evaporate at high temperatures.
Precise Recipe Specs for the Best Kitchen Results
Choosing the right method for your extract depends on how much time you have and what kind of flavor profile you're chasing. While the traditional steep is my go to for its depth, sometimes you need a decision shortcut to get things moving.
| Method | Total Time | Flavor Profile | Best For |
|---|---|---|---|
| Traditional Steep | 8-12 weeks | Deep, complex, velvety | Everyday baking and gifts |
| Sliced & Scraped | 6 weeks | Intense, bean flecked | Custards and ice cream |
| Pressure Cooker | 2 hours | Toasted, slightly woody | Emergency baking needs |
One thing I've learned the hard way: don't rush the process. Even if the liquid looks dark after two weeks, the chemical "mellowing" of the alcohol hasn't fully happened yet. It's like a good wine; the harsh edges need time to smooth out so the floral notes can truly shine.
Trust the timeline, and you'll be rewarded with a liquid that smells like a dream every time you pop the cork.
Simple Ingredients You Need for This Aromatic Project
To get started with this Vanilla Extract Recipe with Vanilla Beans made at home, you only need two high-quality components. The simplicity is what makes it so beautiful.
- 6 whole Grade B vanilla beans: These are specifically "extract grade." They are drier and thinner than Grade A, which actually makes them better for infusing because they have a higher concentration of flavor per ounce and less water content. Why this? Grade B beans provide a more concentrated infusion without the high price of gourmet beans.
- 1 cup 80 proof vodka: You want a neutral, mid shelf vodka. There is no need for the most expensive bottle on the shelf, but avoid the "bottom rung" options that have a chemical aftertaste. Why this? The 40% alcohol content is the ideal ratio for preserving the beans while extracting oils.
Essential Equipment for Bottling Your Homemade Vanilla Liquid
You don't need a professional lab, but the right vessel makes a massive difference in the longevity and quality of your final product.
- 8 ounce glass bottle: Preferably amber or cobalt blue to protect the infusion from light degradation.
- Sharp paring knife: Essential for splitting the beans cleanly without tearing the delicate skins.
- Small funnel: This prevents messy spills when pouring your vodka over the beans.
- Kitchen shears: Sometimes it’s easier to snip the beans into smaller pieces if your bottle is short.
Component Deep Dive
The science behind these ingredients is what makes the magic happen. Here is why we use what we use.
| Component | Science Role | Pro Secret |
|---|---|---|
| 80 Proof Alcohol | Solvent & Preservative | Use vodka for a clean profile; it won't mask the bean's natural floral notes. |
| Grade B Pods | Flavor Source | These beans contain less moisture, meaning they won't dilute your extract over time. |
| Glass Vessel | Non reactive Storage | Avoid plastic, which can leach odors and degrade the delicate vanillin molecules. |
When you combine these, you're initiating a process called maceration. The alcohol permeates the bean's skin, dissolves the oils and vanillin crystals inside, and carries them into the surrounding liquid. It’s a slow motion flavor explosion that only gets better with age.
The step-by-step Process for Crafting Your Custom Extract
Chef's Note: Make sure your hands and equipment are bone dry. Water is the enemy of shelf stability and can introduce unwanted bacteria to your infusion.
- Prep the beans. Take your 6 whole Grade B vanilla beans and place them on a clean cutting board.
- Split the pods. Using a sharp paring knife, slice each bean lengthwise, leaving about an inch at the top connected. Note: This exposes the "caviar" inside, speeding up the flavor release.
- Place in bottle. Fold the beans if necessary to fit them into your 8 ounce glass bottle.
- Add the solvent. Pour 1 cup 80 proof vodka into the bottle using a funnel until the beans are completely submerged.
- Seal it tight. Ensure the cap is screwed on firmly to prevent evaporation.
- The first shake. Give the bottle a vigorous 30 second shake until you see the tiny black seeds swirling.
- Find a dark home. Place the bottle in a cool, dark cupboard away from the stove or sunlight.
- Weekly maintenance. Shake the bottle once a week until the liquid turns a dark, opaque amber.
- The scent check. After 8 weeks, open the bottle; it should smell like sweet timber rather than sharp alcohol.
- Final aging. If you have the willpower, let it go for 4 to 6 months for a truly silky finish.
Solving Common Infusion Issues
Even with a simple recipe, things can occasionally go sideways. The most common issues are usually related to the beans themselves or the environment where the bottle is stored.
Why Your Extract Smells Like Alcohol
If your infusion is only a few weeks old, it will still have a very punchy, boozy scent. This is completely normal! The vanillin takes time to bond with the ethanol molecules. If it still smells like rubbing alcohol after two months, you might not have used enough beans, or the beans were too dry and "dead" to provide enough oil.
Cloudy Liquid or Sediment
You might notice a bit of cloudiness or "gunk" at the bottom of the bottle. Most of the time, this is just the "caviar" (the tiny seeds) escaping the pods. It’s actually a sign of a very high-quality extract! However, if you see fuzzy growth or it smells sour, discard it immediately.
| Problem | Root Cause | Solution |
|---|---|---|
| Weak Flavor | Not enough beans | Add 2-3 more pods and wait another 3 weeks. |
| Oily Film | Natural bean oils | This is good! Just shake the bottle before use to emulsify. |
| Exposed Beans | Evaporation or absorption | Top off with more vodka immediately to prevent mold on the tips. |
Common Mistakes Checklist:
- ✓ Never use "vanilla flavored" vodka; the artificial flavors will ruin the natural bean profile.
- ✓ Don't use a bottle with a metallic lid that can rust; glass or plastic lined caps are best.
- ✓ Avoid keeping the bottle on the counter; UV light breaks down vanillin very quickly.
- ✓ Resist the urge to use the extract before the 8 week mark - it’s just not ready yet.
- ✓ Ensure the beans are fully submerged to prevent any chance of spoilage.
Adjusting for Larger Batches
If you're planning on making gifts, you'll want to scale this up. Making a large batch is often more cost effective because you can buy beans in bulk.
Scaling Down (Small Gift Vials): If you want to make 2 ounce gift bottles, use 1.5 to 2 beans per bottle. The infusion time remains the same. Since you're working with smaller volumes, the flavor might actually concentrate a bit faster, but I’d still stick to the 8 week rule.
Scaling Up (The 750ml Method): For a standard 750ml bottle of vodka, you will need about 20 to 22 vanilla beans. When scaling up, don't just double the salt or spices in other recipes, but here, the ratio of beans to alcohol stays fairly linear.
If the beans are very large, you might get away with 18, but 20 is the safe bet for a "Double Fold" strength extract.
Debunking Cold Infusion Myths
There is a lot of "kitchen folklore" surrounding vanilla. One major myth is that you need to use expensive Bourbon to make "Bourbon Vanilla." The truth is, "Bourbon" refers to the region where the beans are grown (the Bourbon Islands, like Madagascar), not the alcohol used.
Using actual bourbon whiskey is a delicious variation, but it isn't the "traditional" requirement.
Another common misconception is that you have to scrape the seeds out and discard the pods. The pod itself contains a massive amount of flavor! By leaving the whole split pod in the bottle, you ensure you're extracting every last bit of value from that bean.
Some people even say you can't reuse beans, but you absolutely can "top off" your bottle as you use it, as long as the beans still have their characteristic aroma.
Maintenance and Waste Reduction
One of the best things about making this at home is the zero waste potential. Never throw away a vanilla bean! If you finish a bottle of extract, those spent beans can be rinsed, dried, and tucked into a jar of sugar.
After a week, you’ll have fragrant vanilla sugar that’s perfect for coffee or rolling sugar cookies.
Storage Guidelines: Keep your extract in a cool, dark place like a pantry or a low cabinet. Under these conditions, the extract has an indefinite shelf life. In fact, vanilla is one of the few things in your kitchen that actually improves with age, becoming more complex over five or ten years.
Zero Waste Tip: If you have a pod that has finally lost all its flavor after multiple "top offs," don't toss it. Dry it out completely and grind it with a little salt. This "vanilla salt" is an incredible topper for caramels or even roasted root vegetables.
It adds a mysterious depth that people can't quite put their finger on.
Flavorful Serving Suggestions for Your Pure Vanilla Extract
Now that you have this liquid gold, how should you use it? It’s perfect for any dessert, but it’s also a secret weapon in savory dishes. A teaspoon added to a balsamic glaze for roasted strawberries is a "Fruit recipe" game changer.
You can also add a drop to your morning coffee or stir it into plain yogurt for a quick, sophisticated snack.
If you really want to show off the flavor, try it in a simple whipped cream. The tiny black specks from the beans will prove to everyone that you made it from scratch. It also pairs beautifully with a Fruit recipe where the creamy layers can really absorb the floral notes of the extract. Whether you're making a simple glaze or a complex custard, this homemade version will provide a velvety finish that store-bought extracts simply can't match.
For those looking for "vanilla extract recipe with vanilla beans made at home without" alcohol, you can follow this same process using food grade vegetable glycerin. It takes a bit longer to infuse (about 3 months) and the result is a thicker, syrupy liquid that's perfect for those avoiding ethanol.
No matter which solvent you choose, the key is the quality of the beans and the patience to let them work their magic.

Recipe FAQs
How to make vanilla extract from a vanilla bean?
Split the beans lengthwise and submerge them completely in 80 proof vodka. Seal the bottle tightly and shake vigorously for 30 seconds. Store in a cool, dark place, shaking once per week for a minimum of 8 weeks.
What is the best alcohol for making vanilla extract?
Use 80 proof vodka for the cleanest flavor profile. A neutral spirit ensures the pure flavor of the vanilla bean is extracted without masking it. You can certainly experiment with bourbon or rum, but vodka is the standard for true vanilla flavor.
What do I do with vanilla beans after making vanilla extract?
Never discard spent vanilla beans; they still hold flavor. Rinse and dry them thoroughly, then place them in a jar of granulated sugar to create vanilla sugar. This leverages the same flavor extraction principles you used here, similar to how we balance flavors in a quick 5 Minute Oatmeal recipe.
How many vanilla beans do you use when making homemade vanilla?
Use approximately 6 whole Grade B beans per 1 cup (8 ounces) of alcohol. This ratio ensures a strong, flavorful extract that meets standard quality recommendations. For a deeper, "Double Fold" extract, use 20 beans per 750ml bottle.
Must I use Grade B vanilla beans for extraction?
No, but Grade B beans are strongly recommended for efficiency. Grade B beans (extract grade) have lower moisture content, meaning they infuse a higher concentration of flavor into the alcohol over time without watering down the solution.
Can I speed up the vanilla extract process using heat?
You can use a pressure cooker for a rapid infusion, but the flavor will be different. Heat extracts different compounds, resulting in a toasted, woody flavor profile rather than the bright, floral notes achieved through the traditional cold steep. If you enjoyed mastering the slow infusion technique here, you will appreciate the immediate results of our Fast Cinnamon Roll Recipe.
Is it true I must replace the alcohol as I use the extract?
No, this is a common misconception; you only need to top off the alcohol if the beans become exposed. As you pour out extract, the level drops, but if the beans remain submerged, the infusion continues. Top up only when the liquid level dips below the tops of the beans to maintain saturation.
Homemade Vanilla Extract Recipe
Ingredients:
Instructions:
Nutrition Facts:
| Calories | 11 calories |
|---|---|
| Protein | 0 g |
| Fat | 0 g |
| Carbs | 0.1 g |
| Fiber | 0 g |
| Sugar | 0 g |
| Sodium | 0 mg |
