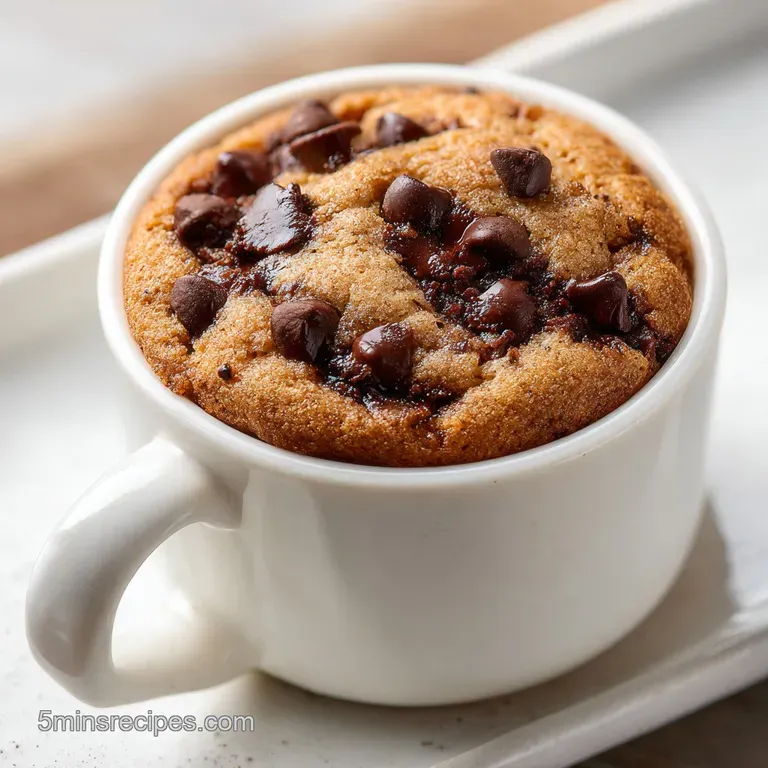
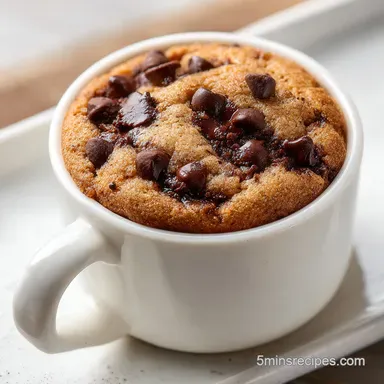
Chocolate Chip Mug Cookie: Fudgy and Warm
- Time: Active 2 minutes, Passive 1 minutes, Total 3 minutes
- Flavor/Texture Hook: Fudgy, buttery, and molten chocolate
- Perfect for: Late night cravings, dorm cooking, or quick treats
- Why This Simple Method Works
- Component Analysis Deep Dive
- Gathering Your Fresh Essentials
- Essential Microwave Kitchen Gear
- Detailed Step By Step Guide
- Fixing Your Common Problems
- Adjusting the Batch Size
- Debunking Microwave Baking Ideas
- Keep Your Treat Fresh
- Making It Look Beautiful
- Recipe FAQs
- 📝 Recipe Card
Close your eyes for a second and imagine that specific, nutty scent of butter melting in a ceramic mug. It’s that warm, comforting aroma that signals something sweet is about to happen.
Discover how to make a yummy and easy microwave mug cookie recipe with chocolate chips right in your own kitchen without the hassle of a baking sheet. I remember the first time I tried this; I was skeptical that a microwave could actually "bake" anything that didn't turn into a rubber puck.
But when I pulled that mug out and saw the chocolate chips glistening and the edges just barely firm, I knew I’d found a staple.
The real hero of this little treat isn't the chocolate, though it certainly helps. It’s the packed light brown sugar. I used to think I could just swap it for more white sugar, but the cookie always came out dry and sandy.
The brown sugar brings molasses to the party, which keeps things moist and gives you that deep, toffee like flavor we all crave in a classic cookie. It’s the difference between a bland biscuit and a rich, velvety dessert.
Honestly, don't even bother with low-fat substitutes here. We’re making a cookie in a mug, not a salad. We want the full fat from the butter and the real deal sugar to get that texture right.
You'll see the steam rising from the mug as the vanilla hits the hot butter, and it smells like a professional bakery for about thirty seconds. It’s a tiny bit of magic that fits in the palm of your hand.
Why This Simple Method Works
Most people treat the microwave like a reheating tool, but it’s actually a high speed moisture mover. When we heat the dough, we aren't just warming it up; we are setting the structure of the flour while the sugars melt into a syrup.
This happens so fast that if we aren't careful, the moisture escapes and leaves us with a brick.
- Moisture Retention: The brown sugar contains molasses, which is hygroscopic, meaning it holds onto water molecules even under the intense heat of a microwave.
- Fat Emulsification: Whisking the butter and sugars until they look like wet sand ensures the fat is evenly distributed, preventing "oily spots" in the finished crumb.
- Starch Gelatinization: The quick burst of heat causes the starch in the flour to swell and set, creating a stable, cake like structure in sixty seconds.
- Resting Period: Leaving the cookie alone for 2 minutes allows the residual heat to finish cooking the center without making the edges tough.
| Premium Ingredient | Budget Alternative | Flavor Impact | Savings |
|---|---|---|---|
| Pure Vanilla Bean | Vanilla Extract | Minor floral loss | Save $15-20 |
| Couverture Chocolate | Store brand Chips | Less "snap" when cold | Save $4-6 |
| European Butter | Standard Salted Butter | Slightly less creamy | Save $2-3 |
If you are looking for ways to keep your grocery bill down while still enjoying high-quality treats, these swaps make a lot of sense. Standard salted butter is actually quite good here because the extra salt balances the high sugar content of the mug cookie.
You don't always need the fancy stuff to get a velvety result that hits the spot.
Component Analysis Deep Dive
Understanding the role of each part of the dough helps you avoid the common pitfalls of mug baking. Since we are working with such small quantities, even a half teaspoon error can change the entire outcome. It’s about precision in a tiny space.
| Ingredient | Science Role | Pro Secret |
|---|---|---|
| Light Brown Sugar | Moisture and chew | Pack it tight in the spoon for the right ratio. |
| All Purpose Flour | Structural foundation | Spoon it into the cup; don't scoop with the cup to avoid packing. |
| Whole Milk | Hydration and lift | Room temp milk blends faster with the melted butter. |
| Semi sweet Chips | Flavor and texture | Use mini chips for more chocolate in every bite. |
The interaction between the milk and the flour is where the magic happens. If you skip the milk, you'll end up with a crumbly mess. If you add too much, it becomes a mug cake. We are aiming for that sweet spot in the middle where it feels like a soft baked cookie pulled straight from a traditional oven.
Gathering Your Fresh Essentials
You likely have everything you need in the pantry right now. That’s the beauty of this recipe; it’s a pantry pull masterpiece. Make sure your flour isn't three years old, as flour can actually absorb smells from the cupboard over time, and nobody wants a cookie that tastes like old spices.
- 1 tbsp Unsalted Butter: Provides the rich, fatty base that carries all the other flavors.
- 1 tbsp Granulated White Sugar: Adds sweetness and helps create those slightly crisp edges.
- 1 tbsp Packed Light Brown Sugar: The key to a chewy, moist center. Why this? The molasses keeps the cookie from drying out in the microwave.
- 3 drops Pure Vanilla Extract: Rounds out the sweetness with a classic floral aroma.
- 1 pinch Sea Salt: Crucial for cutting through the sugar and making the chocolate pop.
- 1 tbsp Whole Milk: Provides the liquid needed to hydrate the flour and create a dough.
- 0.25 cup All Purpose Flour: The main structure. Use a standard brand for consistent results.
- 2 tbsp Semi sweet Chocolate Chips: Use high-quality chips for the best melting experience.
| Original Ingredient | Substitute | Why It Works |
|---|---|---|
| Unsalted Butter | Coconut Oil | Same fat ratio but adds a subtle tropical note. |
| Whole Milk | Almond Milk | Similar hydration; the nuttiness complements the chocolate. |
| All Purpose Flour | Oat Flour | Makes it denser and heartier. Note: Texture will be more like a muffin. |
| White Sugar | Coconut Sugar | Lower glycemic index but slightly grittier texture. |
Using coconut oil is a great trick if you want a dairy-free version, though you'll need to use dairy-free chocolate chips as well. The fat content is almost identical, so the cookie still feels indulgent and rich. If you find yourself wanting more of a snack sized treat without the mug, you might enjoy these Peanut Butter Banana Bites which offer a similar quick fix.
Essential Microwave Kitchen Gear
You don't need a stand mixer or a baking sheet for this one. In fact, the fewer tools you use, the less cleanup you have, which is half the appeal. I usually just use a single fork for the whole process.
The most important "equipment" is actually your mug. Choose a standard ceramic mug (about 8 to 10 ounces). If you use a massive 20 ounce latte mug, the cookie will spread too thin and might dry out. If the mug is too small, it might overflow.
A straight sided mug is better than a tapered one because it promotes even heating from top to bottom.
Also, make sure your measuring spoons are accurate. Since we are dealing with tablespoons, being off by a little bit is actually a huge percentage of the total recipe. Use level tablespoons, not "heaping" ones, unless the recipe specifically asks for it.
A small whisk is nice, but a fork works perfectly to break up the brown sugar clumps and get that wet sand texture we are looking for.
Detailed step-by-step Guide
Right then, let's crack on with the actual cooking. Follow these steps closely, and pay attention to the sensory cues. The smell and the look of the dough will tell you more than the timer ever will.
- Place the 1 tbsp unsalted butter in a microwave safe mug and microwave for 15-20 seconds until just liquified and warm. Note: Don't let it explode; stop as soon as it's liquid.
- Stir in the 1 tbsp white sugar, 1 tbsp packed brown sugar, 3 drops vanilla, and a pinch of salt.
- Whisk the mixture with a fork for about 30 seconds until it looks like wet, dark sand.
- Integrate the 1 tbsp whole milk and whisk until the mixture is glossy and smooth.
- Gently fold in the 0.25 cup all purpose flour using a spoon. Note: Stop as soon as you see no white streaks to keep it tender.
- Fold in 1.5 tablespoons of the chocolate chips, distributing them evenly through the thick dough.
- Press the remaining 0.5 tablespoon of chocolate chips into the top until they are nestled in the surface.
- Microwave on high power for 50 to 60 seconds until the edges are set and the center looks slightly tacky.
- Remove carefully and allow the cookie to rest for 2 minutes. Note: This is when the carryover heat finishes the crumb structure.
- Serve while still warm until the chocolate is melty and the base is soft.
Fixing Your Common Problems
Even the simplest recipes can go sideways if the microwave power is too high or the flour is packed too tight. If your cookie comes out looking like a sponge or feeling like a rock, don't worry. It’s usually a very easy fix for the next round.
Why Your Cookie Is Rubbery
A rubbery texture is almost always caused by over mixing the flour. When you stir flour into liquid, you develop gluten. In a traditional oven, the slow heat allows the dough to expand gently. In a microwave, the rapid heating locks that gluten structure in place instantly.
If you've stirred it too much, those gluten strands become tough and "bouncy" rather than tender and flaky. Just fold the flour in until it disappears, then stop.
Handling Flour Clumps
Sometimes you'll find a little pocket of dry flour in the bottom of the mug. This happens because the corners of the mug are hard to reach with a spoon. Trust me on this: use a fork and really scrape the "elbow" of the mug where the bottom meets the side.
If you see clumps, smash them against the side of the mug with the back of your fork before you finish mixing.
| Problem | Root Cause | Solution |
|---|---|---|
| Dry/Crumbly | Too much flour | Use the spoon and level method for measuring. |
| Greasy Bottom | Butter too hot | Let the butter cool for 1 min before adding sugar. |
| Hardened Top | Overcooked | Reduce microwave time by 10 seconds next time. |
Common Mistakes Checklist
- ✓ Never skip the 2 minute rest; the cookie is still cooking during this time!
- ✓ Use a standard ceramic mug, not plastic or glass, for even heat distribution.
- ✓ Check your microwave wattage; 1000W is standard, but adjust if yours is stronger.
- ✓ Don't over mix once the flour is added; keep those gluten strands short.
- ✓ Ensure your brown sugar is soft and packed; dry brown sugar won't melt properly.
If you find that you prefer a more traditional cake like consistency rather than a dense cookie, you might find the texture of a Mug Cake with Chocolate recipe more to your liking. It uses a slightly different ratio to encourage more lift and airiness.
Adjusting the Batch Size
Since this is a single serve recipe, you might wonder how to make it for a friend. The temptation is to just double everything in one big mug, but I’m telling you now: don't do it. Microwaves struggle to cook large, dense masses evenly. You’ll end up with a lava hot exterior and a raw, soupy center.
If you want to make two cookies, prepare them in two separate mugs. You can mix the dough for both at the same time in a small bowl, then divide it into the mugs. Microwave them one at a time. This ensures that the microwave's energy is focused on one single cookie, giving you that consistent, fudgy result every time.
For scaling down, well, you can't really go smaller than one cookie without getting into "fraction of a teaspoon" territory, which is more trouble than it's worth. If you only want half, just share the mug!
If you are doubling the recipe for a bowl rather than a mug, increase the cook time by only 20% and check it frequently.
| Servings | Ingredient Adjustments | Mug Size | Cook Time |
|---|---|---|---|
| 1 Person | 1x Recipe | 8-10 oz | 50-60 secs |
| 2 People | 2x Recipe (Separate Mugs) | 2x 10 oz | 50s each |
| 4 People | 4x Recipe (In Bowl) | Small Bowl | 2-3 mins |
Debunking Microwave Baking Ideas
One common myth is that you need baking powder or baking soda for a mug cookie. Actually, because we are looking for a dense, fudgy cookie texture, we don't really want a lot of lift.
The steam from the milk and the air incorporated when whisking the butter and sugar provide just enough "oomph" to keep it from being a solid block of fudge. Adding leavening often makes it taste "metallic" in such a small batch.
Another misconception is that the "cookie" will be crispy. Let’s be real: a microwave can’t create a true Maillard reaction crust because it doesn't get the surface hot and dry enough. Your mug cookie will be soft, tender, and gooey more like the center of a slightly underbaked pan of brownies.
If you want "crunch," you have to add it through toppings like toasted nuts or pretzels.
Keep Your Treat Fresh
Honestly, this cookie is designed to be eaten immediately. It’s at its peak about three minutes after it comes out of the microwave. However, life happens. If you can't finish it, you can cover the mug with plastic wrap and keep it on the counter for about 24 hours.
Just know that the texture will firm up significantly as it cools.
To reheat, just pop it back in the microwave for 10 to 15 seconds. Don't go longer, or you'll turn it into leather. If you have leftover dough (unlikely, but possible!), you can actually freeze the raw dough in the mug. Just thaw it in the fridge before microwaving as usual.
Zero Waste Tip: If you have a few cookies that went a bit too long and got hard, crumble them up! They make an incredible topping for vanilla ice cream or can be folded into a milkshake. Never throw away a "failed" cookie; it's just a different form of sugar and butter that still tastes great.
Making It Look Beautiful
Just because it’s a microwave dessert doesn't mean it can't look like it belongs in a cafe. The presentation is all about the contrast between the dark chocolate and the light dough.
- The Finishing Salt: A tiny sprinkle of flaky sea salt (like Maldon) on top right after cooking makes the cookie look gourmet and balances the sugars.
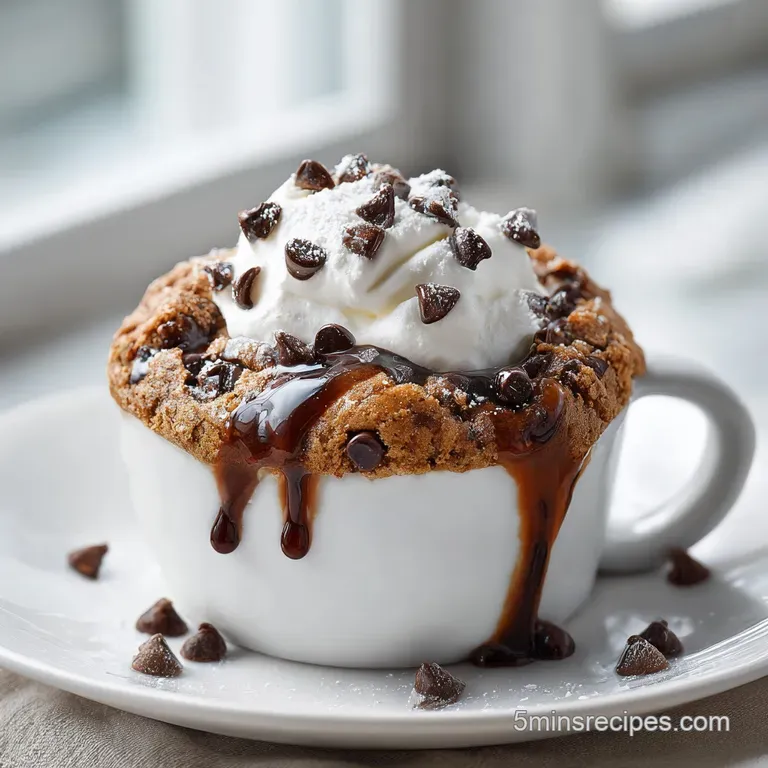
- Ice Cream Melt: Add a small scoop of vanilla bean ice cream while the cookie is still steaming. Watching it melt into the crevices of the cookie is pure food art.
- The Mug Choice: Use a colorful or patterned mug that makes you happy. It sounds silly, but eating a warm cookie out of your favorite mug actually makes the experience feel more like a "treat" and less like a quick fix.
- Whipped Cream Peak: A dollop of fresh whipped cream and a dusting of cocoa powder can hide any "ugly" spots on the surface of the cookie.
The contrast of temperatures is what really does it for me. The "velvety" warmth of the cookie against a cold spoon of cream is heaven. It’s about creating a moment of indulgence in the middle of a busy day.
So, grab your favorite mug, find those chocolate chips hiding in the back of the cupboard, and treat yourself. You’ve earned it.

Recipe FAQs
Is it true I can cook this in any container I have on hand?
No, this is a common misconception. You must use a standard ceramic mug because plastic or thin glass containers do not distribute heat evenly, which often leads to an undercooked, gummy center.
Why is the 2-minute resting time essential?
The cookie continues to cook through residual heat during this window. If you skip this step, the center will remain raw and the overall texture will feel mushy rather than like a baked cookie.
How to troubleshoot a microwave that is more powerful than 1000W?
Reduce your cooking time to 40 seconds and check for doneness. If the center still looks too wet, add another 5-10 seconds, but never exceed the total 60-second limit to avoid a burnt, rubbery result.
How to avoid a tough or chewy cookie texture?
Stop stirring the moment the flour streaks disappear. Over mixing develops excess gluten strands, which turns your tender cookie into a dense, chewy puck. If you enjoyed learning to control texture here, the same flour folding technique applies to our homemade bisquick mix for creating light, fluffy biscuits.
Is it necessary to pack the brown sugar?
Yes, you must pack the brown sugar tightly. Because the sugar needs to melt into the butter to create the base, using loose, dry sugar will prevent the proper consistency and result in a gritty final product.
How to know if the cookie is perfectly cooked?
Look for a center that appears slightly wet or shiny. Since the cookie sets during the two-minute resting period, a center that looks fully dry when you open the microwave door means you have likely overcooked it.
Can I use milk alternatives for this recipe?
No, the recipe is balanced specifically for whole milk. Using other liquids can significantly alter the fat-to-moisture ratio, which prevents the cookie from achieving its signature soft structure.
Microwave Chocolate Chip Mug Cookie
Ingredients:
Instructions:
Nutrition Facts:
| Calories | 461 kcal |
|---|---|
| Protein | 5.3 g |
| Fat | 20.2 g |
| Carbs | 67.3 g |
| Fiber | 3.1 g |
| Sugar | 43.7 g |
| Sodium | 214 mg |
