Simple Moist Chocolate Chip Muffins

- Time: Active 10 minutes, Passive 20 minutes, Total 30 minutes
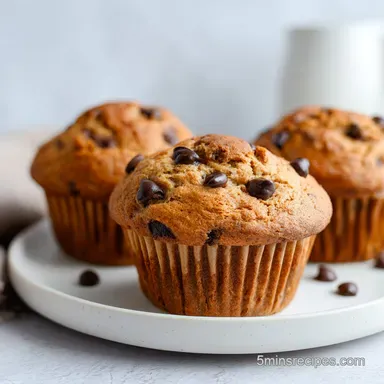
- Flavor/Texture Hook: Golden domed tops with a soft, velvety crumb and melty chocolate pockets.
- Perfect for: Hectic weekday mornings, school lunchboxes, or beginner bakers.
- Quick and Easy Chocolate Chip Muffins
- Why This Recipe Simply Works
- Essential Muffin Baking Specs
- Real Ingredients for Better Baking
- Simple Tools for Fast Cleanup
- Step by Step Baking Guide
- Solving Common Muffin Baking Problems
- Tasty Ways to Customize Flavors
- Storing and Reheating Your Muffins
- What to Serve With Muffins
- Recipe FAQs
- 📝 Recipe Card
Quick and Easy Chocolate Chip Muffins
The kitchen is usually a disaster zone by 7:15 AM at my house. Between hunting for lost shoes and making sure the coffee doesn't go cold, I don't have time for complicated baking. But there is something about that specific aroma of melting semi sweet chocolate and warm vanilla hitting the air that makes the morning rush feel less like a marathon.
I remember the first time I swapped butter for oil in my muffin tin, I was terrified they would taste "cheap," but the result was a total revelation.
These aren't those dry, crumbly hockey pucks you find at the grocery store. We're talking about a muffin that has a soft, almost velvety interior with a top that gets just a little bit of a sugary crust. Since we use oil instead of butter, you don't even need to wait for ingredients to reach room temperature.
You can go from a craving to a warm, gooey bite in exactly 30 minutes, which is basically a superpower for busy parents.
Right then, let's talk about why this specific ratio works so well. We aren't just throwing things in a bowl and hoping for the best. We're using a few clever tricks to make sure every single bite is packed with chips and the texture stays light rather than dense.
Trust me, once you see how fast these come together, you'll never buy the boxed mix again.
Why This Recipe Simply Works
The Secret of the Thermal Blast: Starting with a preheated oven at 375°F (190°C) creates a rapid steam release from the baking powder. This forced expansion pushes the batter upward quickly, creating those high, rounded bakery domes we all love.
Acidity and Tenderness: The inclusion of Greek yogurt does more than add moisture. Its acidity reacts with the baking soda to create extra carbon dioxide bubbles, while the lactic acid breaks down gluten strands for a more tender crumb.
Fat Saturation: Using vegetable oil instead of butter means the fat remains liquid at room temperature. This ensures the muffins feel moist even on day three, whereas butter based muffins can turn firm or dry when they cool.
| Method | Time | Texture | Best For |
|---|---|---|---|
| Fast (Oil Based) | 30 minutes | Velvety and moist | Busy weekday mornings |
| Classic (Butter) | 45 minutes | Rich and cake like | Slow weekend brunch |
| Shortcuts (Mix) | 25 minutes | Spongy/Artificial | Emergency snack only |
The choice between oil and butter really comes down to your schedule. If you want something that tastes like a cozy weekend, butter is great, but for a reliable "grab and go" snack, the oil method wins every single time because of that lasting moisture. It is quite similar to the moisture balance I look for in my Chocolate Chip Banana Bread recipe.
Essential Muffin Baking Specs
| Ingredient | Science Role | Pro Secret |
|---|---|---|
| All Purpose Flour | Provides the structural framework via gluten. | Measure by weight (250g) to avoid heavy, dry muffins. |
| Greek Yogurt | Acts as a tenderizer and moisture lock. | Use full fat for the richest texture and better rise. |
| Baking Powder/Soda | The primary chemical leavening agents. | Check expiration dates; old powder equals flat muffins. |
| Semi Sweet Chips | Adds pockets of fat and sweetness. | Toss in a spoonful of flour to prevent them sinking. |
Using the right flour is key here. Stick to all purpose rather than cake flour. You need that protein content to support the weight of the chocolate chips, otherwise, they will all end up at the bottom of the liner in a sticky mess.
Real Ingredients for Better Baking
- 2 cups (250g) all purpose flour: The base of our structure. Why this? Provides enough protein to hold the heavy chocolate chips in place.
- Substitute: 1:1 gluten-free baking flour (note: texture may be slightly grittier).
- 3/4 cup (150g) granulated sugar: Provides sweetness and helps with browning.
- Substitute: Light brown sugar for a deeper, caramel like flavor.
- 2 tsp baking powder & 1/2 tsp baking soda: Our lift team.
- Substitute: None. You need both for the specific pH balance of the yogurt.
- 1/2 tsp fine sea salt: Sharpens the flavor of the chocolate.
- Substitute: Table salt (use slightly less as it is saltier by volume).
- 1/2 cup (120ml) vegetable oil: Keeps things incredibly moist. Why this? Stays liquid at room temp, ensuring a soft bite days later.
- Substitute: Melted coconut oil (adds a faint tropical scent).
- 1/2 cup (120ml) whole milk: Adds liquid and richness.
- Substitute: Oat milk or almond milk (unsweetened).
- 1/4 cup (60g) Greek yogurt: The secret for a tender crumb.
- Substitute: Sour cream (same fat/acid profile).
- 1 large egg: Binds everything together.
- Substitute: 1/4 cup applesauce (yields a denser, flatter muffin).
- 2 tsp vanilla extract: Rounds out the sweetness.
- Substitute: Almond extract (use only 1/2 tsp as it is strong).
- 1.5 cups (255g) semi sweet chocolate chips: The star of the show.
- Substitute: Dark chocolate chunks for a more grown up flavor.
Chef's Tip: Always save a handful of chocolate chips to press into the tops of the batter right before baking. It makes them look like they came straight from a professional pastry shop!
Simple Tools for Fast Cleanup

- 12 cup muffin tin: Standard size works best for the timing provided.
- Large mixing bowl: You only need one if you whisk the wet ingredients well first.
- Whisk and Silicone Spatula: The whisk breaks up lumps; the spatula is for the "gentle fold."
Don't bother with a stand mixer for this recipe. Over mixing is the enemy of a good muffin, and it's way too easy to go overboard with a machine. A simple hand whisk and a sturdy spatula are all you need to keep the texture light and airy. If you are a fan of low effort baking tools, you will love how little equipment is needed for a 5 Minute Mug recipe too.
step-by-step Baking Guide
- Preheat oven. Set your oven to 375°F (190°C) and line your 12 cup tin with paper liners. Note: A hot oven is crucial for that initial rise.
- Whisk dry ingredients. In your large bowl, combine the 2 cups flour, 3/4 cup sugar, baking powder, soda, and salt.
- Mix wet ingredients. In a separate jug or bowl, whisk the 1/2 cup oil, 1/2 cup milk, 1/4 cup yogurt, egg, and 2 tsp vanilla until completely smooth and pale.
- Create a well. Push the dry ingredients to the sides of the bowl to make a hole in the center.
- Combine. Pour the wet mixture into the well. Note: This prevents you from over working the flour at the edges.
- The gentle fold. Use a spatula to stir until just barely combined with a few streaks of flour remaining.
- Add chocolate. Toss in the 1.5 cups chocolate chips. Stop as soon as they are distributed.
- Fill the tins. Divide the batter evenly, filling each cup about 3/4 of the way full.
- Bake. Slide the tin into the center rack for 20 minutes until the tops are golden and spring back when touched.
- Cool. Let them sit in the tin for 5 minutes before moving to a wire rack. Note: This prevents the bottoms from getting soggy from steam.
Solving Common Muffin Baking Problems
Why My Muffins Are Tough
If your muffins have a rubbery texture or "tunnels" (large air holes) inside, you likely over mixed the batter. When you stir flour and liquid together, gluten starts to develop. For bread, we want lots of gluten. For muffins, we want almost none. Stop stirring the second the white streaks of flour vanish.
The "Sunken Center" Syndrome
Muffins that rise and then collapse usually have too much leavening or an oven that isn't hot enough. If your baking powder is fresh but the centers still dip, try checking your oven temperature with an external thermometer.
Sometimes an oven that claims to be 375°F is actually much cooler, leading to a weak structure that can't hold itself up.
| Problem | Root Cause | Solution |
|---|---|---|
| Chips at the bottom | Batter is too thin or chips are too heavy. | Toss chips in 1 tsp of flour before adding to batter. |
| Dry, crumbly texture | Over baked or too much flour used. | Use a scale for flour and check doneness 2 mins early. |
| Flat, pale tops | Oven temp too low or old baking powder. | Ensure oven is fully preheated to 375°F (190°C). |
Common Mistakes Checklist
- ✓ Never use a whisk once you add the wet ingredients to the dry; switch to a spatula.
- ✓ Don't leave the muffins in the tin for more than 5 minutes after baking (they'll sweat).
- ✓ Avoid low-fat yogurt or skim milk; the fat is necessary for the velvety crumb.
- ✓ Measure your flour by spooning it into the cup and leveling it off, never pack it down.
- ✓ Ensure your egg is at least room temperature if possible for better emulsification.
Tasty Ways to Customize Flavors
2 Flavor Twists
- The Espresso Kick: Add 1 teaspoon of instant espresso powder to the dry ingredients. It doesn't make them taste like coffee; it just makes the chocolate flavor taste much deeper and more intense.
- The Orange Zest: Grate the zest of one large orange into the sugar before mixing. The citrus oils pair beautifully with semi sweet chocolate for a bright, sophisticated vibe.
2 Diet Swaps
- dairy-free Option: Use soy milk and a dairy-free yogurt alternative (like almond or coconut based yogurt). Use vegan chocolate chips to finish it off.
- Whole Grain Boost: Swap 1 cup of the all purpose flour for whole wheat pastry flour. It adds a nutty flavor without making the muffin feel like a lead weight.
If you find yourself with extra chocolate chips after experimenting, they are perfect for making a No Bake Chocolate Truffles recipe.
Storing and Reheating Your Muffins
These muffins will stay fresh in an airtight container at room temperature for up to 3 days. To keep them from getting "sweaty" or sticky on top, place a paper towel in the bottom of the container and another one on top of the muffins. This absorbs any excess moisture that escapes as they sit.
If you want to keep them longer, they freeze beautifully. Wrap each muffin individually in plastic wrap and store in a freezer bag for up to 3 months.
To reheat, I highly recommend using the microwave for about 15 to 20 seconds. This softens the chocolate chips back into a molten state and revives the crumb. If you have the time, 5 minutes in a 300°F (150°C) oven will bring back that slight crust on the top.
For zero waste, if you have a muffin that has gone a bit stale, crumble it over a bowl of vanilla ice cream or use the crumbs as a base for a quick parfait.
What to Serve With Muffins
Honestly, a cold glass of milk or a hot cup of coffee is the classic pairing for a reason. However, if you're serving these as part of a larger brunch, they go incredibly well alongside something salty like crispy bacon or a savory quiche to balance out the sweetness.
If you're hosting a dessert party, these are a great "handheld" option alongside a more formal Chocolate Cream Pie Recipe. The contrast between the fluffy muffin and the silky pie filling is always a hit with guests. I also love serving them with a small bowl of salted butter or even a bit of raspberry jam for those who like a fruity contrast to the rich chocolate.

Recipe FAQs
Can I substitute oil for butter in this recipe?
Yes, absolutely. Substituting oil is key to this recipe's moisture retention, ensuring the muffins stay soft for days. Butter provides flavor, but oil guarantees a permanently tender crumb, similar to the fat balance in our No Bake Energy Bites recipe.
How do I stop the chocolate chips from sinking to the bottom?
Toss the chips in one teaspoon of the measured flour first. This light coating helps the chips adhere to the surrounding batter instead of settling to the bottom during baking. It is a crucial step for even distribution.
Why are my muffin tops domed like a bakery muffin?
This is achieved by a high initial oven temperature. Start your oven at 375°F (190°C) to shock the exterior into rising rapidly before the interior sets. If you enjoy learning about temperature control, mastering this sensory cue is similar to achieving perfect searing in the Peanut Butter Banana recipe.
Is it true that I must use room temperature eggs for proper mixing?
No, this is a common misconception for this oil-based method. Because we are not creaming butter, which requires emulsification, room temperature eggs are not critical. Cold eggs are fine, though slightly warmer eggs mix marginally better with the oil.
How do I ensure the muffins stay moist for three days?
Store them in an airtight container with a paper towel. The paper towel absorbs excess condensation, which is the main cause of sticky or soggy muffin tops. Avoid storing them in the refrigerator, as this dries them out faster.
How much time do I need to mix the wet and dry ingredients separately?
Whisk the wet ingredients until pale and smooth, about 45 seconds. Mix the dry ingredients together for 30 seconds to ensure even distribution of the leavening agents. The goal is minimal mixing once the two are combined.
What can I substitute for Greek yogurt to keep the texture soft?
Use sour cream as a direct substitute for the yogurt. Both offer the necessary acid to react with the baking soda and the high fat content required for a velvety crumb. This replacement yields results nearly identical to our Sweet Breakfast Idea recipe in terms of tenderness.
Moist Chocolate Chip Muffins
Ingredients:
Instructions:
Nutrition Facts:
| Calories | 322 kcal |
|---|---|
| Protein | 4.3 g |
| Fat | 16.1 g |
| Carbs | 41.8 g |
| Fiber | 1.6 g |
| Sugar | 24.2 g |
| Sodium | 184 mg |
