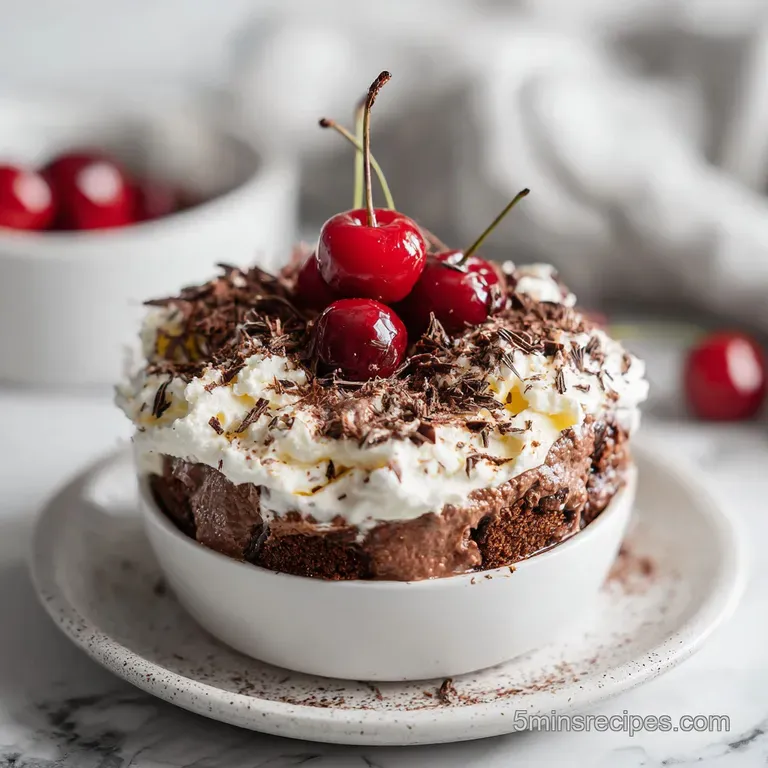
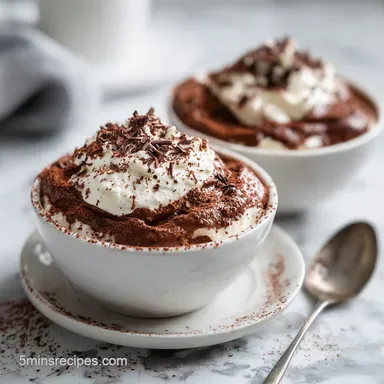
Easy Nobake Chocolate Trifle Recipe
- Time: Active 20 mins, Passive 4 hours, Total 4 hours 20 mins
- Flavor/Texture Hook: Velvety chocolate mousse meets crunchy cookie shatter
- Perfect for: Summer parties, potlucks, and beginner friendly entertaining
- Why This Cold Method Wins
- Essential Success Metrics and Measures
- Selecting the Highest Quality Ingredients
- Tools for a Perfect Texture
- Step-by-Step Construction Guide
- Fixing Common Texture Mistakes
- Flavor Variations and Dietary Adjustments
- Debunking No Bake Dessert Myths
- Proper Storage for Freshness
- Finishing Your Dish with Flair
- Recipe FAQs
- 📝 Recipe Card
Close your eyes and imagine the scent of dark, crushed cocoa hitting a splash of bitter cold brew. That first "crack" of a chocolate sandwich cookie under a rolling pin is one of my favorite kitchen sounds.
I remember making this for a neighborhood block party three summers ago when my kitchen felt like a literal sauna. I couldn't bear to touch a stove, so I pulled out my big glass trifle bowl and started layering.
The magic happens when that slightly bitter coffee soak meets the sweet, creamy pudding. People were scraping the bottom of the bowl with their spoons, trying to get every last bit of the espresso infused whipped cream.
It's the kind of dessert that feels fancy because of the layers, but honestly, it's just about choosing the right components and letting them hang out in the fridge. We've all had those desserts that look pretty but taste like nothing but sugar, but this one has actual depth thanks to that tiny pinch of espresso powder.
Trust me, I've made the mistake of using warm coffee before, and it turned my cookie base into a muddy pile of sadness. We want texture. We want that specific "snap" followed by a melt in-your mouth creaminess.
This is the recipe I send to my friends who say they "can't bake" because, well, you aren't actually baking anything. It’s more like edible architecture, and it's brilliant.
Why This Cold Method Wins
The success of this no bake wonder isn't just luck, it's about managing moisture and fat. We are building a structure that needs to hold its own weight without the help of eggs or flour.
- Starch Hydration: Instant pudding uses pre gelatinized starch that thickens immediately upon contact with cold milk, providing the "bones" for our layers.
- Fat Aeration: High fat heavy cream traps air bubbles during whipping, creating a stable foam that lightens the dense chocolate pudding.
- Capillary Action: The cookies act like sponges, pulling just enough cold brew into their pores to soften without losing their structural integrity.
- Flavor Synergy: The espresso powder doesn't make it taste like coffee, rather it blocks the tongue's ability to perceive excessive sweetness while highlighting the cocoa's fruitiness.
| Texture Target | Chill Time | Moisture Level | Visual Cue |
|---|---|---|---|
| Crunchy & Firm | 1 hours | Low | Cookies still distinct and hard |
| Perfect Mousse | 4 hours | Balanced | Layers hold sharp edges when scooped |
| Soft Cake like | 12 hours | High | Cookies feel like soft sponge cake |
The chill time is non negotiable if you want those clean, beautiful layers that look so good in a glass bowl. If you try to serve it too early, the pudding hasn't fully set, and the cookies won't have that perfect bite. I usually aim for the four hour mark because I love a little bit of "shatter" in my cookie layers.
Essential Success Metrics and Measures
When we look at the components of a chocolate trifle, we have to balance the weight of the pudding with the lightness of the cream. If your pudding is too thin, it will crush the air out of the whipped layers below it.
This is why we use whole milk; the extra fat provides a sturdiness that 2% or skim milk just can't match.
| Component | Science Role | Pro Secret |
|---|---|---|
| Cold Whole Milk | Protein structure | Use ice cold milk to speed up the starch setting process. |
| Heavy Whipping Cream | Air suspension | Keep the bowl and whisk cold to ensure the fat stays solid while trapping air. |
| Powdered Sugar | Texture stabilizer | Contains cornstarch which helps prevent the whipped cream from weeping over time. |
| Espresso Powder | Flavor enhancer | Dissolve it into the cream to avoid dark "freckles" in your white layers. |
Keeping everything cold is the golden rule for any no bake sweet treat. If your kitchen is particularly warm, I even suggest putting your glass trifle bowl in the fridge for ten minutes before you start assembling.
It helps the pudding set against the glass immediately, which prevents those messy drips from ruining your clean lines.
Selecting the Highest Quality Ingredients
You don't need a massive grocery list for this, but the quality of your chocolate and coffee makes a massive difference. Since we aren't cooking out any flavors, everything you put in is exactly what you’ll taste in the final bite.
- 18 oz (510g) Chocolate Sandwich Cookies: I prefer the classic Oreo style for the best crunch. Why this? The cream filling adds extra stability to the cookie layers.
- 1/4 cup (60ml) Cold Brew Coffee: Use a smooth, low acid concentrate. Why this? Provides moisture without the acidity of hot brewed coffee.
- 2 packages (3.9 oz each) Instant Chocolate Pudding Mix: Make sure it says "Instant" and not "Cook and Serve."
- 3 cups (710ml) Cold Whole Milk: Full fat is essential for a velvety mouthfeel.
- 1 tsp Pure Vanilla Extract: Adds a floral note that balances the dark cocoa.
- 2 cups (475ml) Heavy Whipping Cream: Look for at least 36% milk fat.
- 1/2 cup (60g) Powdered Sugar: Also known as confectioners' sugar.
- 1 tsp Espresso Powder: This is a fine powder, not instant coffee granules.
- 1/2 cup (85g) Semi sweet Chocolate Shavings: high-quality bars shaved with a peeler look best.
If you’re a fan of rich textures and want to try another classic, you might also love my No Bake Chocolate Truffles recipe. Both recipes rely on that same principle of high-quality chocolate and chilling time to do the hard work for you.
| Original Ingredient | Substitute | Why It Works |
|---|---|---|
| Cold Brew Coffee | Decaf Coffee | Same moisture and flavor profile without the caffeine kick. |
| Whole Milk | Coconut Milk (Full Fat) | Similar fat content. Note: Adds a subtle tropical flavor to the chocolate. |
| Heavy Cream | Pre made Whipped Topping | Stabilized vegetable fats. Note: Much sweeter and lacks the fresh dairy flavor. |
Tools for a Perfect Texture
You don't need an oven, but a few specific tools will make your life much easier. A large glass trifle bowl is the standard for presentation, but if you don't have one, any large straight sided glass bowl will work. The goal is to see those gorgeous layers from the side.
Chef's Tip: Use a long handled spoon or a piping bag to add the layers. This prevents the pudding from smearing down the sides of the glass, keeping your layers crisp and professional looking.
I also highly recommend a stand mixer or a powerful hand mixer. Whipping two cups of heavy cream by hand is a workout you probably don't want. A silicone spatula is also your best friend here for folding the espresso powder and vanilla into the cream without deflating all those lovely air bubbles you just worked so hard to create.
step-by-step Construction Guide

- Prep the cookies. Place 18 oz of chocolate sandwich cookies into a large zip top bag and crush them with a rolling pin until you have a mix of fine crumbs and pea sized chunks. Note: This variety in size creates a better texture.
- Hydrate the base. Place half of the crushed cookies into the bottom of your trifle bowl and drizzle with 2 tablespoons of the cold brew coffee.
- Mix the pudding. In a large bowl, whisk together 2 packages of instant chocolate pudding mix and 3 cups of cold whole milk until the mixture starts to thicken and resists the whisk.
- Flavor the pudding. Stir in 1 teaspoon of pure vanilla extract and let the pudding sit for 5 minutes to fully firm up.
- Whip the cream. In a separate chilled bowl, beat 2 cups of heavy whipping cream, 1/2 cup of powdered sugar, and 1 teaspoon of espresso powder until stiff peaks form that don't slouch when the beaters are lifted.
- Start the layering. Spread half of the chocolate pudding over the cookie base, using a spatula to push it all the way to the edges of the bowl.
- Add the cream. Gently layer half of the whipped cream over the pudding. Be careful not to press down or you will mix the two layers.
- Repeat the process. Add the remaining cookies (save a handful for the top!), drizzle with the remaining 2 tablespoons of cold brew, then add the rest of the pudding.
- Finish the top. Top with the remaining whipped cream and sprinkle with 1/2 cup of semi sweet chocolate shavings and the reserved cookie crumbs.
- Chill to set. Refrigerate for at least 4 hours until the cookies have softened slightly and the flavors have melded.
The aroma at step five is incredible the espresso powder hits the cold cream and smells like a high end mocha latte. When you're layering, look for the "sizzle" or crackle of the cookies absorbing the liquid; it’s a tiny sound, but it means the magic is happening! For something even more decadent and structurally interesting, check out the Dubai Chocolate Bar recipe which also plays with incredible textures.
Fixing Common Texture Mistakes
Sometimes things don't go exactly as planned, especially with dairy. The most common issue I hear about is the pudding staying too runny.
Fixing Runny Pudding Base
If your pudding hasn't set after ten minutes of whisking and resting, it usually means the milk wasn't cold enough or the ratio was slightly off. You can try whisking in an extra tablespoon of the pudding mix if you have another box, or simply chill it in the fridge for 30 minutes before trying to layer it.
Never try to layer runny pudding; it will just sink through the cookies and make a mess.
Softening Over Whipped Cream
We've all been there you turn your back for ten seconds and your smooth whipped cream starts looking grainy like butter. If this happens, don't panic. Gently fold in a tablespoon or two of liquid heavy cream with a spatula.
This will often "smooth out" the over worked fat globules and return the cream to a velvety state.
| Problem | Root Cause | Solution |
|---|---|---|
| Soggy/Mushy Base | Too much coffee drizzle | Stick to the 1/4 cup total; don't soak them until they're swimming. |
| Weeping Cream | Using granulated sugar | Switch to powdered sugar; the cornstarch acts as a stabilizer. |
| Grey Pudding | Using metallic bowl | Use glass or plastic; some pudding mixes react with certain metals. |
✓ Always use cold bowls and beaters for the whipped cream to ensure maximum volume. ✓ Don't skip the 5 minute rest for the pudding; it needs time for the starches to fully expand. ✓ Sift your powdered sugar if it looks lumpy to avoid white spots in your cream.
✓ Use a gentle hand when folding in the espresso powder to keep the cream airy. ✓ Wipe the inside rim of your trifle bowl with a damp paper towel after each layer for a clean look.
Flavor Variations and Dietary Adjustments
This recipe is incredibly flexible. If you want to change the vibe, you can swap out the chocolate sandwich cookies for peanut butter ones or even ginger snaps for a spicy kick.
Adjusting for Your Party Size
If you're making this for a smaller group, you can easily halve the recipe. Use a smaller glass bowl or even individual mason jars for a "grab and-go" dessert. If you go the individual route, reduce the chill time to 2 hours since the smaller volume sets much faster.
If you are scaling up for a wedding or a massive reunion, I recommend doubling the recipe but making it in two separate trifle bowls. This keeps the weight of the ingredients from crushing the bottom layers too much. For the spices and espresso, only increase them by 1.5x to avoid an overpowering bitterness.
Choosing the Best Cookie Base
| Cookie Type | Flavor Profile | Texture Impact |
|---|---|---|
| Classic Sandwich | Deep Cocoa | Traditional crunch and creamy middle |
| Golden Sandwich | Vanilla/Butter | Sweeter, softer, less intense |
| Thin Mint Style | Peppermint | Crisp and refreshing, very firm |
If you love the combination of fruit and chocolate, you could even add a layer of fresh raspberries between the pudding and the cream. The tartness of the berries cuts through the richness of the chocolate perfectly. For another fruit forward simple treat, my Peanut Butter Banana recipe is a fantastic companion to these heavier chocolate desserts.
Debunking No Bake Dessert Myths
One of the biggest misconceptions is that you can't over mix instant pudding. While it’s more forgiving than flour based batters, beating it too aggressively for too long can actually break the starch bonds you're trying to build, resulting in a thin, watery mess.
Just whisk until it’s combined and let the cold temperature do the heavy lifting.
Another myth is that "heavy cream" and "whipping cream" are interchangeable. In a trifle, you really need the higher fat content of Heavy Whipping Cream (usually 36%+) to support the weight of the pudding layers.
Regular whipping cream (around 30-35%) is lighter and might collapse under the pressure, leading to a puddle at the bottom of your bowl by the next morning.
Proper Storage for Freshness
This trifle is actually better the day after you make it. The cookies have a chance to soften into a cake like texture, and the espresso flavor permeates the cream.
Fridge Storage: Keep the trifle covered with plastic wrap in the refrigerator for up to 3 days. After that, the cookies will become too mushy and the cream may start to lose its volume.
Zero Waste Tip: If you have leftover crushed cookies or chocolate shavings, don't toss them! They are perfect for topping morning oatmeal or stirring into a bowl of yogurt.
If you have a small amount of leftover pudding and cream, fold them together to make a "mousse" and freeze it in an airtight container for a quick frozen treat later in the week.
Finishing Your Dish with Flair
Presentation is half the fun with an easy NoBake chocolate trifle recipe. To get those perfect, clean lines, I like to use the "outside in" method. Spoon your pudding around the edge of the glass first, then fill in the center. This ensures the layer looks perfect from the outside, even if the middle is a bit uneven.
For the garnish, don't just dump the chocolate shavings in the middle. Start at the edges and work your way in, leaving a small circle of white cream visible in the very center. It gives the dish a professional, symmetrical look.
If you’re feeling extra, a few sprigs of fresh mint add a beautiful pop of green that makes the dark chocolate colors really stand out. Just remember to keep it chilled until the very moment you're ready to serve this dessert is at its absolute best when it's ice cold and refreshing.

Recipe FAQs
What are the 4 ingredients in trifle?
The four essential components are sponge/cookie, custard/pudding, fruit (or chocolate in this case), and cream. For this specific no-bake version, we substitute the sponge with chocolate cookies, use instant chocolate pudding for the custard, and whipped cream for the topping.
How to make an easy chocolate trifle?
Crush cookies, mix instant pudding, whip heavy cream, and layer them in a glass bowl. Ensure you drizzle the crushed cookies lightly with cold brew coffee to soften them before layering with the pudding and whipped cream.
Is it better to make a trifle the day before or day of?
Yes, making it the day before is recommended for best results. Chilling for at least four hours allows the cookies to absorb moisture and soften slightly, marrying the chocolate and cream flavors beautifully.
What are the three layers of a trifle?
The classic structure involves a base layer of soaked sponge cake, a middle layer of custard or pudding, and a top layer of whipped cream. In this easy recipe, the layers are crushed cookies, chocolate pudding, and espresso flavored whipped cream.
Can I use regular milk instead of whole milk for the pudding?
No, stick with whole milk for richness and structure. Lower fat milk does not contain enough fat to create the firm, velvety texture needed to support the heavy whipped cream layer above it.
Is it true I must use instant pudding mix instead of cook and-serve?
Yes, you must use instant pudding for this no-bake recipe. Instant pudding uses pre-gelatinized starch that sets quickly when cold, whereas cook and-serve requires heat activation and will not set properly when simply refrigerated.
What is the secret to keeping the whipped cream layer stable?
Use cold ingredients and incorporate powdered sugar for stability. Powdered sugar contains cornstarch, which acts as a stabilizer, preventing the whipped cream from deflating or weeping into the pudding layer.
Nobake Chocolate Trifle
Ingredients:
Instructions:
Nutrition Facts:
| Calories | 495 calories |
|---|---|
| Protein | 4.8 g |
| Fat | 27.1 g |
| Carbs | 59.5 g |
| Fiber | 1.2 g |
| Sugar | 40.4 g |
| Sodium | 570 mg |
