Quick Pickled Radishes
- Time: Active 10 minutes, Passive 5 minutes, Total 15 minutes
- Flavor/Texture Hook: Electric zing with a shattering crispness
- Perfect for: Fusion tacos, snack boards, or brightening up a heavy weeknight bowl
- Master the Bold Zest of Quick Pickled Radishes
- The Physics of the Crunch
- Component Analysis
- Specs and Data for Your Kitchen Success
- The Essential Elements for Your Perfect Brine
- Tools You Need for That Shattering Crunch
- The Step-by-Step Path to Neon Pink Perfection
- Fixing Your Pickles When Things Go Sideways
- Adjusting for a Crowd or a Solo Snack
- Debunking Kitchen Folklore
- Keep Your Pickles Crisp and Vibrant Longer
- Creative Ways to Stack These on Snacks
- Recipe FAQs
- 📝 Recipe Card
Master the Bold Zest of Quick Pickled Radishes
The sound of a mandoline slicer rhythmically dropping paper thin radish rounds into a glass bowl is one of my favorite kitchen beats. It’s like a promise of the crunch to come.
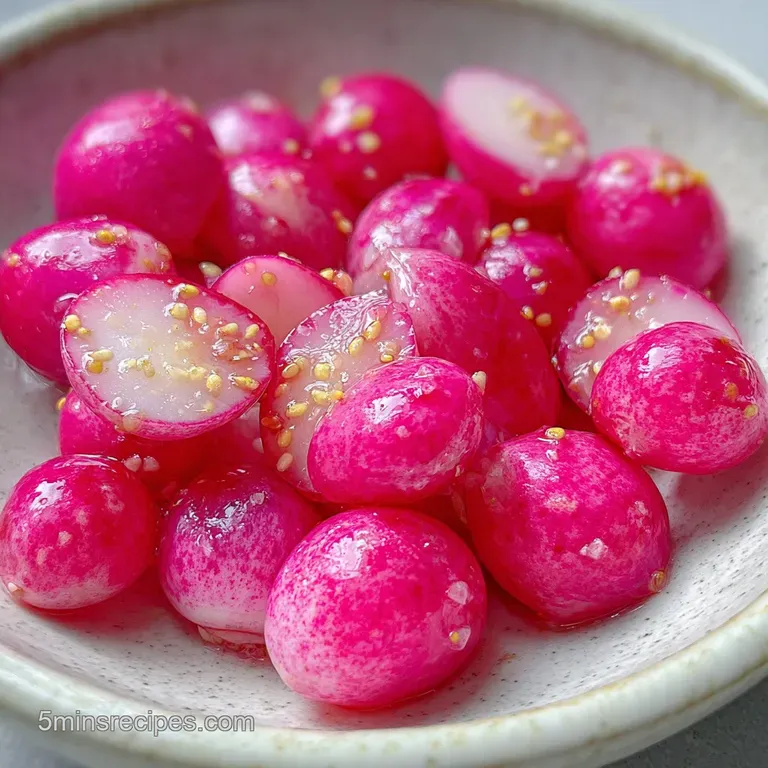
I remember the first time I tried a fusion taco at a street market - it was loaded with heavy brisket and creamy slaw, but the real hero was the bright, neon pink radish slice sitting right on top.
It didn't just sit there, it shattered like glass when I bit into it, releasing a burst of acidity that wiped the palate clean for the next bite.
That’s the magic we're chasing today. It isn't just a side dish, it's a bold snack that transforms a boring sandwich into something you'd pay twenty bucks for at a bistro. Most people think pickling is a weekend long project involving giant pots of boiling water and sterilization rituals, but honestly, we're going to knock this out in the time it takes for your coffee to brew.
We’ve all had those soggy, limp pickles that taste like nothing but salt. Trust me, we are avoiding that trap. By the time you finish this, you’ll have a jar of Quick Pickled Radishes that looks like a sunset and tastes like a lightning bolt.
Let's get into the mechanics of how we make that happen without breaking a sweat.
The Physics of the Crunch
Osmotic Draw: The salt in our brine works by pulling the excess water out of the radish cells, which might sound like it would make them limp, but it actually tightens the fiber structure. This creates that signature snap that feels like it might actually shatter in your mouth.
Acidic Fixation: Apple cider vinegar lowers the pH level instantly, which prevents the natural enzymes from softening the vegetable. This chemical "freeze" ensures your slices stay vibrant and firm instead of turning into mushy rounds after a day in the fridge.
| Method | Prep Time | Final Texture | Shelf Life |
|---|---|---|---|
| Hot Brine | 15 minutes | Slightly softened/tender | 2-3 weeks |
| Cold Brine | 10 minutes | Maximum shattering crunch | 1 week |
| Shortcut | 5 minutes | Raw bite with light tang | 2 days |
Choosing the right method depends on how much time you have. If you want that deep, translucent pink color to develop fast, the hot brine method in this recipe is your best friend. It forces the red pigment from the skin into the white flesh almost instantly.
Component Analysis
| Ingredient | Science Role | Pro Secret |
|---|---|---|
| Apple Cider Vinegar | Lowers pH for preservation | Use high-quality ACV for a fruity, complex undertone. |
| Cane Sugar | Balances acetic acid | Helps the brine "stick" to the radish surface. |
| Red Radishes | Provides cellular structure | Slice them against the grain for the loudest crunch. |
Specs and Data for Your Kitchen Success
To get these results, you don't need a lab, but you do need to respect the ratios. If you love the vibe of these, you might also find the technique similar to what I use for my Marinated Cucumbers in recipe. Both rely on that perfect balance of acid and sugar to keep the veggies from going dull.
- Yield: 16 servings (roughly 1 pint jar)
- Active Effort: 10 minutes
- Heat Time: 5 minutes
- Total Wait: 15 minutes
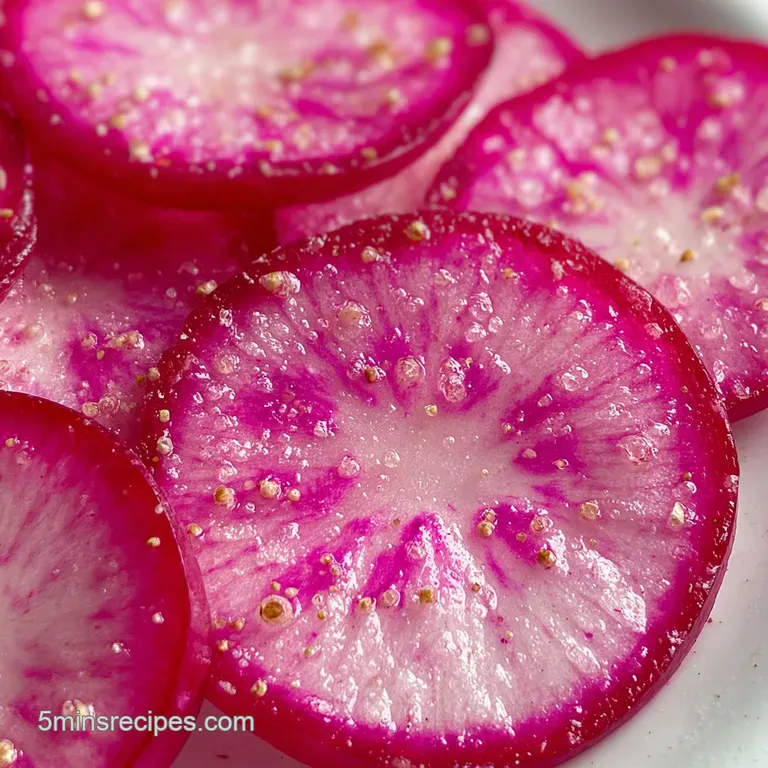
When we talk about the crunch factor, thickness is everything. If you slice them too thick, they won't absorb the brine in the center. If they're too thin, they lose their structural integrity.
We are aiming for that 1/16th inch sweet spot where they become translucent but still hold their shape when lifted with a fork.
The Essential Elements for Your Perfect Brine
Here is what you need to pull from your pantry. Don't skip the garlic - it becomes velvety and mellow after a few days in the liquid.
- 0.5 lb red radishes: Trimmed and sliced 1/16th inch thick. Why this? Red skin provides the natural pink dye for the brine.
- 0.5 cup apple cider vinegar: Your primary acid source. (Substitute: White wine vinegar for a sharper bite).
- 0.5 cup water: To dilute the acidity. (Substitute: Unfiltered apple juice for a sweeter, autumn vibe).
- 1.5 tsp sea salt: For flavor and osmotic pressure. Why this? Dissolves faster than kosher salt in quick brines.
- 1 tbsp cane sugar: To cut the sharpness. (Substitute: Honey, but dissolve it well in the hot water).
- 2 cloves garlic: Smashed to release oils. Why this? Adds an umami backbone to the bright vinegar.
- 0.5 tsp black peppercorns: For a subtle, woody heat.
Chef's Tip: If you want a really unique glow, add a tiny pinch of ground turmeric to the brine. It won't change the flavor much, but it turns the radishes a stunning neon coral that pops on any plate.
Tools You Need for That Shattering Crunch
You don't need a professional kitchen, but a mandoline is a total game changer here. It ensures every single slice is identical, which means they all pickle at the exact same rate. If you're using a knife, make sure it's your sharpest one so you don't bruise the radish cells while cutting.
You'll also need a small saucepan to bring the brine to a simmer. A glass mason jar (16 oz size) is the best vessel for storage because it won't react with the vinegar. Avoid plastic containers if you can, as they can sometimes absorb the pungent radish smell and never let it go.
The step-by-step Path to Neon Pink Perfection
- Prep the produce. Scrub the 0.5 lb radishes thoroughly under cold water to remove any grit from the skin.
- Slice with precision. Use a mandoline or a very sharp knife to slice the radishes into 1/16th inch rounds. Note: Watch your fingers! Use a guard if you have one.
- Pack the jar. Stuff the sliced radishes into a clean glass jar along with the 2 smashed garlic cloves and 0.5 tsp peppercorns.
- Simmer the liquid. In a small saucepan, combine the 0.5 cup ACV, 0.5 cup water, 1.5 tsp sea salt, and 1 tbsp cane sugar.
- Dissolve the solids. Heat over medium until the liquid begins to sizzle and steam and the sugar/salt have completely vanished.
- Infuse the jar. Pour the hot brine over the radishes, ensuring they are completely submerged. Note: Use a spoon to press them down if they float.
- Release air bubbles. Gently tap the jar on the counter to allow any trapped air to rise to the surface.
- Cool it down. Let the jar sit open on the counter for 10 minutes until the glass is cool to the touch.
- Seal and chill. Put the lid on and move it to the fridge. They are ready to eat immediately, but the color peaks after 24 hours.
Fixing Your Pickles When Things Go Sideways
Why Your Radishes Are Soft
If your radishes feel limp instead of snappy, it's usually because the brine was too hot or they sat in the hot liquid for too long before being refrigerated. To prevent this, never let the brine reach a rolling boil - just a gentle simmer is enough to dissolve the sugar.
| Problem | Root Cause | Solution |
|---|---|---|
| Bitter Taste | Radishes were old/woody | Add an extra teaspoon of sugar to the brine. |
| Faded Color | Used white vinegar only | Keep the skins on; they provide the pink pigment. |
| Cloudy Brine | Impurities in salt | Use sea salt or pickling salt; avoid table salt with additives. |
Common Mistakes Checklist
- ✓ Don't skip the "cooling" step - putting a hot jar directly in a freezing fridge can crack the glass.
- ✓ Ensure the radishes stay submerged; any slice poking out of the brine will oxidize and turn brown.
- ✓ Use fresh garlic - sprouted garlic can turn blue or green in the acidic brine (it's safe, just ugly!).
- ✓ Slice as thin as possible - thick chunks will take days to flavor through.
Adjusting for a Crowd or a Solo Snack
If you're scaling this recipe up for a big summer BBQ, remember that you don't need to double the spices linearly. For a 2x batch (1 lb of radishes), increase the salt and sugar to 1.5x the original amount to avoid over seasoning. The liquid, however, should be doubled to ensure everything is covered.
When scaling down for a single taco night, you can actually skip the saucepan entirely. Just whisk the salt and sugar into the room temperature vinegar and water until dissolved. It takes a bit more elbow grease, but it saves a dish and keeps the radishes even crunchier.
| Original Ingredient | Substitute | Why It Works |
|---|---|---|
| Apple Cider Vinegar | Rice Vinegar | Adds a mellow, Asian fusion sweetness. |
| Cane Sugar | Maple Syrup | Adds a rich, earthy depth. Note: Brine will be darker. |
| Sea Salt | Kosher Salt | Same clean flavor. Use 2 tsp if the flakes are very large. |
If you're looking for a different kind of fast topping, my Quick Marinara Sauce in recipe uses a similar "fast heat" method to maximize flavor in minimal time.
Debunking Kitchen Folklore
One common myth is that you need to "sweat" radishes with salt before pickling them. While this works for watery cucumbers, it actually ruins the internal pressure of a radish. You want that water inside the cells when the acid hits them to lock in the crispiness.
Another misconception is that the brine must be boiling when it hits the jar. If you use boiling water, you're essentially cooking the radish. A warm simmer (around 190°F) is plenty to kickstart the color transfer without destroying the vegetable's integrity.
Keep Your Pickles Crisp and Vibrant Longer
Storage: These stay good in the fridge for up to 2 weeks. After that, they don't necessarily go "bad," but they do start to lose that shattering crunch and become a bit more translucent.
Always use a clean fork to fish them out - introducing bacteria from your fingers is the fastest way to spoil the jar.
Zero Waste: Never throw away that leftover pink brine! It is essentially a pre seasoned vinaigrette. Whisk it with some olive oil and a dab of Dijon mustard for the best salad dressing you've ever had.
You can also toss some sliced red onions or even hard boiled eggs into the leftover liquid to keep the pickling party going.
Creative Ways to Stack These on Snacks
These are the ultimate "fusion" ingredient. Throw them onto a Korean style bowl with bulgogi and rice, or use them as a "Quick Pickled Radishes for tacos" topping. The sharpness is the perfect foil for something rich like my Breakfast Sausage Patties recipe.
- If you want a Mexican vibe
- Add a sliced jalapeño and a pinch of dried oregano to the jar.
- If you want an Asian fusion snack
- Swap ACV for rice vinegar and add a few slices of fresh ginger.
- If you want a party appetizer
- Serve them alongside a heavy cheese board to cut through the creaminess of bries and blue cheeses.
Honestly, sometimes I just eat them straight out of the jar when I need a salty, zingy hit in the middle of the afternoon. They are way more satisfying than a bag of chips and a lot prettier to look at in the fridge.
Trust me, once you start keeping a jar of these on hand, a plain sandwich will never feel "enough" again.

Recipe FAQs
How do you pickle radishes quickly?
Make a quick hot brine and pour it over thinly sliced radishes. Simmer apple cider vinegar, water, salt, and sugar until dissolved, then pour over radishes packed with garlic and peppercorns. Let cool for 10 minutes before sealing and chilling.
How to make pickles in 10 minutes?
Focus on thin slicing and a hot, fast brine. The active prep for quick pickled radishes, including slicing and making the brine, is about 10 minutes. They are ready to eat after a short cooling period and chilling.
How do chefs pickle things quickly?
Chefs use rapid pickling techniques focusing on thin cuts and fast acting brines. This often involves a hot liquid that penetrates the food quickly, like the method for these radishes, to achieve flavor and texture in under an hour. If you enjoyed mastering this quick technique, see how the same principle of fast flavor infusion works in our Quick Tuna Salad in 10 Minutes.
What are the common mistakes when pickling radishes?
Common mistakes include slicing too thick, using a boiling brine, or not keeping radishes submerged. Thick slices prevent brine penetration, boiling can overcook them, and exposed radishes will oxidize and turn brown.
Why are my quick pickled radishes soft?
They might be too soft if the brine was too hot or they sat in it too long before chilling. Aim for a simmer, not a rolling boil, and ensure they are refrigerated promptly after cooling to preserve crunch.
Can I make quick pickled radishes without vinegar?
No, vinegar is essential for pickling. The acetic acid in vinegar is what preserves the radishes and gives them their characteristic tangy flavor. You could experiment with different vinegars, like rice vinegar for a milder taste, similar to our Fast Starch Bond recipe which uses quick methods.
How long do quick pickled radishes last?
They typically last up to 2 weeks in the refrigerator. While still edible after that, their signature crisp texture will diminish over time.
Quick Pickled Radishes

Ingredients:
Instructions:
Nutrition Facts:
| Calories | 7 kcal |
|---|---|
| Protein | 0.1 g |
| Fat | 0.1 g |
| Carbs | 1.4 g |
| Fiber | 0.2 g |
| Sugar | 1.1 g |
| Sodium | 216 mg |
