5 Ingredient Peanut Butter Granola Bar
- Time: Active 10 minutes, Passive 120 minutes, Total 130 minutes
- Flavor/Texture Hook: Chewy, salty sweet, and velvety
- Perfect for: Post workout fuel or a bold mid day snack
- The Secret Behind the Perfect Texture
- Vital 5 Ingredient Peanut Butter Granola Bar Stats
- Analyzing Every Single Component
- Tools for the Best Snack
- Following the Foolproof Method
- Fixing Common Snack Bar Disasters
- Swapping Ingredients Like a Pro
- Debunking Common Kitchen Myths
- Keeping Your Bars Fresh
- Bold Ways to Serve These
- Recipe FAQs
- 📝 Recipe Card
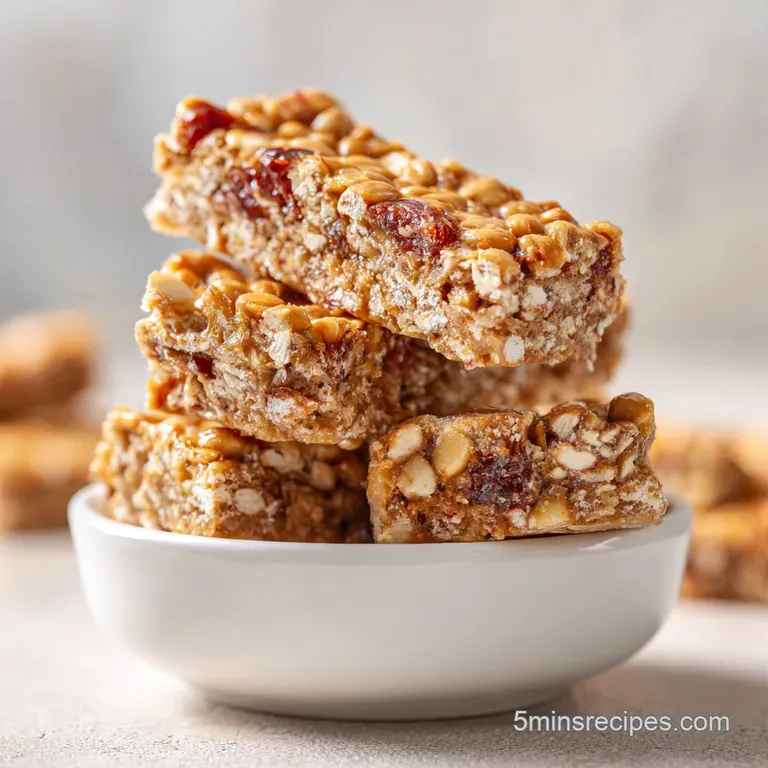
Imagine the heavy, golden scent of raw honey hitting a warm pan, swirling into a pool of creamy peanut butter until it looks like molten silk. That first bite gives you the satisfying shatter of dark chocolate chips against the hearty chew of rolled oats.
Discover the simple joy of our featured 5 Ingredient Peanut Butter Granola Bar with Honey. It’s a total game changer for anyone tired of those dusty, store-bought bars that crumble into a million pieces the moment you open the wrapper.
I remember my first attempt at a homemade snack bar. I didn't heat the binder enough, and I ended up with a bowl of loose, sticky oats that I had to eat with a spoon like some kind of sad, deconstructed cereal. It was messy, frustrating, and honestly, a bit of a disaster.
But that failure taught me the most important lesson in the kitchen: temperature and pressure are your best friends. Now, these bars are a staple in my pantry because they actually hold their shape.
We're going for a bold, thick bar here. No flimsy snacks allowed in this kitchen. We want something that feels substantial when you hold it and doesn't dissolve into a pile of crumbs. By the time we're done, you'll have a batch of bars that look like they came from a high end cafe but cost about a quarter of the price.
Let’s get into why this specific method works so well.
The Secret Behind the Perfect Texture
- Emulsification Power: Heating the peanut butter and honey together creates a temporary emulsion. This liquid "glue" coats every single oat flake evenly, ensuring there are no dry spots that could cause the bar to break.
- Starch Hydration: Even though we aren't baking these, the warm binder slightly softens the outer layer of the rolled oats. This creates a cohesive bond as they chill and press together.
- Cold Set Crystallization: The honey and fats in the peanut butter firm up significantly at lower temperatures. This "set" is what provides the structural integrity without needing eggs or flour.
- Compression Science: Pressing the mixture firmly into the pan removes air pockets. This physical force is what turns a loose mixture into a solid, sliceable bar.
| Method | Time | Texture | Best For |
|---|---|---|---|
| Stovetop & Chill | 130 minutes | Dense, chewy, velvety | Quick prep and maximum chewiness |
| Oven Baked | 25 minutes | Toasty, crispy, brittle | long term shelf stability and crunch |
Choosing between stovetop and oven really comes down to what you want to eat. If you’re like me and love a bar that’s almost like a fudge granola hybrid, the stovetop method we’re using today is the only way to go. Baking them often dries out the honey and makes the oats a bit too sharp for my liking.
This cold set version keeps everything moist and punchy.
Vital 5 Ingredient Peanut Butter Granola Bar Stats
| Ingredient | Science Role | Pro Secret |
|---|---|---|
| Old Fashioned Oats | Structural foundation | Toast them for 5 mins first for a deeper flavor |
| Natural Peanut Butter | Primary fat and binder | Use the "stir well" kind for the best fat ratio |
| Raw Honey | Adhesive and sweetener | Avoid clover honey; use wildflower for a bolder profile |
Analyzing Every Single Component
- 2 ½ cups (225g) Old Fashioned Rolled Oats: These provide the essential bulk. Why this? They hold their shape better than quick oats, which can turn into mush.
- Substitute: Thick cut rye flakes for a more savory, earthy vibe.
- ½ cup (125g) Natural Creamy Peanut Butter: This provides the fat and savory base. Why this? The natural oils help the bars stay soft even when cold.
- Substitute: Creamy almond butter or cashew butter.
- ½ cup (170g) Raw Honey: The liquid gold that holds it all together. Why this? It has a higher viscosity than maple syrup, making for a firmer bar.
- Substitute: Brown rice syrup (great for a stickier, vegan friendly hold).
- ½ tsp Sea Salt: The flavor amplifier. Why this? It cuts through the sugar and makes the peanut butter taste "nuttier."
- Substitute: Miso paste (use 1 tsp) for an incredible Asian fusion salty kick.
- ½ cup (80g) Dark Chocolate Chips: For that essential bitter sweet contrast. Why this? Dark chocolate doesn't melt as quickly during the mixing phase.
- Substitute: Cacao nibs if you want maximum crunch without the extra sugar.
Chef's Tip: If you're feeling adventurous, add a tiny splash of toasted sesame oil to the peanut butter mixture. It adds a smoky, complex layer that pairs beautifully with the honey.
Tools for the Best Snack
You don't need a high tech kitchen for this, but a few specific tools make the process a lot smoother. First, grab an 8x8 inch square baking pan. This size is non negotiable if you want thick bars; anything larger and they'll end up too thin and prone to snapping. You'll also need parchment paper.
Don't try to just grease the pan - you need those "slings" to lift the whole block out once it's frozen.
A sturdy spatula is your best friend here. I’ve snapped flimsy plastic ones trying to stir thick oat mixtures before. Use a silicone or wooden one that can handle some resistance. Also, find something with a flat bottom, like a heavy glass or a metal measuring cup, to help you press the mixture into the corners. If you love making these kinds of snacks, you might find my Breakfast Bars recipe useful for comparing different binding techniques.
Following the Foolproof Method
- Line an 8x8 inch square baking pan with parchment paper, leaving an overhang on two sides to act as a sling.
- Measure out the 2 ½ cups (225g) rolled oats into a large mixing bowl.
- Combine the ½ cup (125g) creamy peanut butter, ½ cup (170g) raw honey, and ½ tsp sea salt in a small saucepan over low heat.
- Stir the mixture constantly for about 3 minutes until it is fluid and completely smooth. Note: Heating prevents the honey from seizing up too quickly when it hits the oats.
- Pour the warm liquid mixture over the oats immediately while it's still runny.
- Fold the ingredients together with your spatula until every oat is thoroughly coated and glossy.
- Wait about 2 minutes for the mixture to cool slightly, then fold in the ½ cup (80g) dark chocolate chips. Note: If the mixture is too hot, the chips will melt and turn the whole bar brown.
- Transfer the mixture to the prepared pan and press down firmly for at least 30 seconds until the surface is flat and compacted.
- Place the pan in the refrigerator to chill for exactly 120 minutes.
- Lift the bars out using the parchment sling and slice them into 12 even rectangles using a sharp chef's knife.
Fixing Common Snack Bar Disasters
Why Your Granola Bar Falls Apart
This usually happens because of two things: either the binder wasn't hot enough to coat the oats, or you didn't press down hard enough. Think of it like making a snowball. If you don't squeeze it, it's just loose powder. You need to apply real pressure to the top of the mixture before it goes into the fridge.
Why Your Granola Bar Is Too Sticky
If the bars feel like taffy and won't release from the paper, the ratio of liquid to dry ingredients is off. This often happens if you use a very "runny" natural peanut butter without stirring the oil back in first. The excess oil prevents the honey from setting into a firm structure.
| Problem | Root Cause | Solution |
|---|---|---|
| Bars are crumbly | Insufficient compression | Press down with a heavy weight for 1 minute |
| Chocolate melted | Mixture was too hot | Wait until oats feel warm, not hot, to the touch |
| Oats are too tough | Using steel cut oats | Only use Old Fashioned or Quick cook oats |
Common Mistakes Checklist
- ✓ Stir your natural peanut butter thoroughly to incorporate all the oil before measuring.
- ✓ Use raw honey rather than processed "clover" honey for a stickier, firmer set.
- ✓ Don't skip the salt; it's the bridge between the sweet honey and savory nuts.
- ✓ Always use parchment paper slings, or you'll never get the bars out in one piece.
- ✓ Let the bars sit at room temperature for 5 minutes before slicing to prevent cracking.
Swapping Ingredients Like a Pro
If you need to scale this recipe down for a small snack, you can easily halve the ingredients and use a small loaf pan. Just remember that the chilling time stays the same - you still need those 120 minutes for the fats to stabilize. If you're looking for a similar flavor profile but in a much faster format, my 3 ingredient Nutella cookies are a great alternative for a quick fix.
When scaling up for a crowd, don't just double everything blindly. Use 1.5x the salt and spices instead of 2x to avoid over seasoning. For the oats and peanut butter, a direct 2x scale works perfectly fine. Just make sure you have a large enough pot to melt the binder without it boiling over.
- If you want a crunchier bar, add ¼ cup of toasted sunflower seeds or crushed pretzels.
- If you want a protein boost, replace ½ cup of oats with ½ cup of vanilla protein powder.
- If you want it vegan, swap the honey for brown rice syrup (maple syrup is too thin).
Debunking Common Kitchen Myths
One big misconception is that you have to bake oats for them to be "safe" or "tasty." In reality, rolled oats are steamed and pressed during processing, so they are already "cooked." Eating them cold in a bar like this is perfectly fine and actually preserves more of their natural fiber structure.
Another myth is that all peanut butter is created equal. Many people think "No Stir" peanut butter is better for baking or bars. In fact, the added palm oils in no stir versions can make these bars feel greasy on the roof of your mouth.
The natural, "oil on-top" kind provides a much cleaner flavor and a better set once chilled.
Keeping Your Bars Fresh
These bars thrive in the cold. You can keep them in an airtight container in the fridge for up to 10 days. If you leave them on the counter on a hot day, the honey will soften, and they might lose their structural integrity. For long term storage, wrap individual bars in plastic wrap and freeze them for up to 3 months.
They actually taste pretty great straight from the freezer!
Zero waste tip: Don't throw away the crumbs left in the pan after slicing! Those little bits of honey coated oats and chocolate are incredible when sprinkled over morning yogurt or a bowl of vanilla ice cream. I usually keep a small "crumb jar" in the fridge for exactly this purpose.
Bold Ways to Serve These
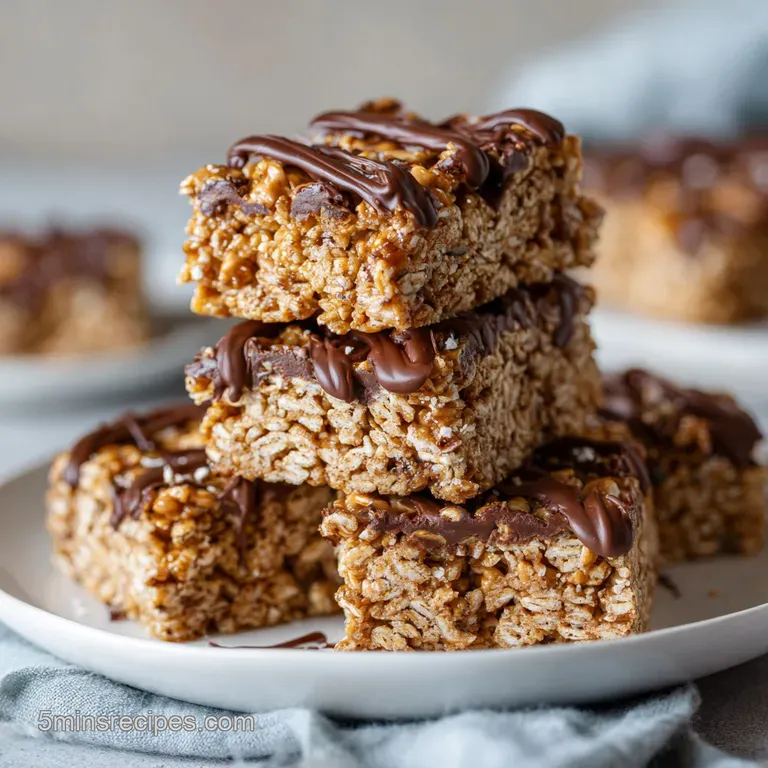
While these are perfect on their own, you can take them to the next level with a few simple tweaks. Try dipping the bottom of each sliced bar into extra melted dark chocolate and letting it set for a "candy bar" finish.
Or, if you're leaning into that Asian fusion vibe I mentioned earlier, sprinkle a few toasted black sesame seeds on top before you press the mixture into the pan.
They also make a fantastic quick breakfast when crumbled into a bowl with a bit of splash of almond milk. The honey and peanut butter slightly dissolve into the milk, creating a rich, flavorful broth for the oats. It's a much more interesting way to start the day than a boring bowl of cereal.
Trust me, once you start making your own 5 Ingredient Peanut Butter Granola Bar, you'll never look at the snack aisle the same way again. Let’s crack on and get some in the fridge!

Recipe FAQs
Can I use natural peanut butter that has separated?
Yes, provided you stir it thoroughly before measuring. The natural oils must be fully emulsified back into the solids to ensure the binder holds the oats together properly.
How to ensure these bars don't fall apart after slicing?
Press the mixture firmly into the pan using the bottom of a measuring cup. This high pressure compaction is essential for creating a dense structure; if you enjoyed mastering this binding technique, you will love applying the same concept to our velvety no-bake energy bites.
Is it true I should bake these bars for a crunchier texture?
No, this is a common misconception. These are designed as a no-bake, chilled bar; adding heat in an oven will melt the chocolate and destroy the chewy, velvety texture intended by the recipe.
How to prevent the chocolate chips from melting when adding them to the oats?
Wait until the peanut butter and honey mixture cools slightly before folding. Adding the chips to the hot mixture will cause them to streak, so let the pan sit off the heat for two minutes first.
Can I speed up the two-hour chilling time?
No, the two-hour window is mandatory for the fats to firm up. Removing them from the refrigerator earlier will result in bars that crumble and lose their shape during the slicing process.
How to store these bars for the best shelf life?
Keep them in the refrigerator inside an airtight container. Because the binder relies on chilled fats to stay solid, they will soften too much if left out at room temperature for extended periods.
How to easily remove the bars from the pan?
Leave an overhang of parchment paper on two sides when lining the pan. This creates a sling that allows you to lift the entire set block out of the pan cleanly before you begin slicing.
5 Ingredient Peanut Butter Granola Bars
Ingredients:
Instructions:
Nutrition Facts:
| Calories | 207 kcal |
|---|---|
| Protein | 5.3 g |
| Fat | 8.3 g |
| Carbs | 30.6 g |
| Fiber | 3.2 g |
| Sugar | 15.4 g |
| Sodium | 98 mg |
