Bisquick Waffle Recipe with Vanilla

- Time: Active 5 minutes, Passive 10 minutes, Total 15 minutes
- Flavor/Texture Hook: Shattering golden crust with a warm cinnamon vanilla crumb
- Perfect for: Hectic school mornings and lazy weekend brunches alike
- Why This Pantry Mix Method Works So Well
- Essential Specifications For A Perfect Morning Breakfast
- Shopping List Items For Your Weekly Grocery Trip
- Minimal Tools You Need For Faster Cleanup
- Mastering The Steps For Perfect Golden Waffles
- Troubleshooting Tips For Every Common Cooking Problem
- Smart Dietary Changes For Every Family Member
- Storage And Freezing Tips For Busy Weekday Mornings
- Serving Ideas To Make Breakfast More Exciting
- Debunking Common Kitchen Myths About Waffle Batters
- Recipe FAQs
- 📝 Recipe Card
Listen, I know the feeling. It is 7:00 AM, the kids are asking where their shoes are, and the thought of measuring out five different types of flour for "artisan" waffles makes me want to go back to bed. That is why I swear by this bisquick waffle recipe. It is the ultimate shortcut that does not taste like a shortcut.
When that first bit of batter hits the hot iron and you hear that loud sizzle, followed by the scent of warm cinnamon wafting through the kitchen, you know it is going to be a good morning.
I used to think that using a box mix meant settling for "okay" waffles. I was wrong. The trick is all in how you treat the wet ingredients and how much air you let stay in the batter. Most people over mix their batter until it is smooth like paint, and then they wonder why their waffles are as tough as a sneaker sole.
We are not going to do that here. We are going to make them light, airy, and perfectly sweet.
This recipe is my go to because it is honest. It uses what you have in the cupboard, it takes almost no time to clean up, and it works every single time. Whether you are fueling up for a long day of errands or just trying to survive a Monday, these waffles have your back.
Let's get into what actually makes this "box" recipe better than most scratch versions I have tried.
Why This Pantry Mix Method Works So Well
The magic of this bisquick waffle recipe lies in the chemistry of the pre mixed base combined with high fat content. Unlike pancakes, waffles need a higher ratio of oil to create that distinct, crispy shell that does not go limp the second it hits the plate.
- Fat Saturation: The 1/3 cup of Wesson Vegetable Oil surrounds the starch molecules, preventing them from bonding too tightly and creating a tender, "short" crumb rather than a bread like texture.
- Starch Gelatinization: When the batter hits the 400°F Cuisinart Waffle Iron, the moisture evaporates instantly, causing the starches to puff and set into a rigid, crispy structure.
- Protein Denaturation: The large egg provides the necessary structure to hold the air bubbles produced by the leavening agents in the mix, ensuring the waffles rise instead of spreading flat.
- Maillard Reaction: The added Granulated Sugar and the proteins in the Whole Milk caramelize against the hot iron plates, giving you that deep mahogany color and nutty flavor profile.
Chef's Tip: Do not reach for the whisk immediately. Use a fork or a rubber spatula to fold the ingredients together. You want small lumps of dry mix to remain, as these create little pockets of steam that make the interior fluffy.
Essential Specifications For A Perfect Morning Breakfast
When you are in a rush, you need numbers that work. I have tested this with various temperatures and times, and these three checkpoints are the "sweet spot" for success. If your iron has a dial from 1 to 5, I always aim for a 4.
| Feature | Target Measurement | Why it Matters |
|---|---|---|
| Iron Temperature | 390°F - 400°F | Ensures a crisp exterior without burning the sugar. |
| Batter Consistency | Thick but pourable | Too thin and it leaks; too thick and it won't fill the grids. |
| Cooking Duration | 3 to 4 minutes | The exact time it takes for the steam to stop escaping. |
Stovetop Pan vs. Electric Waffle Iron
While we are focusing on the waffle iron today, some people try to use this batter in a skillet. It is important to know the trade offs before you start.
| Method | Texture Result | Convenience Level |
|---|---|---|
| Cuisinart Electric Iron | Shattering crust, deep pockets for syrup | Set it and forget it; no flipping required. |
| Lodge Cast Iron Pan | Soft, pancake like, lacks the "crunch" | Requires constant heat management and flipping. |
Shopping List Items For Your Weekly Grocery Trip
You likely have most of these in your pantry right now. I always keep a big yellow box of Bisquick on hand for emergencies. It is one of those versatile staples that saves me at least twice a week.
- Bisquick™ Original Pancake & Baking Mix: 2 cups. This is our foundation. Why this? It contains pre measured leavening and shortening for a consistent rise.
- Whole Milk: 1 ⅓ cups. Do not use skim if you can avoid it. Why this? The fat in whole milk provides a richer mouthfeel and better browning.
- Large Egg: 1 unit. Room temperature is best. Why this? It acts as the "glue" and helps the waffle hold its shape.
- Wesson Vegetable Oil: ⅓ cup. Any neutral oil works. Why this? High fat content is the secret to a waffle that actually crunches.
- McCormick Pure Vanilla Extract: 1 tsp. This is non negotiable for flavor. Why this? It masks the "box" flavor and adds a floral sweetness.
- Granulated Sugar: 1 tbsp. Just a touch. Why this? Sugar aids in the caramelization process for a darker golden color.
- Ground Cinnamon: ½ tsp. A little goes a long way. Why this? Adds warmth and pairs perfectly with maple syrup.
| Original Ingredient | Substitute | Why It Works |
|---|---|---|
| Whole Milk | Buttermilk | Adds a tangy zip. Note: Batter will be thicker; use 2 extra tbsp. |
| Vegetable Oil | Melted Salted Butter | Adds incredible flavor. Note: Waffles may be slightly less crispy. |
| Granulated Sugar | Light Brown Sugar | Adds a hint of molasses flavor and moisture. |
Minimal Tools You Need For Faster Cleanup
I am a big fan of the "one bowl" method. If I have to wash more than three things after breakfast, I am not doing it. You don't need a fancy stand mixer for this. In fact, using one would probably ruin the texture by over developing the gluten.
- Pyrex Glass Mixing Bowl: A medium size is perfect. Glass is great because you can see if there are any pockets of dry flour hiding at the bottom.
- Cuisinart Round Classic Waffle Iron: This is a workhorse. It heats evenly and the non stick coating is actually reliable.
- KitchenAid Flat Whisk: I prefer a flat whisk or a sturdy fork for this batter. It helps you incorporate the wet into the dry without beating the air out of it.
- Lodge Silicone Brush: Essential for brushing a tiny bit of oil onto the iron if it’s getting older.
If you are looking for a savory side to go with these, you can actually use the same logic of quick cooking. While your waffles are in the iron, you could whip up a Breakfast Quesadilla recipe to get some protein and cheese on the table at the same time.
Mastering The Steps For Perfect Golden Waffles
Follow these steps closely. The order in which you combine things matters more than you might think. We want to keep those leavening bubbles alive as long as possible.
- Preheat your iron. Turn your Cuisinart iron to a medium high setting. Note: A hot iron is the only way to prevent sticking.
- Whisk dry spices. Toss the 2 cups of Bisquick, 1 tbsp sugar, and ½ tsp cinnamon in your bowl. Note: Distributing the cinnamon now prevents "clumping" later.
- Create a well. Push the dry mix to the sides to make a hole in the center.
- Add wet ingredients. Pour in 1 ⅓ cups milk, 1/3 cup oil, the egg, and 1 tsp vanilla.
- Gently combine. Use a fork to stir until just moistened. Stop when you see lumps.Note: Lumps are your friend; they mean the gluten isn't overworked.
- Rest the batter. Let it sit for 2 minutes while the iron finishes heating. Note: This allows the flour to hydrate properly.
- Pour the batter. Use about ½ cup of batter for a standard round iron. Listen for the sizzle.
- Spread slightly. Use the back of a spoon to nudge batter toward the edges.
- Cook until steam stops. Watch the sides of the iron. When the visible steam dissipates, they are ready. Wait for the golden brown color.
- Remove with care. Use a silicone spatula or fork to lift the waffle out. Note: Never use metal tools on a non stick iron.
Troubleshooting Tips For Every Common Cooking Problem
Even with a reliable bisquick waffle recipe, things can go sideways. Usually, it is a temperature issue or a "too much love" issue (over mixing).
Why the waffles are sticking
If your waffle is tearing in half when you open the iron, your iron wasn't hot enough or you didn't use enough oil. The oil in the batter usually handles the non stick aspect, but older irons need a little help.
Why the waffles are soggy
Steam is the enemy of a crisp waffle. If you stack them on a plate, the bottom ones will get wet and limp within sixty seconds. Always use a wire cooling rack if you aren't eating them immediately.
Why the middle is raw
This happens when the iron is way too hot. The outside burns before the inside sets. Lower the heat setting and let it cook for an extra minute.
| Problem | Cause | Fix | Pro Tip |
|---|---|---|---|
| Tearing | Opened too early | Wait for the steam to stop entirely. | Use a timer for exactly 3.5 minutes. |
| Dense/Heavy | Over mixing | Fold with a spoon, don't whisk. | Lumps should be the size of peas. |
| Bland Flavor | Old Baking Mix | Check the expiration date on the box. | Add an extra 1/2 tsp of vanilla. |
Smart Dietary Changes For Every Family Member
We all have that one person in the family who needs a tweak. These waffles are surprisingly resilient to changes. If you are looking for a healthy snack on the side for someone who avoids grains, you might suggest a Peanut Butter Banana recipe to keep them satisfied while everyone else enjoys the waffles.
- dairy-free: Swap the whole milk for unsweetened almond or oat milk. Result: Slightly thinner batter but still very crispy.
- High Protein: Replace ¼ cup of the Bisquick with your favorite unflavored protein powder. Result: A more "chewy" texture; may need 1 extra tbsp of milk.
- Savory Twist: Omit the sugar, cinnamon, and vanilla. Add ½ cup shredded sharp cheddar and a pinch of chive.
Why does extra oil create a shattering crust?
It comes down to heat transfer. Oil conducts heat much more efficiently than the water in milk. By having that 1/3 cup of oil in the mix, the batter literally fries against the iron plates. This creates a crust that stays rigid even under a heavy pour of syrup.
How do room temperature eggs help?
Cold eggs can cause the melted fats or oils in a batter to seize up and clump. By using a room temperature egg, the batter stays emulsified and smooth, which leads to a more even rise in the iron.
Storage And Freezing Tips For Busy Weekday Mornings
I always make a double batch. Always. There is no better feeling than reaching into the freezer on a Tuesday morning and having a "homemade" waffle ready in two minutes.
Fridge Storage: Keep them in an airtight container for up to 3 days. They will lose their crispness, but a quick toast will bring it back.
Freezing: This is the pro move. Lay the cooked waffles in a single layer on a baking sheet and freeze for 1 hour. Once they are hard, toss them into a freezer bag. They will stay good for up to 2 months.
Reheating: Forget the microwave. It turns waffles into rubber. Use a toaster or a 350°F oven for 5 minutes. This restores the "shatter" to the crust.
Zero Waste Tip: If you have leftover batter, do not throw it out! You can cook the rest of the waffles and freeze them, or even use the batter to dip apple slices and fry them in a pan for a quick snack.
Serving Ideas To Make Breakfast More Exciting
While maple syrup is the classic choice, don't be afraid to branch out. My kids love what we call "Waffle Tacos" where we fold them over with yogurt and berries in the middle.
- The Classic: Salted Kerrygold butter and Grade A Dark Maple Syrup.
- The Elvis: Peanut butter, sliced bananas, and a drizzle of honey.
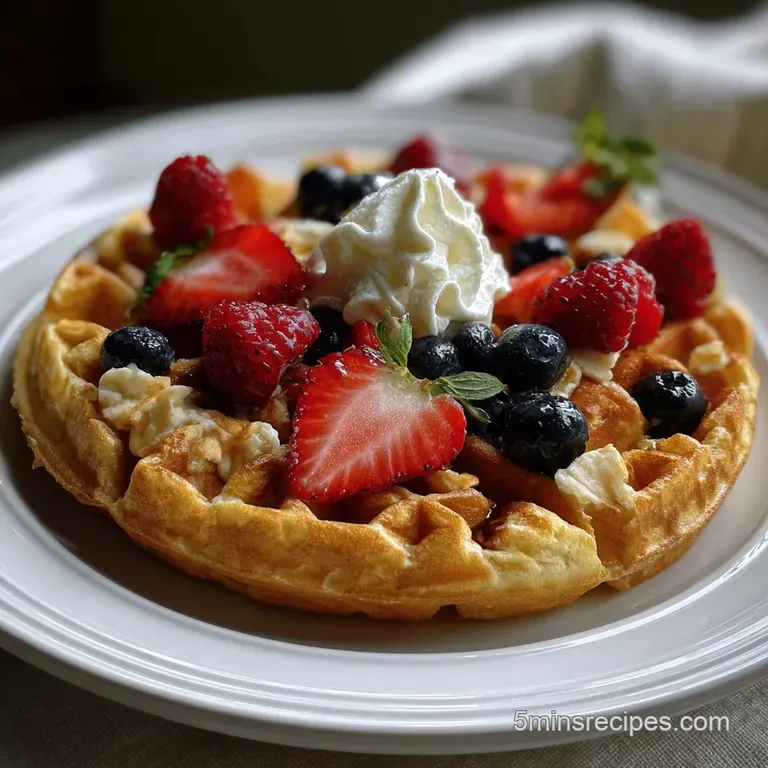
- The Berry Blast: A handful of fresh blueberries and a dollop of whipped cream.
- The Savory: A fried egg on top with a dash of hot sauce.
Honestly, don't even bother with the low-fat "pancake syrup" if you can help it. Real maple syrup has a complexity that pairs beautifully with the cinnamon in the batter. If you really want to go all out, warm the syrup in a small pot before serving. It makes a huge difference.
Debunking Common Kitchen Myths About Waffle Batters
There is a lot of bad advice out there about making the "perfect" waffle. Let's clear some of that up so you can cook with confidence.
Myth: You must beat egg whites separately for fluffy waffles. Truth: While this works for Belgian waffles, it is totally unnecessary for a bisquick waffle recipe. The chemical leaveners in the mix are powerful enough to give you a great rise without the extra dishes and effort.
Myth: Searing the iron with butter is better than oil. Truth: Butter has milk solids that burn at high temperatures. If you grease your iron with butter, you will end up with black specks and a bitter taste. Stick to a high smoke point oil like vegetable or canola.
Myth: The "Ready" light on the iron is always right. Truth: Most "ready" lights are based on a simple timer, not the actual moisture content of the waffle. Always trust the steam. If it is still steaming heavily, the waffle is still wet inside. Wait for the steam to slow down to a whisper.
This recipe has saved my sanity more times than I can count. It is fast, it uses one bowl, and it makes me feel like a "pro mom" even when I haven't had my coffee yet. Just remember: don't over mix, keep the iron hot, and always make enough for the freezer!

Recipe FAQs
Can I substitute water for the milk in the Bisquick waffle recipe?
No, milk is strongly recommended. The fat and protein in whole milk are crucial for achieving the signature rich flavor and tender interior structure; water results in a flat, tough waffle.
What is the secret to getting waffles that are crispy and not soggy?
Keep the iron very hot and serve immediately or use a rack. The high temperature creates an instant crust through rapid water evaporation. If stacking, place them on a wire rack instead of a flat plate to allow air circulation, similar to how you cool cookies to maintain texture.
How long should I mix the batter for the best texture?
Mix only until the dry ingredients are barely incorporated. You want small lumps to remain; overmixing develops gluten, which leads to dense, chewy waffles instead of light, airy ones.
Can I use baking powder instead of relying on the Bisquick leavening?
No, do not add extra chemical leavener. Bisquick already contains leavening agents; adding more will cause the waffle to rise too quickly and then immediately collapse, resulting in a rubbery texture.
What temperature should my waffle iron be set to for this recipe?
Aim for between 390°F and 400°F (about a medium high setting). This heat range is necessary to immediately brown the sugars (Maillard reaction) before the interior overcooks.
I am out of Bisquick; can I substitute a different mix or make it from scratch?
You can use pancake mix, but the results will vary. If you want scratch waffles, you'll need to manually measure flour, salt, sugar, and baking powder. If you are short on time and just need a quick breakfast, try our 5 Minute Oatmeal Recipe with Cinnamon and Brown Sugar instead of starting a full scratch waffle recipe.
If I make a double batch, how should I properly reheat frozen waffles?
Always use a toaster or oven, never the microwave. Microwaving turns waffles soft and damp. Reheating frozen waffles in a toaster or a 350°F oven for 5 minutes restores the crispy exterior that this recipe is known for.
Bisquick Waffle Recipe

Ingredients:
Instructions:
Nutrition Facts:
| Calories | 496 calories |
|---|---|
| Protein | 9 g |
| Fat | 31 g |
| Carbs | 47 g |
| Fiber | 1 g |
| Sugar | 8 g |
| Sodium | 765 mg |
