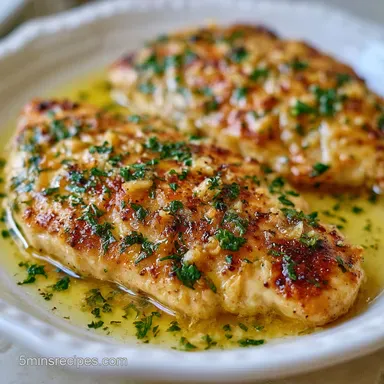
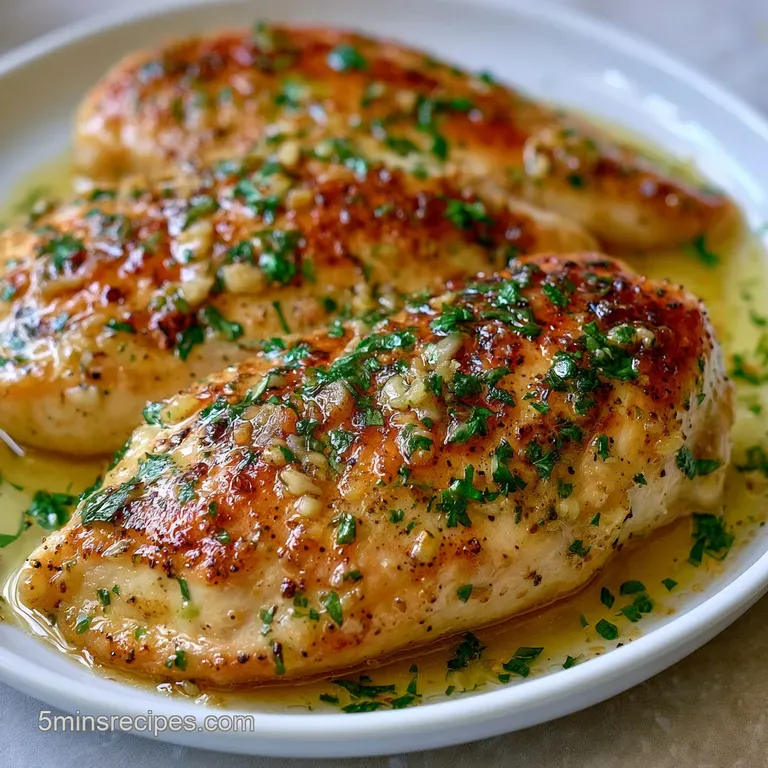
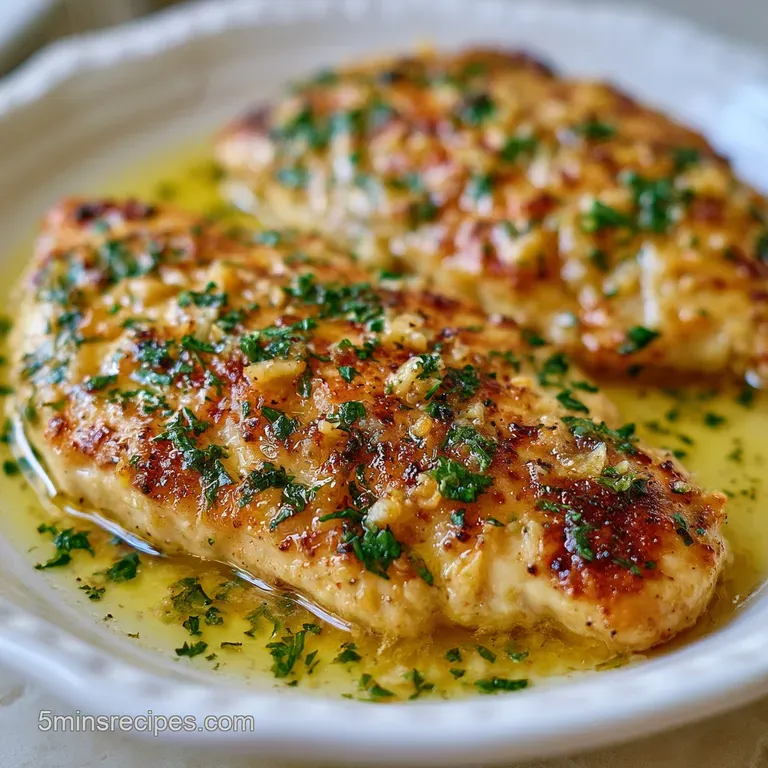
Garlic Butter Chicken Breast: Pan-Seared
- Time: 5 min active + 15 min cook = Total 20 mins (plus 5 min resting)
- Flavor/Texture Hook: Mahogany brown crust with a velvety, lemon garlic finish
- Perfect for: Fast weeknight dinners, high protein meal prep, or beginner cooks
- Simple Chicken Breast Recipe for Dinner with Garlic and Butter
- The Truth About Lean Meat
- Component Analysis
- The Ingredient List
- Essential Kitchen Tools
- Step by Step Cooking
- Solving Common Cooking Issues
- Smart Swaps and Tweaks
- Kitchen Folklore
- Keeping Leftovers Fresh
- Best Side Dish Ideas
- Recipe FAQs
- 📝 Recipe Card
That first hiss when the meat hits the pan is everything. You know that sound? It is the sound of a dinner that is actually going to taste like something. I remember the first time I tried to make a "fancy" garlic butter chicken. I just threw the breasts in the pan as they were, thick on one end and thin on the other.
By the time the center was safe to eat, the edges were basically pencil erasers. It was a disaster.
I spent a few months just experimenting with how to stop that from happening. I realized the secret isn't some expensive tool, it is just a bit of muscle and a better way to handle the butter. This Simple Chicken Breast Recipe for Dinner with Garlic and Butter is the only one you need for a perfect weeknight meal.
No more rubbery meat or burnt garlic bits that taste like charcoal.
We are going for a specific result here: a golden, savory exterior and a center that stays succulent. It is a fast process, but you have to be present in the kitchen. You can't just set a timer and walk away. You've got to watch the butter foam and smell the garlic turn fragrant.
Trust me, once you get the hang of the basting part, you'll never go back to just baking your chicken.
Simple Chicken Breast Recipe for Dinner with Garlic and Butter
The magic of this dish comes from the contrast between the over high heat sear and the gentle butter baste. Most people make the mistake of adding garlic too early, and then they spend the whole meal picking bitter, black specks out of their food. We avoid that by adding the aromatics only at the very end.
When you use a heavy pan, like cast iron, you get a much more consistent heat. This is what creates that mahogany color. If you use a thin pan, the temperature drops the moment the meat hits the surface, and instead of searing, your chicken just steams in its own juices. That is how you end up with pale, grey meat.
It is also a budget smart approach. You are taking a basic, affordable protein and using a few pantry staples - butter, garlic, and lemon - to make it taste like something from a bistro. You don't need a dozen expensive spices when you have the right technique.
The Truth About Lean Meat
To understand why we treat the chicken this way, you have to look at what is happening in the pan. Chicken breast is lean, meaning there is very little fat to protect the proteins from the heat.
- Uniform Thickness
- Pounding the meat ensures every square inch hits the pan at the same time, preventing the "burnt edges, raw center" syndrome.
- Fat Conductivity
- Butter acts as a heat conductor, transferring warmth into the meat more efficiently than air or oil alone.
- Acid Balance
- The lemon juice at the end cuts through the richness of the butter, brightening the whole dish.
- Carryover Cooking
- Resting the meat allows the internal temperature to stabilize, which keeps the juices inside the fibers.
| Method | Time | Texture | Best For |
|---|---|---|---|
| Fresh Sear | 15 mins | Crispy crust, juicy center | Fresh dinner |
| Pre cut Tenders | 10 mins | Softer, faster cook | Kids/Quick lunch |
| Oven Baked | 25 mins | Uniform, less crust | Large batches |
| Slow Cooker | 4 hours | Shredded, soft | Meal prep |
Since we are focusing on speed and quality, the fresh sear wins every time. It gives you that restaurant style finish in a fraction of the time.
Component Analysis
Understanding what each ingredient actually does helps you make better decisions if you're missing something in the pantry.
| Ingredient | Science Role | Pro Secret |
|---|---|---|
| Unsalted Butter | Heat medium & Flavor | Use unsalted so you can control the salt levels yourself |
| Fresh Garlic | Aromatic base | Mince it finely so it releases oils without burning |
| Lemon Juice | PH Balancer | Always add after heat is off to keep the citrus flavor "bright" |
| Olive Oil | Smoke point booster | Prevents the butter from burning too quickly at high heat |
The Ingredient List
Here is everything you need. Keep it simple, but don't skimp on the quality of the butter if you can help it.
- 4 boneless, skinless chicken breasts (approx. 680g) Why this? Standard size for even cooking
- ½ tsp salt Why this? Basic seasoning for flavor
- ½ tsp black pepper Why this? Adds a subtle bite
- 1 tbsp olive oil Why this? Higher smoke point than butter
- 4 tbsp unsalted butter Why this? Creates the velvety sauce
- 4 cloves garlic, minced Why this? Punchy, aromatic flavor
- 1 tbsp fresh lemon juice Why this? Cuts the fat
- 1 tbsp fresh parsley, chopped Why this? Fresh, herbal finish
Quick Substitutions:
- Butter → Ghee (Higher smoke point, slightly nuttier)
- Fresh Parsley → Dried Oregano (Adds an earthy, Mediterranean vibe)
- Lemon Juice → White Wine (Adds a more complex, acidic depth)
- Olive Oil → Avocado Oil (Better for extremely high heat)
Essential Kitchen Tools
You don't need a professional kitchen, but the right pan makes a massive difference. A 12 inch cast iron skillet is my go to because it holds heat like a beast. If you don't have one, a heavy bottomed non stick pan works, but you might lose a bit of that deep brown crust.
You will also need a meat mallet. If you don't own one, don't panic - a heavy rolling pin or even the bottom of a sturdy skillet will do the trick. The goal is just to flatten the thick end of the breast.
Finally, a digital meat thermometer is non negotiable for me. I've wasted too many dinners guessing "by feel" only to find the chicken was still pink or completely dried out. According to USDA guidelines, chicken must reach an internal temperature of 165°F (74°C) to be safe.
Step by step Cooking
Let's crack on. Make sure your chicken is patted dry with paper towels first. If the meat is wet, it will steam instead of sear, and you'll lose that mahogany crust.
- Place chicken breasts between two pieces of plastic wrap and pound the thickest part with a mallet until an even thickness of about ¾ inch. Note: Pounding the meat is a pro move, and as Serious Eats explains, it's all about creating a uniform thickness for even cooking.
- Season both sides generously with salt and pepper.
- Heat olive oil in a 12 inch cast iron skillet or heavy bottomed non stick pan over medium high heat until shimmering.
- Lay the chicken in the pan and sear undisturbed for 5-7 minutes until a mahogany colored crust forms.
- Flip the breasts and sear the other side.
- Reduce heat to medium. Add the butter and minced garlic to the pan.
- Tilt the pan slightly and use a spoon to continuously pour the sizzling garlic butter over the chicken for the final 3-5 minutes of cooking, until the internal temperature reaches 165°F (74°C).
- Remove from heat and stir in the fresh lemon juice and chopped parsley.
- Let the chicken rest for 5 minutes until the juices settle before serving.
Chef's Tip: When basting, don't just pour the butter on top. Spoon it over the edges and the top repeatedly. This "washes" the chicken in flavor and keeps the surface moist.
Solving Common Cooking Issues
Even with a simple recipe, things can go sideways. Usually, it's a matter of heat management.
Bitter Burnt Garlic
If your garlic turns dark brown or black, it has burnt. This happens if the pan is too hot when the butter goes in or if you didn't lower the heat to medium. Burnt garlic is bitter and ruins the sauce. If this happens, it is better to wipe the pan and start the butter/garlic step over.
Raw Middle Burnt Outside
This is a classic sign that your heat was too high or your chicken was too thick. By pounding the meat to a uniform ¾ inch, you solve 90% of this problem. If it still happens, lower your heat and cover the pan with a lid for 2 minutes to trap the heat.
Rubber Texture
Rubberiness comes from overcooking. Once the thermometer hits 165°F (74°C), get it out of the pan. If you leave it in, the muscle fibers tighten and squeeze out all the moisture.
| Problem | Root Cause | Solution |
|---|---|---|
| Pale Chicken | Pan not hot enough | Wait for oil to shimmer before adding meat |
| Butter Separates | Heat too high | Lower to medium when adding butter |
| Dry Meat | Overcooked | Use a thermometer and rest for 5 mins |
Checklist for Success:
- ✓ Chicken patted completely dry before seasoning
- ✓ Meat pounded to an even thickness
- ✓ Pan shimmering hot before the first sear
- ✓ Heat lowered before adding the butter and garlic
- ✓ Rested for at least 5 minutes
Smart Swaps and Tweaks
If you want to change the vibe of this dish, you can easily pivot. For instance, if you want a more indulgent feel, you could whisk in some Garlic Parmesan Sauce at the end for a creamy, salty finish.
If you are watching calories, you can swap the butter for a mix of olive oil and a touch of butter for the flavor. You'll lose some of that velvety texture, but the garlic and lemon will still do the heavy lifting.
For those who prefer a different protein, chicken thighs work beautifully here. They are more forgiving because of the higher fat content. Just increase the initial sear time by 2-3 minutes per side since they are often denser.
Decision Shortcut:
- If you want it creamier → add a splash of heavy cream with the lemon.
- If you want it zestier → double the lemon juice and add lemon zest.
- If you want it spicy → add a pinch of red pepper flakes to the butter.
Kitchen Folklore
Let's clear some things up. I've heard a lot of myths about searing meat that just aren't true.
The "Seal In" Myth: Many people think searing "seals in the juices." It doesn't. Moisture loss happens regardless of how you sear it. The crust is about flavor, not a waterproof barrier.
The "Oil First" Myth: Some say you should put butter in first. Don't. Butter has milk solids that burn at high temperatures. Starting with olive oil and adding butter later protects the flavor.
The "No Rest" Myth: Some think resting is only for big roasts. Even a chicken breast needs a few minutes to let the proteins relax and reabsorb the juices.
Keeping Leftovers Fresh
If you have leftovers, store them in an airtight container in the fridge for up to 3-4 days. The sauce might solidify, which is normal since butter is the base.
To reheat, avoid the microwave if you can. The microwave tends to turn chicken breasts into rubber. Instead, put the chicken in a pan over medium low heat with a tablespoon of water or a tiny bit of extra butter. Cover it with a lid for 3-5 minutes.
This steams the meat back to life without overcooking it.
For freezing, this dish is okay, but the lemon juice can sometimes make the texture slightly grainy. I recommend freezing the cooked chicken without the sauce, then making a fresh garlic butter glaze when you reheat it. It will last about 3 months in the freezer.
Zero Waste Tip: Don't toss the leftover garlic butter in the pan! Pour it over steamed broccoli or use it to toast a piece of sourdough bread. It is liquid gold.
Best Side Dish Ideas
Because this dish is rich and savory, you want sides that provide a bit of crunch or acidity to balance the plate.
This chicken is a total winner alongside a one pan pasta for a full meal. The starch in the pasta loves that garlic butter sauce. If you want something lighter, a simple arugula salad with a balsamic glaze works perfectly. The peppery greens cut right through the richness of the butter.
For a low carb option, roasted asparagus or sautéed spinach are great choices. You can actually cook the vegetables in the same pan right after you remove the chicken, letting them soak up those leftover brown bits (the fond) from the bottom of the skillet.
It adds a massive layer of flavor to the veggies with zero extra effort.
Recipe FAQs
How to prevent the chicken from drying out?
Pound the breasts to a uniform 3/4 inch thickness. This ensures the meat cooks evenly so the edges don't overcook while the center reaches 165°F.
Is it true I can skip pounding the chicken to save time?
No, this is a common misconception. Skipping this step results in uneven cooking, leaving the thickest part raw or the thinnest part rubbery.
How to achieve a mahogany crust on the meat?
Pat the chicken dry with paper towels before seasoning. Excess moisture creates steam in the pan, which prevents the meat from searing properly.
Can I use a non-stick pan instead of cast iron?
Yes, a heavy bottomed non-stick pan works perfectly. The main requirement is a pan that distributes heat evenly to maintain a consistent sear.
How to know when the chicken is perfectly cooked?
Use a meat thermometer to confirm an internal temperature of 165°F. This is the only reliable way to ensure the chicken is safe to eat without overcooking it.
Should I add the minced garlic at the start of the searing process?
No, add it only after the chicken is seared. Garlic burns quickly at high temperatures and will turn bitter if it stays in the pan for the full 15 minutes.
What sides pair best with this garlic butter chicken?
Pair it with a light pasta or steamed vegetables. If you enjoyed the fast prep time here, see how the same efficiency works in our quick pasta sauce.
Garlic Butter Chicken Breast