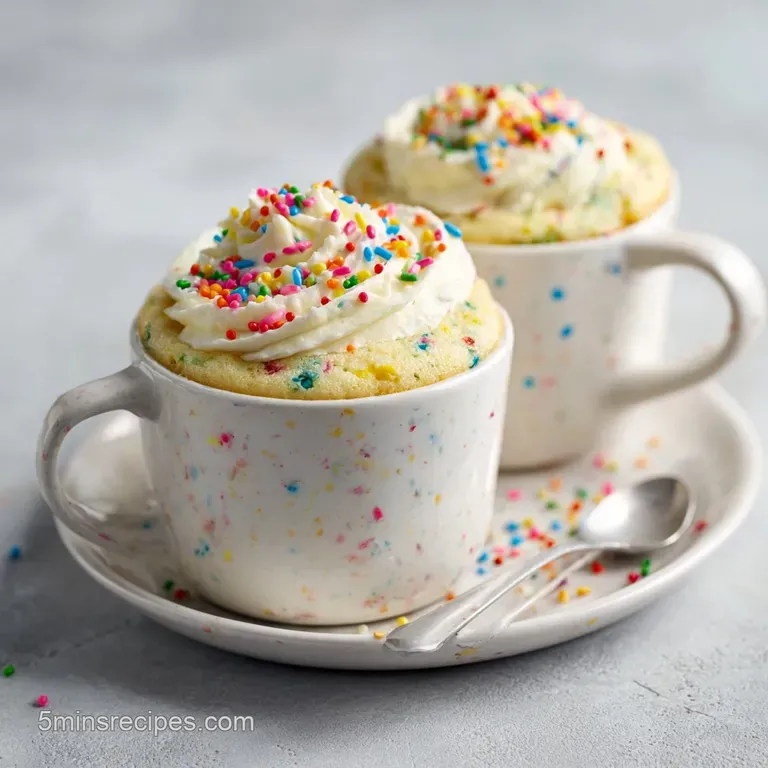
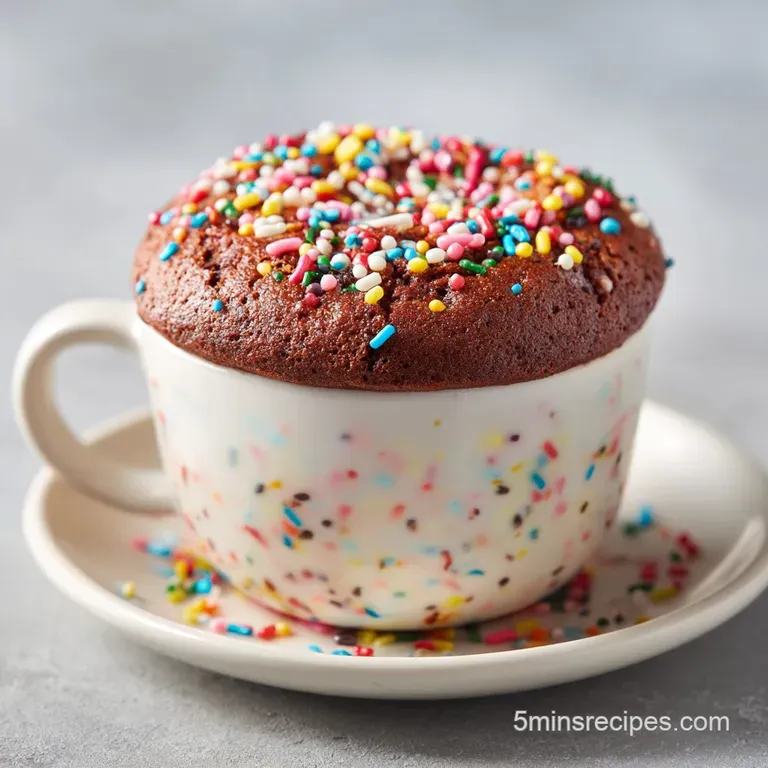
Chocolate Mug Cake: Fudgy and Molten
- Time: Active 2 minutes, Passive 1 minute, Total 3 minutes
- Flavor/Texture Hook: Fudgy, molten, and intensely chocolatey
- Perfect for: Late night cravings, portion control, or beginner bakers
- Master the Ultimate Microwave Mug Cake
- The Quick Fix Science of Steam
- Component Deep Dive for Success
- Essential Pantry Elements for Success
- Best Tools for Easy Baking
- Simple Steps for Fudgy Results
- Fix Common Mug Cake Errors
- Creative Flavor Swaps and Changes
- Scaling for More People
- Kitchen Myths Debunked
- Keeping Your Sweet Treats Fresh
- Top Toppings for Extra Flavor
- Recipe FAQs
- 📝 Recipe Card
Master the Ultimate Microwave Mug Cake
Have you ever wondered why some microwave desserts feel like a warm hug while others taste like a discarded pencil eraser? It all comes down to the struggle between moisture and radiation.
Most of us have been there standing in front of the microwave at 11:00 PM, watching a batter rise like a volcano only to have it collapse into a tough, chewy brick the moment the timer dings. It's a tragedy that happens in kitchens every single day, but it doesn't have to be your story.
I remember my first attempt at a mug cake; I followed a recipe that called for a whole egg. The result was a weirdly spongy, sulfur smelling hockey puck that even my dog looked at with suspicion. It was a humbling moment for someone who prides themselves on baking.
That disaster sent me down a rabbit hole of testing hydration ratios and fat content because I knew a truly velvety, rich chocolate cake was possible in under three minutes.
The secret I discovered isn't about fancy equipment; it’s about understanding how microwaves actually cook. Instead of dry heat from an oven, we’re using electromagnetic waves to excite water molecules.
If you don't have the right balance of fats and sugars, those water molecules just evaporate, leaving you with a dry, sad mess. This recipe is the result of those messy experiments, designed to give you that molten, decadent experience every single time.
The Quick Fix Science of Steam
The physics of this quick dessert is actually quite fascinating when you stop to think about it. Unlike a traditional oven that bakes from the outside in, a microwave heats the water, sugar, and fat molecules throughout the batter simultaneously.
This means the transition from raw batter to "overcooked" happens in a matter of seconds, not minutes.
Steam Leavening: Without an egg to provide structure, the combination of baking powder and the rapid heating of milk creates tiny steam pockets that lift the flour.
Fat Barrier: The neutral oil coats the flour proteins, which prevents too much gluten from forming during your vigorous whisking, keeping the crumb tender and velvety.
Sugar Liquefaction: As the granulated sugar heats up, it temporarily turns into a hot syrup that keeps the cake moist even after the microwave stops.
Cook Method Comparison
| Method | Time | Texture | Best For |
|---|---|---|---|
| 800W Microwave | 65 seconds | Airy and soft | Standard mugs |
| 1000W Microwave | 60 seconds | Fudgy and dense | This specific recipe |
| 1200W Microwave | 50 seconds | Very moist | High power units |
Choosing the right time for your specific machine is the difference between a molten center and a dry crumb. Most modern microwaves are around 1000W, which is why 60 seconds is our "gold standard" for this single serving treat.
If you know your microwave is a beast, start checking at 45 seconds to ensure you don't lose that silky interior.
Component Deep Dive for Success
| Ingredient | Science Role | Pro Secret |
|---|---|---|
| All purpose flour | Provides the structural framework | Fluff the flour before measuring to avoid a heavy, dense cake. |
| Unsweetened cocoa | Adds flavor and absorbs liquid | Use Dutch processed cocoa for a darker color and smoother chocolate taste. |
| Neutral oil | Prevents the "rubbery" texture | Avoid olive oil unless you want a savory, grassy undertone to your chocolate. |
| Baking powder | Creates the rapid rise | Ensure your powder is fresh by checking if it bubbles in hot water. |
Before you start mixing, let’s talk about the flavor profile we’re building. This isn't just a "sweet" dish; it’s a balanced composition. We use salt to sharpen the cocoa and vanilla to provide a floral backbeat that makes the chocolate feel more expensive than it is.
- Primary
- Intense dark chocolate
- Secondary
- Warm Madagascar vanilla
- Accent
- Sharp sea salt crystals
- Finish
- Creamy whole milk fats
Essential Pantry Elements for Success
To get started, you'll need to gather your ingredients. Accuracy is everything when you're working with such small volumes. A little too much flour can turn this from a cake into a biscuit, so use level tablespoons and measuring cups.
- 1/4 cup All purpose flour: Why this? Provides enough protein to hold the bubbles without becoming tough.
- 2 tbsp Unsweetened cocoa powder: Why this? Delivers the intense chocolate hit without adding extra sugar.
- 2 tbsp Granulated sugar: Why this? Essential for moisture and that classic sweet treat finish.
- 1/4 tsp Baking powder: Why this? The engine that makes our cake fluffy in seconds.
- 1 pinch Fine sea salt: Why this? Acts as a flavor conductor for the cocoa powder.
- 1/4 cup Whole milk: Why this? The fat content in whole milk creates a much richer crumb.
- 2 tbsp Neutral oil: Why this? Stays liquid at room temp, ensuring the cake remains soft.
- 1/2 tsp Pure vanilla extract: Why this? Rounds out the bitterness of the cocoa.
- 1 tbsp Semi sweet chocolate chips: Why this? These melt into a hidden "lava" pool in the center.
| Original Ingredient | Substitute | Why It Works |
|---|---|---|
| Whole milk | Oat milk (Full fat) | High fat content maintains the creamy, velvety texture. |
| Neutral oil | Melted butter | Adds a nutty flavor. Note: Cake may firm up faster as it cools. |
| All purpose flour | 1:1 gluten-free blend | Xanthan gum in blends mimics the structure of wheat flour. |
Using high-quality cocoa powder is the single best way to upgrade this recipe. If you use the cheap, chalky stuff, your cake will taste like cardboard. I always reach for a premium brand because, in a three minute recipe, there’s nowhere for poor ingredients to hide.
Best Tools for Easy Baking
You don't need a stand mixer for this, but you do need the right vessel. A 12 ounce (350ml) mug is the sweet spot. If the mug is too small, the batter will overflow and create a sticky mess on your microwave glass. If it's too large, the cake will look like a flat pancake at the bottom.
Chef's Tip: Use a straight sided mug rather than a tapered one. Tapered mugs cause the heat to concentrate at the bottom, which can lead to uneven cooking and a dry base.
A small balloon whisk is also your best friend here. While a fork works in a pinch, a whisk incorporates air into the dry ingredients and ensures you don't have any hidden pockets of dry flour at the bottom of the mug.
If you find yourself making these often, it's worth investing in a tiny "mini whisk" just for your late night mug cake habit.
Simple Steps for Fudgy Results
- Whisk dry ingredients. In a 12 ounce microwave safe mug, combine 1/4 cup flour, 2 tbsp cocoa powder, 2 tbsp sugar, 1/4 tsp baking powder, and a pinch of salt. Note: Whisk until the color is a uniform light brown with no white streaks.
- Add liquid components. Pour in 1/4 cup whole milk, 2 tbsp neutral oil, and 1/2 tsp vanilla extract.
- Emulsify the batter. Whisk vigorously until the batter is glossy and smooth. Make sure to scrape the "corners" at the bottom of the mug.
- Insert the core. Place 1 tbsp chocolate chips directly into the center of the batter. Do not stir them in; they need to stay bunched up to create the lava effect.
- Position the mug. Place the mug on the outer edge of the microwave turntable rather than the center. Note: This helps the cake cook more evenly as it rotates.
- Microwave on high. Cook for 60 seconds exactly.
- Monitor the rise. Watch until the top is set but still looks slightly shiny. It will puff up significantly then settle.
- Stabilize the crumb. Allow the cake to sit undisturbed for 1 minute.
- Check the texture. The cake should feel springy to a light touch.
- Final garnish. Add a tiny sprinkle of flaky salt on top if you're feeling fancy.
While you're waiting for that 60 second zap, you'll start to smell the vanilla and cocoa blooming. It’s a sensory trigger that tells your brain dessert is coming. But patience is key here! If you dig in immediately, the steam will burn your tongue and the cake will feel gummy.
That 1 minute rest is when the starch molecules finish setting.
Fix Common Mug Cake Errors
The most common complaint with any microwave dessert is that it feels "rubbery." This is usually because someone tried to add an egg to a single serving recipe. A whole egg is simply too much protein for this amount of flour, creating a structure that is far too strong. By omitting the egg, we keep the cake tender.
Why Your Cake Is Dry
If your cake feels like a desert, you likely overcooked it. Microwave power varies wildly. If you have a very strong microwave, 60 seconds might be too long. Next time, try 50 seconds. Also, ensure you aren't over measuring your flour. Always spoon flour into your measuring cup rather than packing it down.
| Problem | Root Cause | Solution |
|---|---|---|
| Overflowing batter | Mug is too small | Use a 12 ounce mug or fill only 2/3 full. |
| Gummy bottom | Unmixed flour | Use a small whisk to reach the bottom "corners." |
| Tough texture | Overcooking | Reduce power to 80% or cut time by 10 seconds. |
Common Mistakes Checklist
- ✓ Never skip the salt; it’s the only thing that makes the chocolate "pop."
- ✓ Don't stir the chocolate chips; let them sink naturally for a molten center.
- ✓ Avoid "low-fat" milks if possible, as the fat is what keeps the crumb soft.
- ✓ Always let it rest for at least 60 seconds before that first bite.
- ✓ Check your baking powder expiration date old powder means a flat cake.
If you're looking for a slightly different texture, you might want to try my Mug Brownie which is even denser and more fudge like. The troubleshooting for both is similar: watch the timer like a hawk!
Creative Flavor Swaps and Changes
The beauty of a basic chocolate base is that it's a canvas for your imagination. Once you've mastered the standard version, you can start playing with the profile. I'm a huge fan of adding a teaspoon of peanut butter right into the center along with the chocolate chips for a "buckeye" style treat.
If you want a deeper flavor, add a pinch of espresso powder to the dry ingredients. It won't make the cake taste like coffee, but it will make the chocolate taste three times as intense.
If you want a seasonal twist, swap the vanilla for peppermint extract during the holidays, or add a dash of cinnamon and cayenne for a Mexican hot chocolate vibe. The cinnamon adds a woody warmth that contrasts beautifully with the sugar. For those who aren't in the mood for chocolate, you could even try a 5 Minute Mug Cake that uses different base flavors.
Budget Alternatives
| Premium | Budget | Flavor Impact | Savings |
|---|---|---|---|
| Pure Vanilla Bean | Vanilla Extract | Minimal in a 60 second cook | Save $15+ |
| Valrhona Cocoa | Hershey's Cocoa | Slightly less "dark" profile | Save $8 |
| Whole Milk | Water + 1 tsp Oil | Less creamy but still works | Save $3 |
Scaling for More People
Can you make two of these at once? Technically, yes, but you shouldn't just double the time. When you put two mugs in the microwave, the energy is split between them. You’ll need to increase the time by about 50-70%, not 100%.
Scaling Down: Since this is already a single serving, scaling down is tough. If you want a "bite sized" version, use a large espresso cup and cut all ingredients in half. You'll only need to microwave it for about 35 seconds.
Scaling Up: If you're making these for a group, I recommend cooking them one-by-one. It only takes a minute each, and you ensure every person gets a cake that is cooked exactly right. If you try to do four at once, the ones in the center will be raw while the ones on the edges will be overdone.
Kitchen Myths Debunked
Many people believe that "microwaves cook from the inside out." This is actually a myth. Microwaves penetrate about an inch into the food, and the rest of the heat is conducted inward.
This is why let down time (resting) is so important; it allows the center to finish cooking via residual heat without toughening the outer edges.
Another myth is that you need an egg for a "real" cake. In large scale baking, eggs provide structure and emulsification. But in a mug cake, the quick burst of steam from the milk and the chemical reaction of the baking powder provide more than enough lift.
Skipping the egg actually results in a superior, more "lava like" texture that won't turn spongy as it cools.
Keeping Your Sweet Treats Fresh
This is designed to be an "instant" dessert, eaten while warm. However, life happens. If you find yourself unable to finish it, you can cover the mug with plastic wrap. It will stay soft in the fridge for about 24 hours. To reheat, just give it 10-15 seconds in the microwave to loosen the fats back up.
Zero Waste Tip: If you have a cake that came out a bit too dry, don't throw it out! Crumble it up and use it as a topping for vanilla ice cream, or mix it into a milkshake. You can also save the "crumbs" in a freezer bag to use as a base for a future cheesecake crust or parfaits.
I’ve even used leftover mug cake crumbles as a "dirt" topping for chocolate pudding. There’s no reason for any bit of this chocolatey goodness to go to waste. Just remember that the texture is best within the first ten minutes of cooking.
After that, the sugars begin to crystallize and the starches retrogress, making the cake firmer and less "molten."
Top Toppings for Extra Flavor
While this cake is incredible on its own, a few additions can take it from a "snack" to a "dessert." A scoop of cold vanilla bean ice cream is the classic choice. The contrast between the hot, steaming cake and the freezing cream creates a "baked Alaska" effect in your mouth.
If you want to keep it simple, a dollop of whipped cream and some fresh raspberries provide a tartness that cuts through the richness of the cocoa. I also love a drizzle of salted caramel. The way the golden caramel seeps into the porous chocolate cake is honestly one of the best sights in any kitchen.
Whatever you choose, make sure to add it after the one minute resting period so your toppings don't immediately melt into a puddle.

Recipe FAQs
How do you make a 3 ingredient cake in a mug in the microwave?
This is a common misconception. A successful mug cake requires the balance of flour, cocoa, sugar, baking powder, salt, milk, oil, and vanilla to achieve the proper texture, rather than just three items.
Why is my microwave mug cake rubbery?
Overcooking is the primary culprit. Microwaving for longer than 60 seconds causes the proteins in the flour to tighten, resulting in a tough, rubbery crumb.
How long should I leave a mug cake in the microwave?
Cook for exactly 60 seconds on high power. The top should look set but remain slightly shiny when you pull it out.
How to make a mug cake with Betty Crocker mix?
Follow the standard preparation steps using your dry mix in place of the base ingredients. Ensure you whisk in the milk, oil, and vanilla extract until the batter is glossy and smooth before adding chocolate chips.
Is it true I can use low-fat milk for this recipe?
No, this is a common misconception. The fat in whole milk is essential to maintaining a tender crumb; using low-fat alternatives often leads to a dry or tough finished cake.
Why does my mug cake sometimes taste flat or salty?
Skipping the salt prevents the chocolate flavor from popping. If you enjoyed learning how to balance flavor profiles here, see how we apply the same seasoning principles in our Garlic Bread recipe.
How to fix a cake that collapsed after cooking?
Let the mug rest for 60 seconds before eating. This waiting period allows the crumb structure to stabilize and set, preventing the center from sinking or appearing raw.
Molten Chocolate Mug Cake

Ingredients:
Instructions:
Nutrition Facts:
| Calories | 592 kcal |
|---|---|
| Protein | 8.0 g |
| Fat | 35.8 g |
| Carbs | 67.7 g |
| Fiber | 4.6 g |
| Sugar | 37.1 g |
| Sodium | 325 mg |
