Easy Diy Bisquick Baking Mix
- Time: Active 10 minutes, Passive 0 minutes, Total 10 minutes
- Flavor/Texture Hook: Flaky, buttery, and incredibly tender
- Perfect for: Busy weekday mornings and budget conscious meal prep
- Simple Homemade Bisquick Mix For Busy Mornings
- Why This Pantry Staple Works
- Quick Performance Metrics For Baking
- Simple Elements For Pantry Success
- Essential Tools For Better Dough
- Making Your Bulk Baking Base
- Pro Secrets For Flaky Results
- Variations For Every Morning Craving
- Storage Tips For Long Freshness
- Ideas To Use Your Mix
- Critically High in Sodium
- Recipe FAQs
- 📝 Recipe Card
Simple Homemade Bisquick Mix For Busy Mornings
We've all been there, standing in the kitchen at 7:00 AM with three hungry kids circling like sharks, only to find the yellow box in the pantry is stone cold empty. It’s frustrating, right?
I used to rely on those pre made mixes because, honestly, who has time to measure six different things before the first cup of coffee has even kicked in? But then I realized I was paying a massive premium for someone else to mix flour and salt.
This Homemade Bisquick Mix is the ultimate solution for those of us who need to get breakfast on the table without losing our minds. It’s a literal lifesaver on Tuesday mornings when the "I’m hungry" whines start before the sun is even fully up.
Plus, because we're using real butter instead of shelf stable vegetable shortening, the flavor is on a completely different level. It’s richer, the texture is more "shatter on-your tongue" flaky, and you know exactly what’s inside it.
Trust me, once you realize you can whip up 6 cups of this stuff in ten minutes, you’ll never walk down the baking aisle for a pre made mix again. We’re going to look at how to get that perfect crumbly texture that makes for the world's best biscuits and pancakes.
Right then, let’s get your pantry stocked so you can actually enjoy your coffee tomorrow morning while the waffles are browning.
Why This Pantry Staple Works
The beauty of this mix lies in the way we handle the fat and the leavening agents. By prepping the base ahead of time, we're essentially doing the hard work of the "biscuit method" in one big batch.
When you eventually add your liquid to this mix, the flour is already coated in tiny pockets of fat, which ensures your baked goods stay tender rather than becoming tough or bread like.
- Fat Suspension: Cold butter is cut into the flour, creating microscopic layers that steam and expand during baking to produce a flaky texture.
- Chemical Leavening Balance: The ratio of baking powder to flour is calibrated for a high rise, ensuring that even after weeks in the fridge, the mix remains active.
- Starch Coating: Coating the flour proteins in fat limits gluten development, which is the secret to a velvety crumb in pancakes and muffins.
I remember the first time I tried making this and I just dumped the butter in. Huge mistake. You really want those little "peas" of fat. It's the difference between a flat, sad puck and a biscuit that practically floats off the plate.
| Method | Time | Texture | Best For |
|---|---|---|---|
| Stovetop (Pancakes) | 5 mins | Soft, airy | Fast weekday breakfast |
| Oven (Biscuits) | 12 mins | Flaky, crispy | Weekend brunch |
| Waffle Iron | 4 mins | Shatter crisp | Special treats |
When you are deciding which way to go, remember that the stovetop is your fastest friend, but the oven is where this mix really shows off its ability to rise and shine. If you have five extra minutes, the oven results are always worth it for that golden, crackling crust.
Quick Performance Metrics For Baking
Understanding the numbers behind your mix helps you stay consistent every time you pull the jar out of the fridge. Since we're making a bulk batch, keeping these checkpoints in mind will ensure your first batch of pancakes is just as good as the last one.
For Aerated, Flaky Textures
The key is the size of the butter. You aren't looking for a smooth paste; you want texture. Think about the size of a pea or a lentil. If the butter gets too warm, it melts into the flour and you lose those air pockets.
This is why I always suggest starting with butter that’s so cold it’s almost painful to touch.
For Precise Chemical Leavening
Baking powder starts losing its "oomph" the moment it’s exposed to moisture. Since this mix lives in the fridge, keep your container airtight. I once left a jar loosely capped and my biscuits turned out like actual skipping stones. Not my best mom moment, I'll admit.
For Ingredient Integrity and Health
Using real butter means we have to keep this in the refrigerator. Unlike the store-bought version that uses hydrogenated oils to stay shelf stable for years (which is a bit creepy when you think about it), ours is a fresh product. The sea salt acts as a minor preservative, but the cold is your real best friend here.
| Ingredient | Science Role | Pro Secret |
|---|---|---|
| All Purpose Flour | Structure Provider | Sift before measuring for a lighter mix |
| Baking Powder | Leavening Agent | Use aluminum free to avoid metallic aftertaste |
| Unsalted Butter | Tenderness & Flake | Freeze for 10 mins before cutting in |
| Fine Sea Salt | Flavor Enhancer | Dissolves faster than coarse kosher salt |
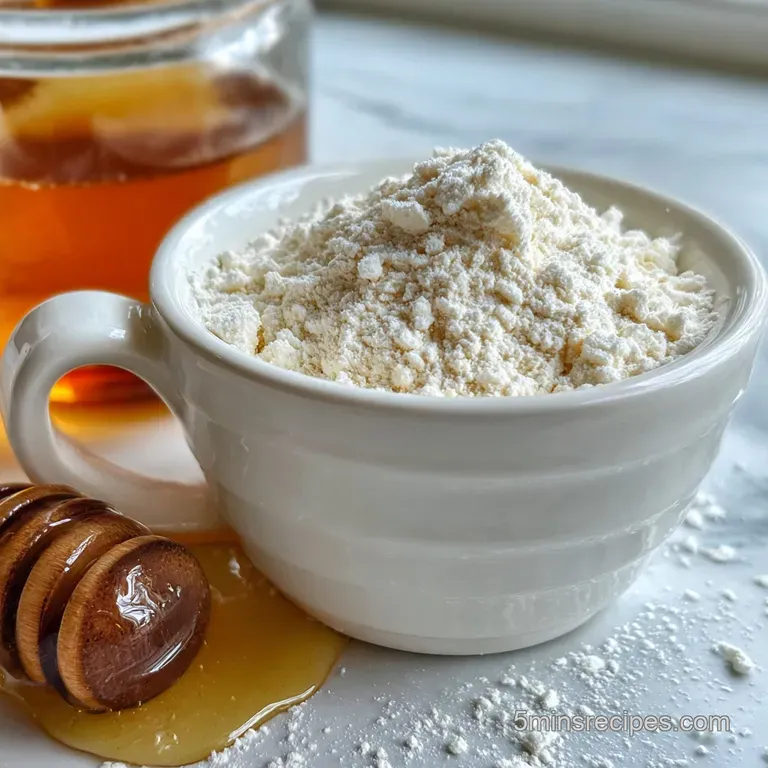
Simple Elements For Pantry Success
The ingredients for a Homemade Bisquick Mix are probably already sitting in your kitchen. This is a budget smart recipe because buying these items in bulk is significantly cheaper than the small boxes of "just add water" mixes.
I usually buy my flour in the big 10 pound bags and keep a few boxes of butter in the freezer just for this.
- 6 cups (750g) All Purpose Flour: This is your foundation. Why this? Provides the perfect protein balance for both biscuits and pancakes.
- 3 tbsp (42g) Baking Powder: Our lifting power. Why this? High volume ensures a fluffy result even with heavy add ins.
- 1 tbsp (18g) Fine Sea Salt: Essential for flavor. Why this? Fine grains distribute evenly through the dry mix without settling.
- 1 cup (226g) Cold Unsalted Butter, cubed: The flavor engine. Why this? Unsalted allows you to control the exact sodium levels yourself.
If you're out of butter, you can use vegetable shortening (1:1 ratio). It won't have that rich, creamy flavor, but it will make the mix shelf stable so it can sit in the pantry instead of the fridge. I personally stick with butter because the taste is incomparable, and it makes my Bisquick Waffle Recipe taste like a high end brunch spot.
Essential Tools For Better Dough
You don't need a professional bakery setup to make a killer Homemade Bisquick Mix from scratch. However, a few specific tools will make the process much faster and keep you from getting flour all over your clean yoga pants (we've all been there).
I highly recommend using a pastry cutter (sometimes called a dough blender). It has those sturdy wire loops that cut through cold butter like a dream. If you don't have one, two knives or even a sturdy fork will work, but it takes about three times as long and your hands might get a bit cramped.
A large, wide mixing bowl is also key. You need room to move the flour around as you incorporate the fat. Once it's finished, you'll want a large glass jar with a tight seal. I love using a half gallon Mason jar because I can see exactly how much I have left at a glance.
Just make sure the jar is bone dry before you put the mix in, or you'll end up with a clumpy, activated mess.
Making Your Bulk Baking Base

Right, let’s get down to the actual making. This process is incredibly satisfying it's like a 10 minute meditation before the chaos of the day starts. Follow these steps exactly to ensure your mix stays light and airy.
Phase 1: The Dry Aeration
- Measure out your 6 cups of All Purpose Flour into your largest mixing bowl.
- Add the 3 tbsp of Baking Powder and 1 tbsp of Fine Sea Salt.
- Whisk these dry ingredients vigorously for about 30 seconds until the mixture looks aerated and uniform. Note: This ensures you don't get a concentrated "salty" or "bitter" spot in your final baked goods.
Phase 2: The Fat Integration
- Take your 1 cup of cubed, cold butter straight from the fridge.
- Drop the butter cubes into the flour mixture, tossing them lightly so they are coated.
- Use your pastry cutter to press down into the butter until the mixture resembles coarse crumbs with some pea sized pieces. Note: Stop before it becomes a paste; those little lumps are the secret to the flake!
Phase 3: Final Texture Check
- Run your clean fingers through the mix to check for any massive chunks of butter you might have missed.
- Transfer the mixture carefully into your airtight storage container.
- Seal the lid tightly and place it in the refrigerator immediately until the butter feels firm and cold again.
If you are craving something savory later tonight, this mix is the perfect starting point for my favorite Sausage Ball Recipe. It’s so much faster than starting from scratch every single time you want a snack!
Pro Secrets For Flaky Results
The biggest mistake people make with a homemade bisquick mix easy recipe is overworking the dough once they add liquid. But there are a few other traps you can fall into before you even get to that stage.
Why Your Biscuits Are Heavy
If your biscuits come out looking like flat, dense pucks, it’s usually because the butter melted before it hit the oven. This happens if you use room temperature butter or if you handle the mix too much with your warm hands.
| Problem | Root Cause | Solution |
|---|---|---|
| Greasy Texture | Butter melted during mixing | Use frozen butter and a cold bowl |
| No Rise | Expired baking powder | Test powder in hot water; it should bubble |
| Tough Crumb | Over mixing the final dough | Mix only until "just combined" |
One trick I've learned over the years is to actually chill the bowl and the pastry cutter in the freezer for 10 minutes before I start. It keeps the butter solid for longer, which is a total game changer for that best homemade bisquick mix texture.
- ✓ Always use "spoon and level" method for flour to avoid packing it too tight.
- ✓ Ensure your baking powder is less than six months old for maximum lift.
- ✓ Work quickly to keep the butter from softening in the bowl.
- ✓ Sift the flour first if you want the most velvety pancakes imaginable.
- ✓ If the mix feels warm after cutting in butter, pop the whole bowl in the fridge for 20 minutes before storing.
Variations For Every Morning Craving
One of the reasons I love this homemade bisquick mix for dumplings and other treats is how versatile it is. You can easily tweak the base to fit your family's dietary needs or just to spice things up.
For a gluten-free Alternative
You can swap the all purpose flour for a 1:1 gluten-free flour blend. Just make sure the blend contains xanthan gum, or your biscuits will crumble into dust. The texture will be a bit more "short" (like a shortbread), but it’s still delicious.
Note: Coconut milk powder added to the dry mix can also help add richness to gluten-free versions.
For Savory Herb Biscuits
If you know you’re going to use a batch specifically for dinner, you can add 2 tablespoons of dried parsley, a teaspoon of garlic powder, and a half cup of dried parmesan to 2 cups of the mix. This is my go to for topping a Chicken Pot Pie recipe. It adds so much depth to a standard weeknight meal.
Chef's Tip: For a deep, nutty flavor, try browning half the butter, chilling it until solid again, and then cutting it into the mix. It adds a toasted aroma that is absolutely "chef's kiss" in waffles.
Storage Tips For Long Freshness
Because this recipe uses real butter, we can't treat it like the store-bought stuff that sits in the dark pantry for a year. Treat it with a little more love, and it will reward you with much better flavor.
Fridge Storage: Store your mix in an airtight container for up to 3 months. The butter will stay fresh, and the baking powder will remain active. Always give the jar a good shake before measuring it out, as the heavier salt and butter bits can sometimes settle at the bottom.
Freezer Storage: If you don't think you'll use it all in three months, this mix freezes beautifully. Put it in a heavy duty freezer bag, squeeze out the air, and it’ll last for 6 months. You don't even need to thaw it; just measure and go!
Zero Waste Tip: If you find yourself with just a half cup of mix left and it’s getting close to its "use by" date, use it as a thickener for stews or as a quick breading for chicken cutlets. It adds a lovely buttery crunch that plain flour just can't match.
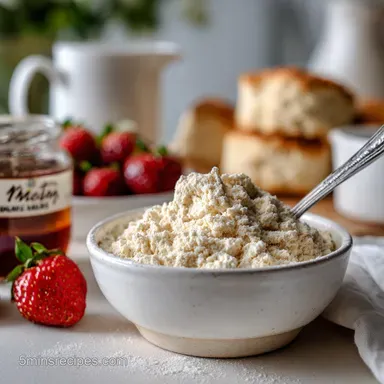
Ideas To Use Your Mix
Now that you have your jar ready to go, what are you going to make first? The most common use is the 1 cup bisquick substitute rule basically, any recipe calling for the boxed stuff can use this 1:1.
For the Classic Fluffy Pancake, I usually mix 2 cups of this mix with 1 cup of milk and 2 eggs. It’s simple, fast, and the kids love it. If you want to go the extra mile, throw in a handful of blueberries or some dark chocolate chips.
The heavy butter content in our homemade version means the edges get that amazing crispy lace texture that you just don't get with the commercial stuff.
If you’re in a real rush, try the 2 Ingredient Emergency Biscuit. Just mix 2 cups of the mix with about 2/3 cup of heavy cream. Drop them by the spoonful onto a baking sheet and bake at 450°F for about 10 minutes.
They are ridiculously rich and save me on those nights when I realize I forgot to buy bread for dinner.
Honestly, having this mix on hand has changed my morning routine. I'm no longer measuring four different white powders while my eyes are half closed. I just scoop, stir, and sizzle. It’s the ultimate gift to your future, busy self.
Give it a shot this weekend you’ll be so glad you did when Monday rolls around!

Critically High in Sodium
2807 mg mg of sodium per serving (122% % of daily value)
The American Heart Association recommends limiting sodium intake to no more than 2,300mg per day for most adults.
Tips to Reduce Sodium in Your Recipe
-
Reduce Added Salt-25%
The recipe calls for 1 tbsp of fine sea salt. Reduce this by half or even eliminate it completely. You can always add a pinch at the end if needed. This will significantly lower the sodium content, as it is a major source.
-
Use Unsalted Butter-15%
Ensure you're using truly unsalted butter. Even slightly salted butter contributes unnecessary sodium. Double check the label to verify!
-
Reduce Baking Powder-5%
Baking powder contains some sodium. While essential for the recipe, slightly reducing the amount from 3 tbsp to 2.5 tbsp could offer a small reduction without drastically impacting the final result. This is a minor adjustment.
-
Enhance with Herbs & Spices
Experiment with sodium free herbs and spices like black pepper, garlic powder, onion powder, paprika, or dried herbs (such as rosemary or thyme) to boost flavor. This won't reduce sodium, but it will enhance the flavor profile to compensate for less salt.
Recipe FAQs
What can I use if I don't have Bisquick?
Make your own! Homemade Bisquick mix is a simple blend of flour, baking powder, salt, and cold butter, offering superior flavor and texture. It’s perfect for pancakes, biscuits, and waffles, providing a convenient pantry staple.
How do you make homemade biscuit mix?
Combine dry ingredients and cut in cold butter. Whisk together all-purpose flour, baking powder, and fine sea salt. Then, use a pastry blender or your fingers to cut in cold, cubed unsalted butter until the mixture resembles coarse crumbs with some pea-sized pieces.
Is Bisquick just flour and baking powder?
No, it's more than just flour and baking powder. While those are key components, original Bisquick also contains leavening agents, salt, and shortening or fat, which contribute to its unique texture and flavor.
What is in original Bisquick mix?
Original Bisquick contains flour, leavening agents, and fat. Specific ingredients typically include enriched flour, corn starch, dextrose, palm oil, baking soda, salt, and monocalcium phosphate.
Can I use a homemade biscuit mix for waffles?
Yes, absolutely! Your homemade biscuit mix is perfect for waffles, offering a tender and slightly crisp result. For a delicious batch, combine 2 cups of your homemade mix with 1 cup of milk and 2 eggs, then cook in a preheated waffle iron.
How long does homemade Bisquick mix last?
In the refrigerator, it lasts up to 3 months. Because it uses real butter, it needs to be kept cold to maintain freshness and prevent the fat from going rancid. For longer storage, it can be frozen for up to 6 months.
Can I make savory biscuits with homemade mix?
Yes, savory biscuits are a fantastic variation. For herb biscuits, add 2 tablespoons of dried parsley, 1 teaspoon of garlic powder, and a half cup of dried parmesan to 2 cups of your homemade mix before adding liquid. This is a great addition to hearty dishes, similar to how you might top a stew.
Homemade Bisquick Mix 2
Ingredients:
Instructions:
Nutrition Facts:
| Calories | 729 calories |
|---|---|
| Protein | 13 g |
| Fat | 32 g |
| Carbs | 95 g |
| Fiber | 3 g |
| Sugar | 0.3 g |
| Sodium | 2807 mg |
