Lemon Pepper Chicken Recipe: Golden and Zesty
- Time: 5 min active + 10 min cook = Total 15 minutes
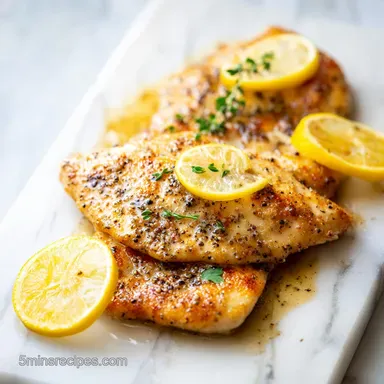
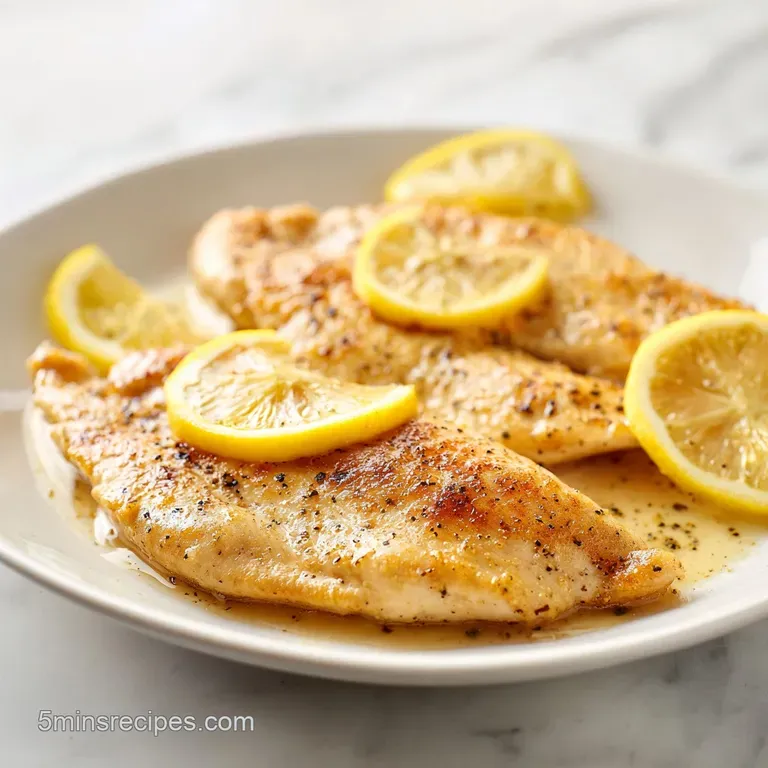
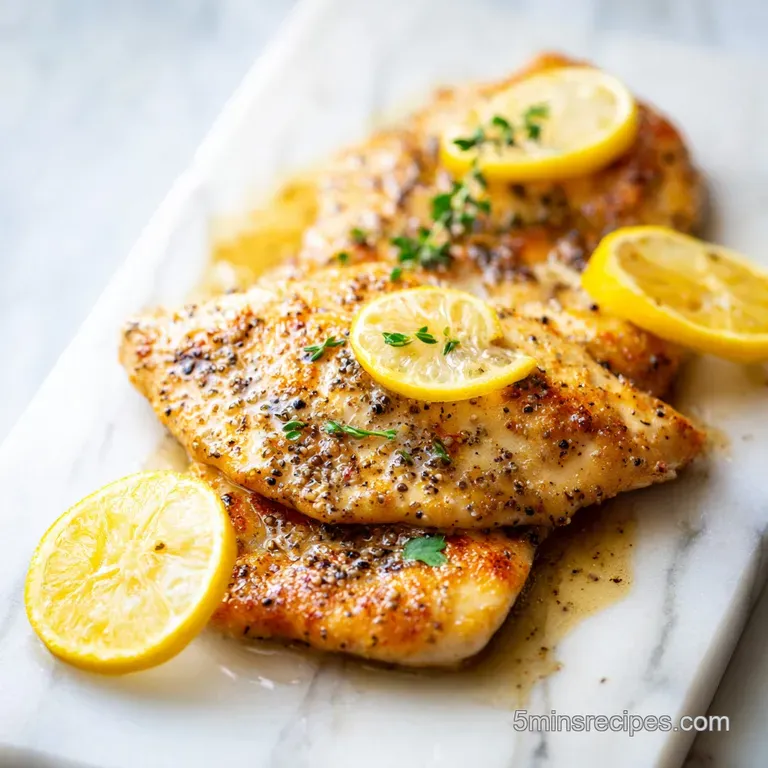
- Flavor/Texture Hook: Tangy, buttery glaze with a mahogany colored sear
- Perfect for: Busy weeknights or low effort date nights
The smell of bubbling butter and toasted black pepper hitting a hot pan is enough to wake up anyone. It's that specific, sharp aroma that cuts through the air, reminding me of those classic American diners where lemon pepper wings first became a cult favorite.
In a lot of soul food traditions, the balance of acid and heat is everything, and this dish brings that vibe to a simple chicken breast.
I remember trying to make this as a "fancy" meal once, but I overthought it. I tried marinating the meat for twelve hours, which actually made the texture a bit mushy. I learned the hard way that for a quick searing dish, simplicity wins. You don't need a long soak when you have the right sear and a velvety pan sauce.
That's where this lemon pepper chicken recipe comes in. We're focusing on speed and a heavy hitting flavor profile. You'll get a bright, citrusy punch balanced by the richness of unsalted butter, all wrapped in a thin, crispy coating.
Trust me, once you see that mahogany crust form in the pan, you'll never go back to plain grilled breasts.
Nailing Your Lemon Pepper Chicken Recipe
To get this right, you need to focus on the surface of the meat. If the chicken is wet, it will steam instead of sear. I always use a paper towel to pat the meat bone dry before it even touches the flour. This ensures the flour sticks in a thin, even layer rather than clumping into a paste.
The heat management is the second big secret. You want your olive oil shimmering - almost smoking - before the chicken hits the pan. This creates an immediate sizzle that locks in the texture.
If the pan is too cool, the chicken will slide around and lose those precious juices, leaving you with something rubbery instead of succulent.
Finally, the pan sauce is where the magic happens. We aren't just pouring liquid in; we're deglazing. Those brown bits stuck to the bottom of the pan are concentrated flavor. By scraping them up with the chicken broth and lemon juice, you're building a complex glaze that ties the whole dish together.
The Logic Behind the Method
- Starch Shield: The flour creates a physical barrier that protects the meat from the direct heat, allowing it to brown without drying out.
- Fat Emulsion: Butter and lemon juice combine to create a thick, velvety sauce that coats the chicken instead of running off.
- Acid Tenderizing: Adding fresh lemon juice at the end provides a bright contrast to the heavy butter and cuts through the richness.
- Temperature Spike: High initial heat triggers the browning process quickly, ensuring the inside stays juicy while the outside is crisp.
| Element | Fresh Method | Shortcut Method | Impact |
|---|---|---|---|
| Lemon | Fresh Zest & Juice | Bottled Lemon Juice | Fresh is brighter; bottled is more acidic/bitter |
| Garlic | Freshly Minced | Garlic Powder | Fresh adds aromatic depth; powder is one note |
| Seasoning | Custom Mix | store-bought Blend | Custom lets you control salt; blends are faster |
Essential Ingredient Breakdown
Understanding how each part of this dish behaves helps you make smarter choices in the kitchen. For example, using the right flour ensures your crust doesn't peel off the meat during the sear.
| Ingredient | Science Role | Pro Secret |
|---|---|---|
| All Purpose Flour | Starch Binder | Shake off every bit of excess to avoid "cakey" crust |
| Unsalted Butter | Emulsifier | Use cold butter at the end for a glossier sauce |
| Lemon Pepper Seasoning | Flavor Base | Check for salt content first so you don't over season |
| Chicken Broth | Deglazing Agent | Use low sodium to keep the flavor balanced |
Must Have Kitchen Tools
You don't need a professional kitchen for this, but a few specific tools make the process faster. A 12 inch stainless steel or cast iron skillet is non negotiable here. Non stick pans are okay, but they don't develop the "fond" (those brown bits) nearly as well, which means your sauce will be thinner and less savory.
I also suggest using a digital meat thermometer. It's the only way to be 100% sure your chicken is safe without overcooking it into a piece of cardboard. According to the USDA Food Safety guidelines, chicken must reach 165°F to be safe, and a thermometer helps you pull it at exactly that moment.
For the prep, a shallow bowl or a zip top bag works best for dredging. The bag method is great if you hate cleaning extra dishes, as you can just shake the chicken inside with the flour mixture.
The step-by-step Process
Right then, let's get into the actual cooking. Keep your ingredients prepped and ready next to the stove so you aren't scrambling while the oil is hot.
Phase 1: The Prep & Season
- Pat the chicken dry with paper towels. Note: Moisture is the enemy of a good sear.
- Mix the flour, lemon pepper seasoning, and salt in a shallow bowl.
- Dredge each chicken piece in the flour mixture, shaking off any excess until only a thin veil remains.
Phase 2: The over High heat Sear
- Heat olive oil in a 12 inch skillet over medium high heat until shimmering.
- Sear chicken for 3-5 minutes per side until a mahogany colored crust forms and the internal temperature hits 165°F (74°C).
- Remove chicken to a plate and let it rest for a few minutes.
Phase 3: The Butter Lemon Glaze
- Lower heat to medium and melt butter in the same pan, scraping up the brown bits.
- Stir in minced garlic for 30 seconds until fragrant and golden.
- Pour in chicken broth and lemon juice, simmering for 2 minutes until the liquid reduces by half.
- Return chicken to the pan, spooning the sauce over the top for 1 minute, then garnish with lemon zest and chopped parsley.
Fixing Common Cooking Issues
Even with a simple recipe, things can go sideways. Usually, it's a matter of temperature or timing. If your sauce is too thin, you probably didn't let the broth reduce enough before adding the chicken back in.
Troubleshooting Common Issues
| Issue | Solution |
|---|---|
| Why Your Chicken Is Rubbery | This usually happens because of "crowding the pan." If you put too many pieces of chicken in at once, the pan temperature drops, and the meat releases moisture. Instead of searing, it boils in its own |
| Why Your Sauce Separates | If the sauce looks oily or "broken," the heat was likely too high when you added the butter and lemon juice. To fix this, whisk in a teaspoon of cold water or a tiny knob of cold butter off the heat t |
| Why The Crust Is Soggy | Sogginess happens if you let the chicken sit in the sauce for too long. The goal is to glaze the meat, not simmer it in the liquid. Spoon the sauce over the top and serve immediately to keep that shat |
Common Mistakes Checklist
- ✓ Pat chicken dry before dredging
- ✓ Use a shimmering oil, not lukewarm
- ✓ Don't overcrowd the pan
- ✓ Reduce sauce by half before adding meat
- ✓ Pull chicken exactly at 165°F
Fun Flavor Variations
If you're feeling adventurous, this base can be tweaked for different vibes. For a creamy lemon pepper chicken recipe, stir in two tablespoons of heavy cream or a dollop of mascarpone right before returning the chicken to the pan.
This creates a velvety, restaurant style sauce that pairs great with pasta.
If you want a crispy lemon pepper chicken recipe using an air fryer, skip the butter sauce. Toss the dredged chicken in a light spray of oil and air fry at 375°F for about 12-15 minutes, flipping halfway.
You'll get a different kind of crunch, but it's still punchy.
For those avoiding gluten, you can swap the all purpose flour for almond flour. As noted in many keto guides, almond flour provides a moisture rich but denser crumb than AP flour. It browns faster, so keep a close eye on the heat to avoid burning. If you're looking for other quick proteins, my homemade teriyaki chicken is another record time winner for dinner.
Quick Choice Guide
- Want it Creamy? → Add 2 tbsp heavy cream to the sauce.
- Want it Healthier? → Swap butter for extra olive oil.
- Want it Spicy? → Add a pinch of cayenne to the flour.
Storage and Waste Tips
Leftovers keep well in an airtight container in the fridge for 3-4 days. When reheating, avoid the microwave if you can, as it will make the crust rubbery. Instead, toss the chicken in a hot skillet for 2 minutes over medium heat to revive the crispiness.
For the freezer, this dish lasts about 2 months. I recommend freezing the chicken and sauce separately. Freeze the sauce in a small silicone mold and the chicken in a freezer bag. Reheat the sauce in a small pot and the chicken in the oven at 350°F (180°C).
To keep things zero waste, don't toss your lemon hulls. After you zest and juice them, you can simmer the leftover rinds in a pot of water with a cinnamon stick for a natural stovetop potpourri. Also, any leftover flour dredge should be discarded, as it has touched raw meat and cannot be reused.
Perfect Side Dish Pairings
Since this dish is quite rich and zesty, you want sides that can soak up the extra butter sauce. A bed of fluffy jasmine rice or a pile of garlic mashed potatoes is the classic move. The starch balances the acidity of the lemon perfectly.
For something lighter, sautéed asparagus or roasted Brussels sprouts work a treat. The charred, earthy flavor of the vegetables cuts through the butter glaze. If you're serving this as part of a bigger spread, a light homemade tartar sauce can actually serve as a surprising, tangy dipping sauce for the crispier edges of the chicken.
If you're hosting a crowd, I suggest prepping the flour dredge in advance and keeping it in a sealed container. You can sear the chicken in batches and keep them warm in a low oven (200°F) while you finish the sauce in one big pan at the end.
This ensures everyone gets a hot, velvety meal at the same time.
Recipe FAQs
What do I need for Lemon Pepper Chicken?
Chicken breasts, lemon pepper seasoning, and flour. You also need olive oil, butter, garlic, chicken broth, fresh lemon juice, zest, and parsley for the sauce.
What are the three ingredients in lemon chicken?
Lemon, pepper, and chicken. These three form the core flavor profile, though this recipe uses garlic and butter to create a richer pan sauce.
What is the number one lemon pepper seasoning?
A blend of dried lemon peel, coarse black pepper, and salt. This combination provides the essential zing and heat required for the flour dredge.
What spices enhance the flavor of lemon chicken?
Garlic and fresh parsley. Minced garlic adds aromatic depth to the broth reduction, while chopped parsley provides a bright, fresh finish.
Why is my chicken rubbery instead of seared?
You likely crowded the pan. Adding too many pieces at once drops the oil temperature, causing the meat to boil in its own juices rather than searing.
How to reheat leftovers without making them soggy?
Toss the chicken in a hot skillet for 2 minutes over medium heat. Avoid the microwave, as it makes the flour crust rubbery and soft.
What side dishes pair best with this recipe?
Pasta or steamed vegetables. If you enjoyed the buttery pan sauce technique here, try it again with our garlic parmesan sauce for a different flavor profile.
Lemon Pepper Chicken Breast