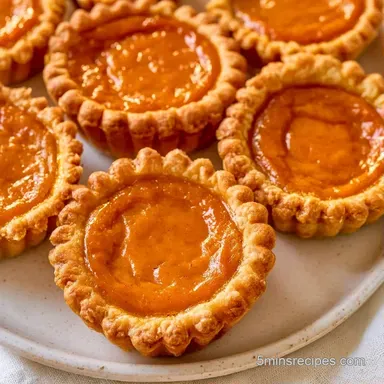
Effortless Mini Pumpkin Pies
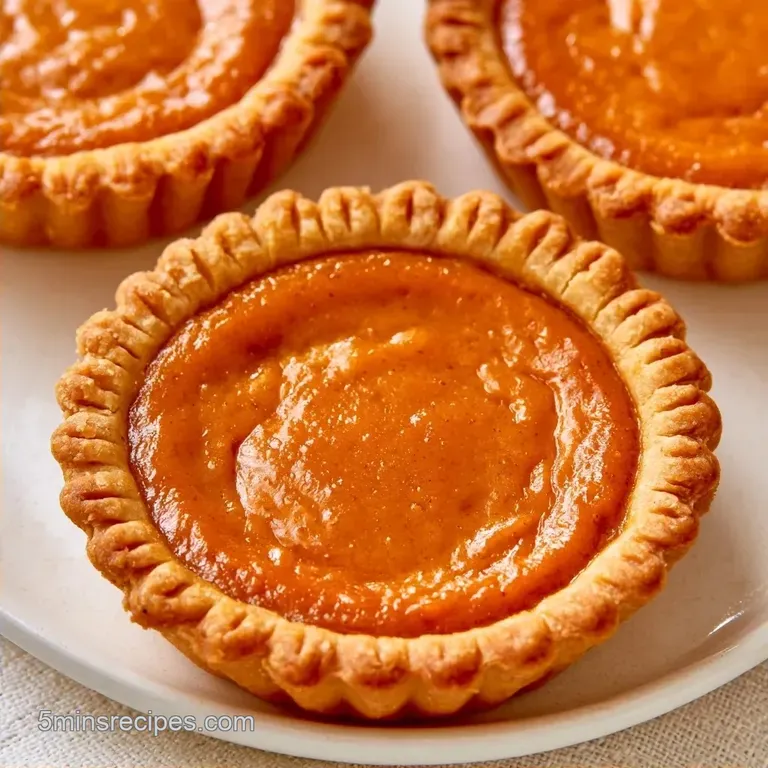
- Time: 30 min active + 30 min bake
- Taste & Texture: Buttery, crisp crust with a rich, spiced center
- Perfect for: Holiday parties or a quick autumn treat
The aroma of toasted butter and cinnamon wafting from the oven is my favorite signal that November has arrived. There is something about that scent that makes the entire house feel cozy, even when a chilly draft slips through the window.
I used to bake traditional full sized pies, but the slicing process always frustrated me. One piece would be massive, another a mere sliver, and the crust typically crumbled into a mess on the plate.
That is why I shifted to these miniature versions. They are far easier to handle, and you never have to worry about the center sagging as you lift a slice. These Mini Pumpkin Pies deliver that same nostalgic experience in a portion that feels just right.
You can look forward to a crust that snaps and a filling that feels substantial. The process is straightforward, and you don't need professional equipment to achieve great results. Now, let's dive into how to make these.
The Trick Behind the Texture
Condensed Milk: This ingredient replaces both the sugar and some of the liquid, which prevents the custard from becoming watery or weeping.
Muffin Tin Walls: Using a tin instead of pre made shells allows the pastry to climb the sides, creating a thicker, more supportive base.
If you're into the science of bakes, Serious Eats' testing shows that chilling the dough before baking prevents the crust from shrinking down the sides of the pan. This keeps your Mini Pumpkin Pies looking neat instead of like little craters.
Recipe Specs
When you're planning your baking day, it helps to know exactly where the time goes. Since we're using premade crust, the "work" is mostly assembly.
| Method | Heat Source | Texture | Result |
|---|---|---|---|
| Oven | 350°F Rack | Set & Golden | Traditional pie feel |
| Stovetop | Custard Pot | Soft & Creamy | More like a pudding |
For these, the oven is the only way to go. You need that dry heat to crisp up the pastry and set the eggs in the filling.
Precision Checkpoints:
- Crust thickness: 1/8 inch
- Filling level: 3/4 of the way up
- Oven temp: 350°F (175°C)
Gathering Your Essentials
I've found that using a high-quality pumpkin puree makes a huge difference. Don't accidentally grab pumpkin pie filling, which already has sugar and spices in it. You want the plain stuff so you can control the cinnamon and ginger levels yourself.
The eggs act as the binder here. They react with the condensed milk to create a stable structure that doesn't collapse when it cools. Trust me on this, don't try to use egg whites alone or you'll end up with a souffle instead of a pie.
Decision Shortcut:
- For a firmer set: add one extra egg yolk.
- For a spicier kick: increase the ginger to 3/4 tsp.
- For a softer crust: roll the dough slightly thinner.
Ingredients & Substitutes
Here is what you'll need for 12 mini pies.
- 1 package (14.1 oz / 400g) refrigerated premade pie crusts Why this? Saves an hour of rubbing butter into flour.
- 1 tbsp (15g) melted butter Why this? Helps grease the tin and adds flavor.
- 1 can (15 oz / 425g) pumpkin puree Why this? Provides the base body and color.
- 1 can (14 oz / 397g) sweetened condensed milk Why this? Adds sweetness and a silky texture.
- 2 large (100g) eggs Why this? Sets the custard during baking.
- 1 tsp (2g) ground cinnamon Why this? Classic autumn warmth.
- ½ tsp (1g) ground ginger Why this? Adds a sharp, bright note.
- ¼ tsp (0.5g) ground cloves Why this? Deep, aromatic spice.
- ½ tsp (3g) salt Why this? Balances the sugar from the milk.
Substitution Table
| Original Ingredient | Substitute | Why It Works |
|---|---|---|
| Premade Crust | Puff Pastry | Flakier and lighter. Note: Rises more, may overflow |
| Condensed Milk | Evaporated Milk + 1/2 cup Sugar | Similar consistency. Note: Less rich than condensed |
| Ground Cloves | Allspice | Similar warm profile. Note: Slightly milder flavor |
Equipment Needed
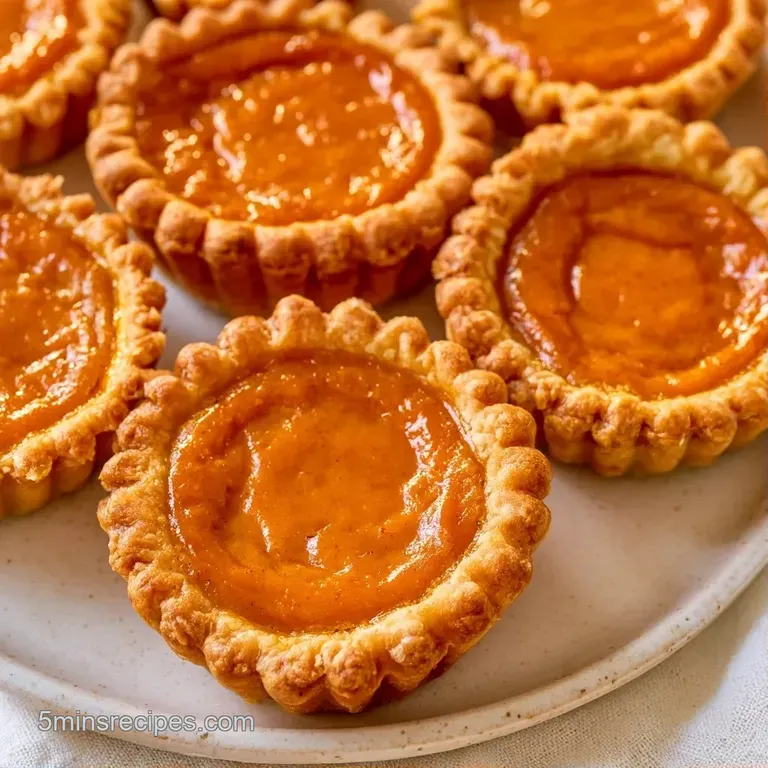
While you don't need fancy equipment, having the right tools makes things easier. I use a standard 12-cup muffin tin; if yours is deeper, your pies will simply be taller.
A 3 inch circular cutter is ideal, but a wide mouthed drinking glass is a great alternative. Just make sure it's slightly larger than the muffin cup's diameter so the dough can properly climb the sides.
You will also want a whisk and a spacious mixing bowl. A hand mixer is fine, but a whisk is plenty since you aren't whipping any heavy cream.
From Prep to Plate
Time to get these Mini Pumpkin Pies into the oven.
Setting Up the Crusts
- On a surface dusted with flour, roll out the store-bought dough to a thickness of 1/8 inch. Note: If the dough is too thick, the crust may taste doughy.
- Cut 12 circles using a 3 inch round cutter.
- Carefully press each circle into the muffin cups. Use your thumbs to push the pastry up the sides to ensure there are no gaps at the bottom.
- Chill the prepared tin in the refrigerator. Note: This keeps the fat in the crust from melting too soon, which helps prevent shrinking.
Mixing the Filling
- Combine the pumpkin puree, sweetened condensed milk, and eggs in a bowl, whisking until the texture is perfectly smooth.
- Stir in the salt, cloves, ginger, and cinnamon. Whisk until the deep orange color is consistent throughout.
- Divide the filling among the crusts, filling them about 3/4 of the way up. Note: Leaving this space prevents the mixture from bubbling over.
- Set your oven temperature to 350°F (175°C).
- Bake on the center rack for 25–30 minutes until the filling is set and the edges are golden brown.
Chef's Note: To check for doneness, give the pan a light shake. The outer edges should be firm, while the center retains a slight, jelly like wobble. It will solidify as it cools.
Troubleshooting Guide
Even straightforward recipes can have their pitfalls, typically stemming from incorrect timing or temperatures.
Avoiding Soggy Bottoms
A soggy base usually occurs if the crust wasn't sealed properly or the filling is too moist. To stop this, apply a small amount of melted butter to the raw crust's bottom before adding the filling. This fat barrier prevents moisture from penetrating the dough.
Preventing Cracked Tops
Cracks are often a sign of overbaking, as the eggs in the custard contract too tightly when overheated. Remove them from the heat as soon as the center has a slight wobble. Since USDA guidelines state that egg-based custards are safe at 160°F, there's no need to overbake them for safety.
Stopping Overflows
If the filling leaks over the edges, you likely overfilled the shells. Because condensed milk expands during heating, it's best to follow the 3/4 rule.
| Problem | Fix |
|---|---|
| Soggy Bottom | Brush crust with melted butter first |
| Cracked Tops | Pull from oven 2-3 minutes earlier |
| Filling Overflow | Fill only 3/4 of the way up |
What to Serve This With
Because these are so rich, you'll want a topping that balances the sweetness. Unsweetened whipped cream is a timeless option. I personally love adding a dash of freshly grated nutmeg to the cream to enhance the aroma.
When adding these to a dessert platter, lean toward tart pairings. A handful of fresh raspberries or a slice of Granny Smith apple provides a nice contrast to the heavy pumpkin flavor.
To find more autumn themed sweets for your table, my Healthy Pumpkin Bread is a wonderful choice for anyone seeking a less sugary treat.
Freezing and Reheating Guide
Since these are small, they're perfect for meal prepping. You can prepare a large batch to keep ready for whenever a craving hits.
Refrigeration Keep your Mini Pumpkin Pies in a single layer in a container. Avoid stacking them, as moisture from the top pies can soften the crusts below. They stay fresh in the fridge for about 3 to 4 days.
Freezing These can be frozen once they have cooled completely. Arrange them on a tray and flash freeze for 60 minutes before transferring them into a freezer bag. They keep for about 2 months.
Reheating For the best texture, let them thaw in the refrigerator overnight. If you prefer them warm, pop them in a 300°F oven for about 5-8 minutes. Avoid using the microwave, as it can make the crust rubbery.
Variations & Substitutions
Depending on what you have in your pantry, you can tweak this recipe to change the vibe.
Using Graham Cracker Crust
If you don't want to roll out dough, you can make Mini Pumpkin Pies with graham cracker crust. Just mix graham cracker crumbs with melted butter and sugar, press them into the muffin tin, and bake for 5 minutes before adding the filling. It's a bit more like a cheesecake base. For a similar no bake feel, you might enjoy my NoBake Pumpkin Cheesecake.
Swapping for Puff Pastry
For a fancier look, use puff pastry. It's much airier than standard pie crust. Just roll it thin and cut your circles. Keep in mind that puff pastry rises a lot, so you might need to reduce the filling slightly so it doesn't overflow.
Creating a dairy-free Version
You can use coconut condensed milk instead of the dairy version. It adds a slight coconut flavor, but it works well with the pumpkin and cinnamon. Just make sure to shake the can well before measuring, as the coconut fat tends to separate.
Adding a Cream Cheese Swirl
For a bit of contrast, whisk together 2 oz of softened cream cheese with a teaspoon of maple syrup. Drop small dollops of this mixture on top of the pumpkin filling and swirl it in with a toothpick before baking. This adds a tangy layer that breaks up the richness.
Recipe FAQs
What is the bake time for these mini pies?
Bake for 25 30 minutes. Remove the tin from the center rack once the edges are golden brown and the filling is set.
How to adjust baking time for mini pies?
Begin checking for doneness at the 20-minute mark. A toothpick poked into the middle should emerge clean or with only a few moist crumbs attached.
Do mini pumpkin pies need to be refrigerated?
Yes, keep them chilled. Since the filling contains eggs and sweetened condensed milk, they must be stored in the cold to stay safe.
Which variations work best for mini pumpkin pies?
Add extra ginger or cinnamon to the filling for more warmth. If you enjoy combining autumn flavors, see how we use pumpkin in our chocolate chip pumpkin bread.
Is it true that you must blind bake the crust first?
Surprisingly, no. The short bake time and filling ratio allow the premade crust to cook through perfectly without a pre-bake step.
Why did my mini pies shrink?
The dough likely became too warm before baking. Keep the prepared crusts in the fridge until the moment you pour in the filling to lock the shape.
Can a different pan be used if muffin cups are missing?
Use a mini tart pan or a standard cupcake tray. Brush the sides with melted butter to ensure the crust releases easily after baking.
Does the filling require heavy whisking for smoothness?
No, and here's why. The sweetened condensed milk creates a naturally stable, creamy base that incorporates the pumpkin puree with minimal effort.
Mini Pumpkin Pies