Guilt-Free Pumpkin Whoopie Pies
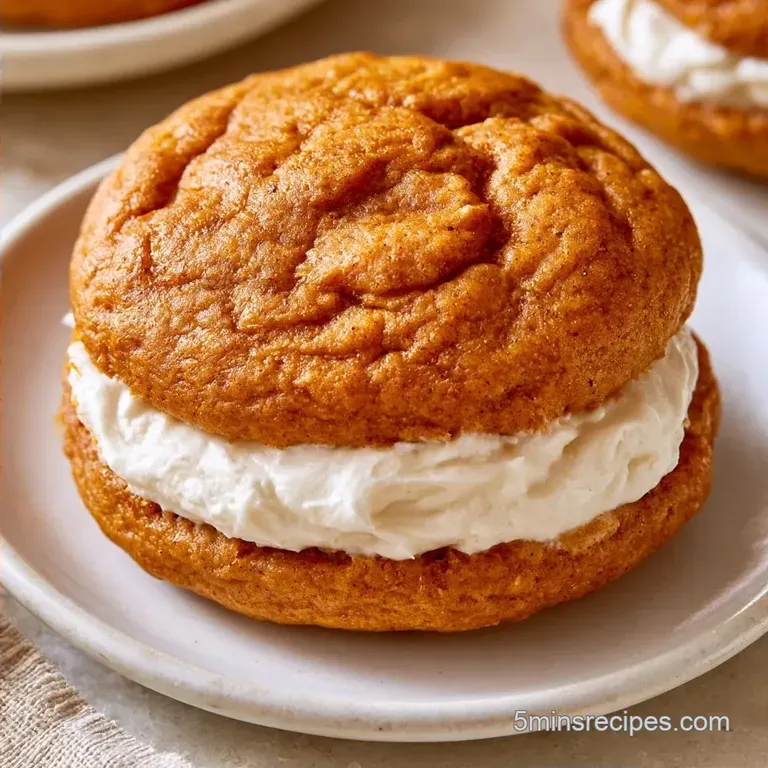
- Time: 20 min active + 12 min baking
- Flavor/Texture Hook: Spiced, pillowy cakes with a glossy filling
- Perfect for: Autumn parties or a cozy weekend treat
The smell of cinnamon and toasted nutmeg hitting a hot oven is the best part of autumn. But there is a problem most people hit with pumpkin treats: the "dry sponge" effect. You bake them, and instead of a soft cake, you get a dense, rubbery disc that feels like it was made in a lab.
I've dealt with that a lot, usually because too much pumpkin purée kills the rise.
My fix is a specific balance of acidity and fat. By swapping some oil for Greek yogurt, you get a crumb that actually bounces back. It makes these Pumpkin Whoopie Pies feel light rather than heavy, while keeping that rich, spiced flavor we all want.
You can expect a dessert that tastes like a high end bakery item but doesn't require a professional kitchen. These Pumpkin Whoopie Pies are soft, a bit tangy from the cream cheese, and have a deep orange color that looks great on a platter.
Why This Method Works
Yogurt Acidity: The lactic acid in Greek yogurt reacts with baking soda to create carbon dioxide bubbles, which gives the cakes a lift.
Sugar Choice: Coconut sugar adds a caramel note that pairs better with pumpkin than plain white sugar.
Fat Balance: Using light olive oil instead of butter keeps the cakes moist for days without making them feel greasy.
Since we are keeping things light, you might also like my healthy pumpkin bread for a less sweet snack.
| Source | Time | Texture | Best For |
|---|---|---|---|
| Fresh Purée | More prep | Denser crumb | Bold, earthy flavor |
| Canned Purée | Instant | Lighter feel | Speed and consistency |
The choice between fresh and canned purée mostly affects how much water is in the batter. Canned purée is standardized, which helps the cakes stay consistent.
What Each Ingredient Does
| Ingredient | What It Does | Best Swap |
|---|---|---|
| Greek Yogurt | Adds lift and moisture | Sour cream |
| Coconut Sugar | Deep sweetness and color | Brown sugar |
| Pumpkin Purée | Core flavor and bulk | Butternut squash purée |
| low-fat Cream Cheese | Tangy structure for filling | Neufchâtel cheese |
A quick tip: if you use a different flour, keep in mind that gluten-free blends often need an extra 1/2 teaspoon of baking powder to get the same height.
The Technical Details
This recipe is designed for a standard home oven. We use metric weights for accuracy because a "cup" of flour can vary by 30 grams depending on how you scoop it.
For the best results, make sure your cream cheese and butter are truly softened. If they are too cold, the filling will have tiny lumps that won't disappear, no matter how much you whip them.
Must Have Tools
You don't need fancy gear, but a few things make this a lot easier. A 2 tablespoon cookie scoop is a lifesaver here. It ensures every cake is the same size, so they all finish baking at the same time.
I also suggest using parchment paper on your baking sheets. Pumpkin batters can be sticky, and parchment prevents them from clinging to the pan. An electric hand mixer is needed for the filling to get it light and airy.
How To Bake Them

Phase 1: Prepping the Batter
- Combine the all purpose flour, baking soda, pumpkin pie spice, and salt in a medium bowl using a sifter. Note: Sifting ensures the spices are lump free.
- In a large bowl, whisk the coconut sugar and egg until the mixture turns pale.
- Stir in the pumpkin purée, Greek yogurt, light olive oil, and vanilla extract. Mix until the batter is glossy and smooth.
- Carefully combine the dry mixture with the wet ingredients. Stop mixing as soon as the flour is incorporated to prevent the cakes from becoming tough.
Phase 2: Baking the Cakes
- Use a 2 tablespoon scoop to place portions of batter onto a parchment lined sheet, leaving 2 inches of space between each.
- Bake at 180°C (350°F) for 12 minutes until the tops spring back when pressed. The aroma of autumn spices will fill your kitchen.
- Transfer the cakes to a wire rack to cool completely. Note: If the cakes are still warm, your frosting will melt.
Phase 3: Whipping and Assembling
- Use a mixer to beat the softened low-fat cream cheese and unsalted butter until smooth.
- Gradually mix in the powdered sugar, vanilla extract, and lemon juice. Beat until the filling is light and fluffy.
- Spoon or pipe a generous amount of filling onto the flat side of a cooled cake. Press another cake on top to finish your Pumpkin Whoopie Pies.
Now you have a fresh batch of Homemade Pumpkin Whoopie Pies ready to enjoy. Believe me, waiting for them to cool is the toughest part, but it's essential for keeping the filling stable.
Fixing Common Issues
A frequent challenge with Pumpkin Whoopie Pies is achieving the right texture. If they lack height, it often indicates that the baking soda has lost its potency. Make sure your leavening ingredients are fresh.
Another common hurdle is the filling leaking from the sides. This typically occurs if the cream cheese mixture is too warm or if the cakes are overfilled. To ensure they hold their shape, refrigerate the assembled pies for 30 minutes before you serve them.
| Problem | Fix |
|---|---|
| Cakes are too flat | This can result from overmixing the batter or using outdated baking soda. Be quick and gentle when folding. |
| Preventing leaks | Use filling that is slightly chilled and avoid overstuffing; a 1 inch layer is typically sufficient. |
| Batter is too sticky | Moisture levels in pumpkin purée vary. If the mix is too runny, stir in one tablespoon of flour at a time. |
If you enjoy this tangy filling, you might also like my mini pumpkin pies, which feature a similar taste.
Adjusting The Batch Size
To make a half batch, use 1/2 cup Greek yogurt and 1/2 cup oil. Since you cannot easily divide an egg, whisk one and measure out 25 grams of the mixture. Reduce the baking time by approximately 2 minutes and check for doneness early.
When doubling the recipe, avoid doubling the salt and pumpkin pie spice exactly. Use 1.5x the spices to prevent the flavor from becoming too intense. Bake in stages to avoid overcrowding the oven, which can lower the temperature and cause the cakes to spread.
Keeping Them Fresh
Arrange these Pumpkin Whoopie Pies in a single layer inside a container. They will last in the refrigerator for 3 days. Since the cream cheese filling requires chilling for safety, the cakes actually develop a softer, fudgier texture after spending a night in the cold.
These can be frozen for up to 2 months. Wrap each pie separately in parchment paper before tucking them into a freezer bag. To serve, allow them to thaw in the refrigerator overnight.
Avoid waste by using any leftover filling. It works great as a dip for apple slices or as a quick breakfast spread on toast.
Best Ways To Serve
These taste delicious on their own, though rolling the edges of the filling in cinnamon sugar or crushed gingersnaps adds a nice bit of texture. I personally enjoy presenting them on a wooden platter alongside some fresh apple slices.
For gatherings, placing each treat in a miniature cupcake liner is a smart move. This ensures your guests' hands stay clean and gives these Pumpkin Whoopie Pies a polished, professional appearance.
As for drink pairings, a warm cider or a simple latte works perfectly. The acidity of the coffee provides a great balance to the creamy filling.
Fun Flavor Changes
For a unique variation, consider filling your Pumpkin Whoopie Pies with marshmallow. Simply replace the butter and cream cheese with a combination of melted marshmallows and a touch of butter, beating them until they reach stiff peaks.
For a plant based version, combine 1 tbsp ground flaxseed with 3 tbsp water to replace the egg, and opt for a coconut based cream cheese. Keep in mind that vegan cakes are typically denser and may require one additional minute of baking time.
| Original Ingredient | Substitute | Why It Works |
|---|---|---|
| Coconut Sugar | Maple Syrup | Comparable earthy sweetness. Note: Decrease other liquids by 1 tbsp |
| Greek Yogurt | Apple Sauce | Provides moisture and a slight tang. Note: Results in softer, moister cakes |
| low-fat Cream Cheese | Mascarpone | Offers a richer, creamier flavor. Note: Higher in calories |
You can also simplify the process by using a spice cake mix. Just prepare the mix as directed, stirring in 1/4 cup of pumpkin purée to the batter. While this is a quicker method, the homemade batter provides a more complex flavor profile.
Whether you prefer the traditional Amish Pumpkin Whoopie Pies approach or a contemporary version, the secret is achieving the right mix of tang and spice. These Quick Pumpkin Whoopie Pies are a wonderful way to enjoy autumn tastes without a long day in the kitchen.
Just ensure the cakes have cooled entirely before filling for the best results.
Recipe FAQs
What is the filling in whoopie pies made of?
It consists of whipped cream cheese, butter, powdered sugar, vanilla, and lemon juice.
Tip: Use a room temperature base to ensure the frosting is perfectly smooth.
How do I make homemade pumpkin whoopie pies?
Mix dry ingredients, beat wet ingredients with pumpkin and yogurt, fold them together, bake for 12 minutes, and sandwich with cream cheese frosting.
Tip: Use a cookie scoop for uniform sizing so they bake evenly.
Do pumpkin whoopie pies need to be refrigerated?
Yes, because the cream cheese filling requires cold storage for safety.
Tip: Let them sit at room temperature for 20 minutes before eating for a softer texture.
Which ingredient ensures a moist crumb?
Greek yogurt provides the acidity and moisture needed to keep the cakes tender.
Tip: If you enjoyed using yogurt for lift here, the same principle works in my pumpkin muffins.
Can I substitute white sugar?
White sugar works as a replacement but you will lose the deep caramel notes of coconut sugar.
Tip: Measure by weight for the most consistent results.
Is it true that pumpkin cakes always turn out dense?
That's a myth. The right balance of acidity from yogurt and baking soda provides a proper rise.
Tip: Avoid over mixing the batter after adding flour to keep them airy.
Why did my frosting stay flat?
The butter or cream cheese may have been too cold to incorporate enough air during whipping.
Tip: Use an electric hand mixer on high speed for several minutes until light and fluffy.
Guilt Free Pumpkin Whoopie Pies