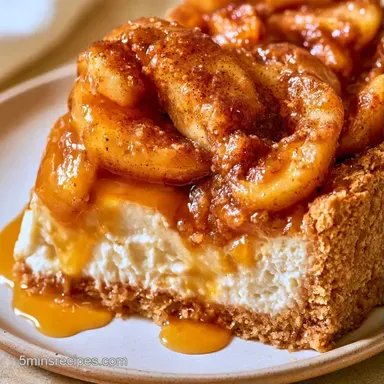
Nobake Apple Dessert: Caramel Apple Lush
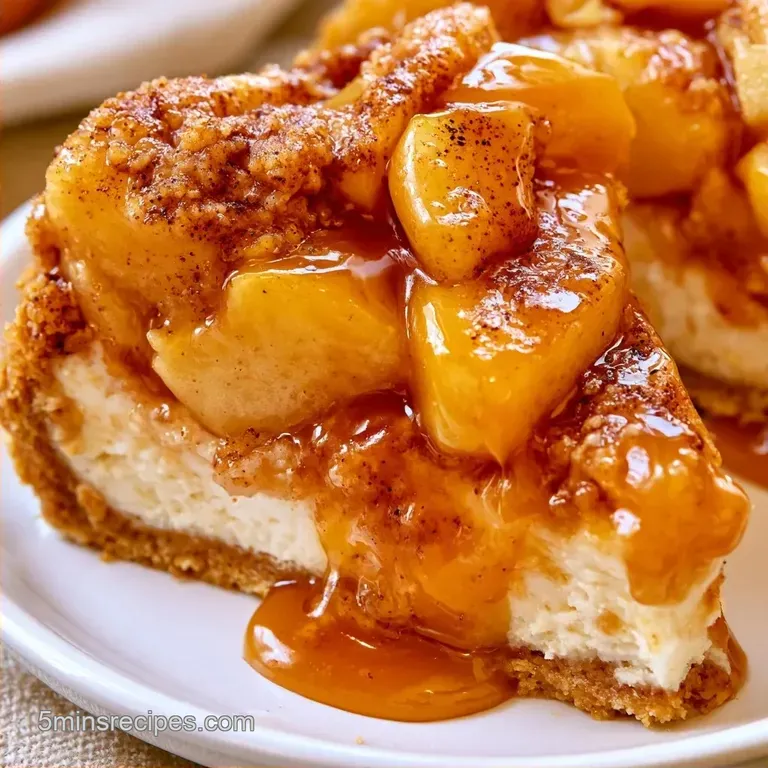
- Time: 20 min active + 4 hrs chilling
- Flavor/Texture Hook: Tangy cream cheese meets spiced apples and a buttery, crisp base
- Perfect for: Last minute potlucks or a small effort family treat
The smell of cinnamon and caramel usually means the oven has been running for hours. But I’ve found a way to get that same vibe without the heat. My first attempt at a no bake treat for a neighborhood party was a disaster.
I rushed the chilling time, and the whole thing turned into a soupy, apple flavored puddle on a platter. It was a humbling moment that taught me that patience is actually an ingredient.
Since then, I’ve tweaked the ratios to make sure this NoBake Apple Dessert actually holds its shape. The goal is a clear contrast between the crunch of the graham crackers and the airiness of the cream. It's a relief to have a dessert that doesn't require checking a timer every five minutes.
You can expect a treat that feels like a cross between a cheesecake and an apple pie. This NoBake Apple Dessert layers flavors from a toasted crust up to a salted caramel finish. It’s simple, but it looks like you spent all afternoon on it.
Why This Recipe Works
Cold Butter: It acts as a glue. Once it chills, it locks the crumbs together so the slice doesn't fall apart.
Soft Cheese: Room temperature cream cheese blends completely with the sugar. This prevents those annoying white lumps in the cream layer.
| Method | Time | Texture | Best For |
|---|---|---|---|
| No Bake | 20m active / 4h chill | Creamy & Crisp | Hot days / Potlucks |
| Baked Pie | 2h total | Flaky & Warm | Holiday dinners |
Ingredient Deep Dive
The magic happens when you balance the heavy fats with the acidity of the apples. Serious Eats' testing shows that adding brown sugar to a graham crust gives it a deeper, toasted flavor than white sugar alone.
| Component | Purpose | Substitute Notes |
|---|---|---|
| Graham Crumbs | Structural Base | Digestive biscuits: Similar crunch, slightly saltier |
| Cream Cheese | Tangy Body | Mascarpone: Richer and sweeter, less tang |
| Apple Filling | Primary Flavor | Fresh sautéed apples: More effort, less syrup |
| Caramel Sauce | Sweet Finish | Maple syrup: Lighter taste, runnier consistency |
Ingredients & Substitutes
For the Base 1.5 cups (180g) graham cracker crumbs Why this? Provides a sturdy, honey flavored crunch 6 tbsp (85g) unsalted butter, melted Why this? Binds the crumbs into a solid crust 2 tbsp (25g) brown sugar, packed Why
This? Adds a hint of molasses Substitute: Coconut oil (melted) for a dairy-free base
For the Cream Layer 8 oz (225g) cream cheese, softened Why this? Creates the thick, cheesecake like middle 0.5 cup (60g) powdered sugar Why this? Dissolves faster than granulated sugar 1 tsp (5ml) vanilla extract Why
This? Rounds out the tang of the cheese 1 cup (240ml) heavy whipping cream, chilled Why this? Adds air and volume to the fillingSubstitute: Greek yogurt (thick) for a tarter, lower fat version
For the Topping 21 oz (600g) apple pie filling Why this? Consistent sweetness and thickness 0.5 tsp (2.5ml) ground cinnamon Why this? Boosts the autumn spice profile 1 cup (240ml) whipped topping, thawed Why this?
Holds its shape better than fresh cream on top 0.25 cup (60ml) salted caramel sauce Why this? Adds a salty contrast to the sweet applesSubstitute: Butterscotch sauce for a deeper, buttery flavor
Equipment Needed
This recipe is straightforward and requires no special equipment. To whip up the cream, a standard electric mixer or a stand mixer will do the trick. I suggest using an offset spatula for the apple layer; it's the best way to achieve a perfectly level surface without disturbing the cream cheese base.
You will also need a 9x9 inch baking pan. For a neat finish, line the pan with parchment paper, ensuring there's an inch of overlap on the sides. This makes it easy to hoist the NoBake Apple Dessert out of the pan before you start slicing.
Step-by-step Instructions
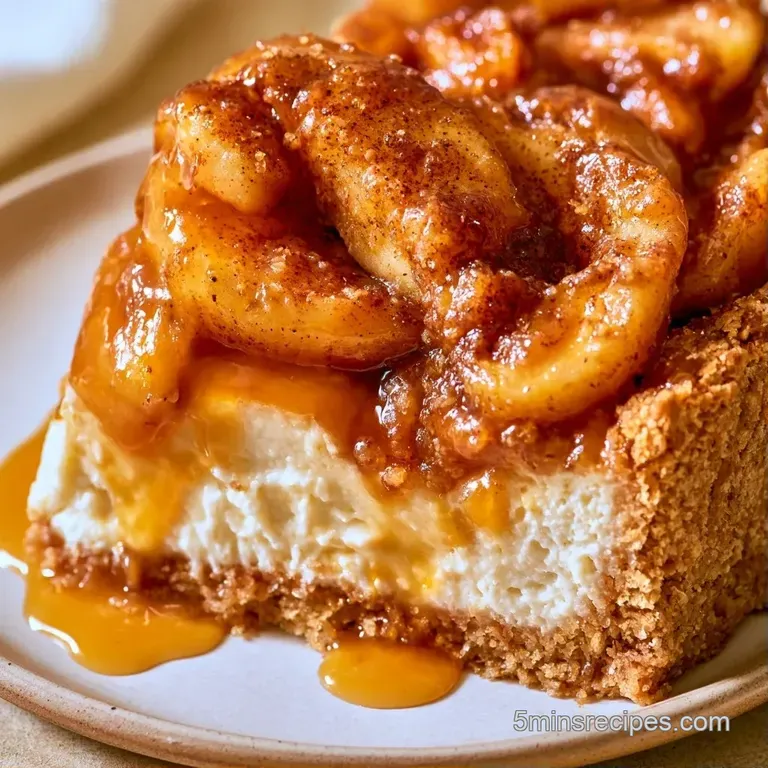
Phase 1: The Foundation 1. Mix graham cracker crumbs, melted butter, and brown sugar in a bowl. Stir until the mixture looks like wet sand. 2. Pour the crumbs into your 9x9 pan. Press firmly into the bottom and slightly up the sides. 3.
Refrigerate for 10 minutes until the butter sets and the crust feels firm.
Phase 2: The Cream Layer 4. Beat the softened cream cheese and powdered sugar in a large bowl. Mix until the texture is smooth and glossy. 5. Stir in the vanilla extract. 6. Whip the chilled heavy cream in a separate cold bowl.
Beat until stiff peaks form (they should stand straight up when you lift the whisk). 7. Fold the whipped cream into the cream cheese mixture using a spatula. Do this gently until no white streaks remain. 8. Spread the mixture evenly over your chilled crust.
Phase 3: The Finishing Touches 9. Mix the cinnamon into your apple pie filling. Pour it over the cream layer and smooth the top with your spatula. 10. Spread the thawed whipped topping over the apples in a level layer. 11. Drizzle the salted caramel sauce over the top in a zigzag pattern. 12.
Refrigerate for at least 4 hours until the edges are firm to the touch.
Fixing Common Issues
Lumpy Cream Cheese
This happens if the cheese was too cold when you started. If you see small lumps, don't panic. You can pop the mixture in the microwave for 5 to 10 seconds, then whisk vigorously before you fold in the whipped cream.
Crumbling Crust
A crust that falls apart usually means there wasn't enough pressure during the pressing phase or not enough butter. Next time, use the bottom of a flat measuring cup to pack the crumbs tightly. For this batch, just chill it longer, which helps the fats harden.
Runny Top Layer
If the apple filling feels too loose, it can seep into the cream layer. To prevent this, make sure your apple filling is chilled before adding it to the NoBake Apple Dessert. If it's already runny, a few extra hours in the fridge usually firms everything up.
Easy Variation Ideas
For a similar orange hued option, my pumpkin bars are always a hit in October. For this apple recipe, you can replace the graham crackers with crushed gingersnaps; the ginger spice complements the apple filling beautifully.
You can also create a NoBake Apple Dessert featuring cream cheese and a touch of lemon. Simply stir one teaspoon of lemon zest into the cream cheese layer to balance the sweetness and make the dessert feel lighter.
For an even more indulgent NoBake Caramel Apple Dessert, try adding a layer of crushed pecans over the crust. This provides a salty, nutty crunch that breaks up the creamy texture.
| Goal | What to change |
|---|---|
| Tangier taste | Add 1 tbsp lemon juice to cheese |
| Thicker crust | Use 7 tbsp melted butter |
| Less sweet | Use 1/4 cup powdered sugar |
Freshness and Storage
Store this dessert in a covered dish in the cooler for up to 4 days. Due to the dairy and the moisture from the apples, it shouldn't be left out on the counter. I advise against freezing this particular NoBake Apple Dessert, as the whipped topping may lose its consistency and turn grainy once thawed.
For more rich treats, take a look at the pumpkin cheesecake I shared. Both of these layered desserts follow the same storage guidelines.
To minimize waste, try stirring any extra apple pie filling into your morning oatmeal or spooning it over vanilla ice cream. Any remaining graham crumbs are perfect for breading fried chicken or creating a crust for a small batch of cheesecakes.
Ways to Serve
To get a clean slice, rinse your blade with hot water and dry it before each cut. This keeps the cream cheese from clinging to the knife and messing up the layers. I suggest adding a dash of extra cinnamon on top for a touch of color.
Since this NoBake Apple Dessert is quite indulgent, it works great with something acidic. Fresh berries or a cup of black coffee can help balance the sweetness. When sharing this at a gathering, cut it into small 2x2 inch squares. This ensures the portions are easy for guests to handle while standing.
Believe me, the salted caramel drizzle is the highlight here be generous with it. The touch of salt really makes the apple flavor pop. While the treat is simple, the layers give it a sophisticated feel.
This NoBake Apple Dessert is a guaranteed hit for those craving a professional bakery taste without any actual baking.
Recipe FAQs
Can I use fresh apples instead of pie filling?
No, stick with the apple pie filling to keep the layers stable. Fresh apples release too much moisture and would make the cream cheese layer soggy.
How to prevent the crust from crumbling?
Press the crumb mixture firmly into the bottom and slightly up the sides of the pan. Chill the crust for 10 minutes before adding toppings to ensure the butter sets properly.
Is it true this dessert can be served right away?
This one's false: You must refrigerate the dessert for at least 4 hours or overnight. This time is necessary for the edges to become firm enough to slice.
What creates the airy texture in the filling?
Gently folding whipped cream into the cream cheese mixture preserves the air bubbles. If you enjoyed mastering this folding technique, see how it works in our pumpkin cheesecakes.
Nobake Apple Dessert