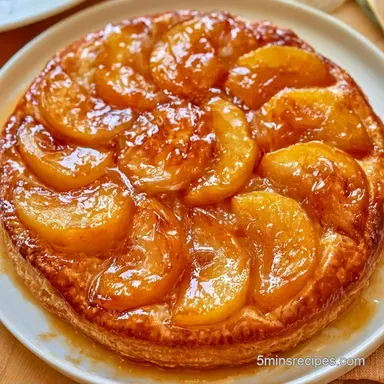
Caramelized Pear Puff Pastry Tarts
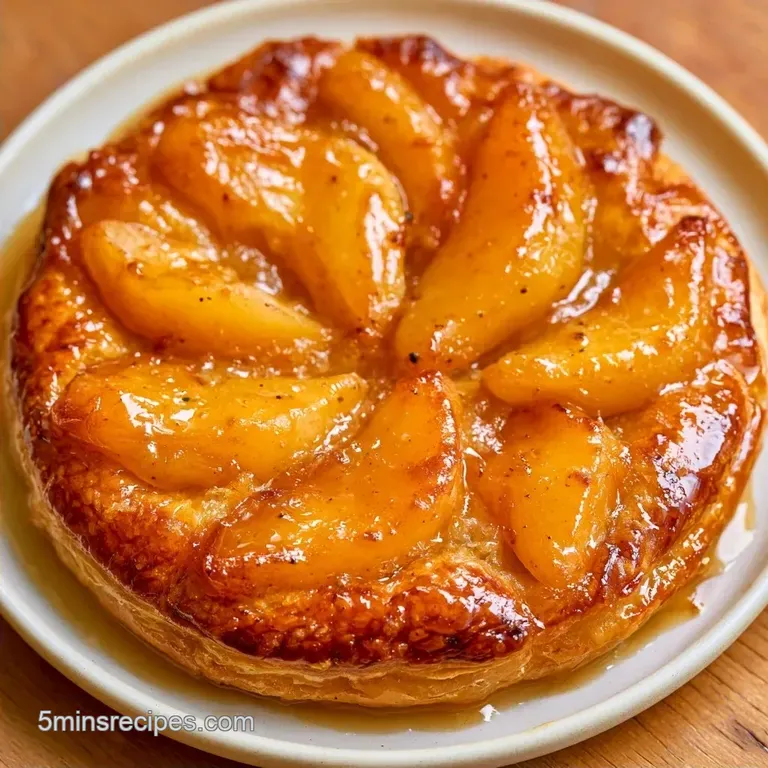
- Time: 10 minutes prep + 35 minutes bake time
- The Appeal: Golden, shattering pastry with mahogany syrup pears
- Perfect for: A rushed morning brunch or an easy dessert
Pear Puff Pastry Tarts Made Easy
The smell of cinnamon and bubbling brown sugar hitting a hot pan is enough to wake up any house. I usually grab Bosc pears for this because they're the real heroes here. Unlike other pears that turn into mush the second they hit heat, Bosc pears stay firm and hold their shape, which is what you need when you're layering them on a delicate pastry.
I've tried using canned pears or softer varieties, but the moisture level is all wrong. You end up with a puddle of juice that ruins the crunch. These Pear Puff Pastry Tarts rely on that specific density to keep the dessert feeling light and airy rather than heavy and wet.
If you're rushing through a busy morning or need a treat that looks like you spent hours on it, this is the one. It's a simple assembly job that uses the oven to do the heavy lifting, leaving you more time to actually enjoy the coffee.
The Trick Behind the Texture
Steam Pockets: The butter layers in the pastry evaporate quickly at 400°F, pushing the dough up into flaky ridges.
Moisture Control: Sautéing the pears first reduces their water content, ensuring the syrup thickens before it ever touches the dough.
| Fresh Pears | Shortcut (Frozen/Canned) | Impact | Savings |
|---|---|---|---|
| Firm, floral taste | Softer, sweeter | Higher risk of soggy crust | Low |
| Requires peeling/coring | Ready to use | Faster prep, less texture | 5-10 mins |
The beauty of this method is that it mimics a bakery style without the need for a rolling pin or a professional kitchen. By using a high temperature, we shock the pastry into rising quickly.
The Building Blocks
What Each Ingredient Does
| Component | Purpose | Substitute Notes |
|---|---|---|
| Bosc Pears | Structure & flavor | Anjou pears: softer, may release more juice |
| Puff Pastry | Crispy base | Homemade: takes hours, uses same logic |
| Brown Sugar | Caramelization | Maple syrup: thinner, alters the syrup's thickness |
| Apricot Preserves | High gloss finish | Peach jam: similar taste, slightly different color |
Ingredients List
- 3 large Bosc pears, peeled, cored, and thinly sliced (approx. 680g)
- 1 tbsp lemon juice Why this? Keeps pears from browning and adds brightness
- 4 tbsp unsalted butter
- 1/3 cup light brown sugar, packed
- 1 tsp ground cinnamon
- 1/4 tsp salt
- 1 sheet frozen all-butter puff pastry, thawed (approx. 480g) Why this? Higher butter content means better flake
- 1 large egg, beaten
- 1 tbsp water
- 2 tbsp apricot preserves
- 1 tsp hot water
Chef's Note: If you can't find Bosc pears, just make sure the pears you buy are still slightly firm to the touch. If they're too soft, they'll disintegrate in the pan.
Equipment Needed
You don't need much here. A medium skillet for the pears and a baking sheet with parchment paper will do. I use a sharp knife to score the pastry borders, but a pizza cutter works too if you're feeling lazy.
A small microwave safe bowl is necessary for the apricot glaze. If you have a pastry brush, it makes the egg wash and glaze application much cleaner, though a spoon works in a pinch.
Bringing It Together
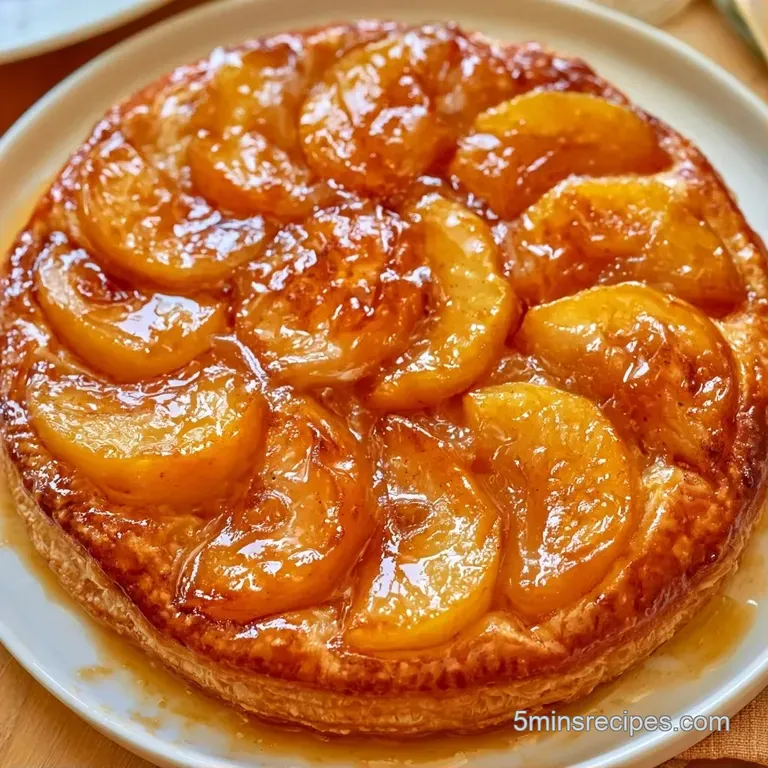
Phase 1: Caramelizing the Pears
Melt the butter in a medium skillet over medium heat until foaming. Stir in the cinnamon, brown sugar, and salt. Once the sugar begins to bubble, add the pear slices and lemon juice.
Sauté for 5–7 minutes until the fruit softens and is coated in a rich, mahogany colored glaze. Remove from the heat and let cool slightly.
Phase 2: Shaping the Puff Pastry
Warm your oven to 400°F (200°C). Roll the thawed puff pastry out onto parchment paper. Slice the sheet into 8 equal rectangles (roughly 3x5 inches). Use a knife to lightly score a border about 1/2 inch from the edge, being careful not to cut all the way through.
Phase 3: Assembly and Baking
Spoon a generous portion of the caramelized pears into the center of each rectangle. Brush the scored borders with the beaten egg wash. Bake for 15–20 minutes until the edges have puffed and the pastry has achieved a shattering, golden brown texture.
Phase 4: The Finishing Touch
While the tarts are still hot, microwave the apricot preserves and water in a small bowl for 15 seconds. Gently brush the glaze over the fruit for a high gloss finish.
- Oven Temp
- 400°F (200°C).
- Pastry Cut
- 8 rectangles of 3x5 inches.
- Sauté Time
- 5
Handling Common Pastry Issues
One of the biggest complaints with these Pear Puff Pastry Tarts is the "soggy bottom." This usually happens if the pears are added to the pastry while they are still too wet or if the oven isn't hot enough to sear the bottom of the dough immediately.
If the pastry doesn't rise, it's almost always because the dough got too warm before hitting the oven. Puff pastry depends on cold butter layers; if the butter melts on the counter, you lose the lift.
Another issue is the edges burning before the center is cooked. This happens if your oven runs hot or if the egg wash was applied too thickly on the very tips of the pastry.
| Problem | Root Cause | Solution |
|---|---|---|
| Soggy Base | Excess fruit moisture | Sauté pears until syrup is thick |
| Flat Pastry | Dough warmed up | Chill cut rectangles 10 mins before baking |
| Burnt Edges | Oven temp too high | Rotate pan halfway through baking |
Creative Twists and Swaps
Feel free to experiment by substituting the pears with other fruits. I've had great results with Apple Puff Tarts using this same caramelization process. The apple variety is a bit tarter, while the pear remains more floral.
For a nutty touch, scatter some toasted slivered almonds over the fruit before baking to provide a crisp contrast to the soft texture. If you prefer something akin to a Puff Pastry Fruit Tart, you can skip the sautéing step and use fresh berries topped with a dollop of sweetened cream cheese.
Decision Shortcut
- Brighter flavor? → stir 1 tsp lemon zest into the sugar
- More depth? → add a pinch of ground ginger
- Nutty flavor? → brush edges with melted butter and cinnamon sugar
| Variation | Change | Result |
|---|---|---|
| Savory Sweet | Add gorgonzola crumbles | Sharp, salty contrast |
| Vegan | Coconut oil & maple syrup | Lighter, dairy-free |
| Extra Rich | Add a dollop of mascarpone | Creamy, bistro style |
How to Store and Keep Fresh
Keep any leftover tarts in a single layer on a plate covered with a loose cloth or a vented container. They stay good for about 2 days. Avoid stacking them, or the bottom tarts will get squashed and lose their crunch.
For the freezer, let the tarts cool completely. Place them on a tray to flash freeze for an hour before moving them to a container. They'll last about 2 months this way.
To get that shattering texture back, don't use the microwave. Instead, pop them in a toaster oven or a 350°F oven for 5 minutes. This crisps the butter layers back up without overcooking the fruit.
Regarding waste, don't toss the leftover apricot glaze. If you have a bit left in the bowl, use it to glaze a few slices of fresh fruit or stir it into some yogurt for a quick morning snack.
Presentation Tips
For a professional, boutique look, present these on a slate board or a white ceramic platter. A light sprinkle of powdered sugar around the edges right before serving creates a beautiful contrast against the dark mahogany pears.
I suggest pairing these with a spoonful of chilled mascarpone or a dollop of vanilla ice cream. The contrast between the hot pastry and the cold topping is a winner.
When serving these to a group, place a small mint leaf on the apricot glaze. This tiny detail makes the colors pop and gives the dish a polished finish.
The Trick Behind the Texture
The real magic here is lamination. Puff pastry is just layers of dough and butter folded over and over. When the heat hits, the water in the butter turns to steam, which physically lifts the dough.
Sautéing the pears isn't just about flavor. It's about removing the water that would otherwise soak into the pastry. By creating a thick syrup, the fruit sits on top of the dough rather than soaking into it.
This combination of high heat and moisture control is what gives the tarts their specific structure. Without the sauté step, you'd have a pear stew on a piece of bread. With it, you have a refined dessert.
Recipe FAQs
Should I cook the puff pastry before adding the filling?
No, you bake the pastry and fruit together. Sautéing the pears first removes excess moisture so the dough stays crisp during the final bake.
Which pastry works best for this recipe?
Stick with a frozen all-butter puff pastry sheet. The high butter content is essential for achieving those shattering, golden layers.
Can these tarts be made with gluten-free flour?
No, this recipe relies on a pre-made all-butter puff pastry sheet. You would need to source a specialized gluten-free pastry alternative.
Why did my tart develop a soggy bottom?
The pear slices likely released too much juice. Make sure to sauté them until the syrup is thick and mahogany colored to lock in the moisture.
Could I use fruit conserves for the glaze?
Yes, apricot preserves are the ideal choice here. Heat them with a bit of water in the microwave for 15 seconds for a glossy finish.
How to get a perfectly flaky crust?
Bake the tarts at 400°F. This high temperature causes the butter layers to evaporate quickly, pushing the dough up into ridges.
Would shortcrust pastry work as a substitute?
No, shortcrust will not provide the same lift. You would lose the light, airy texture that comes from the layers of puff pastry.
Is it true that you must blind bake the crust to prevent sogginess?
Surprisingly, no. Sautéing the pears before assembly concentrates the flavor and prevents the pastry from getting wet.
Pear Puff Pastry Tarts