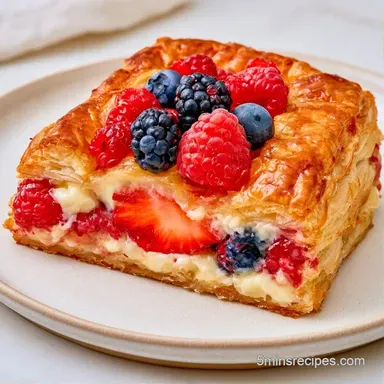
Puff Pastry Fruit Tart with Mascarpone Cream
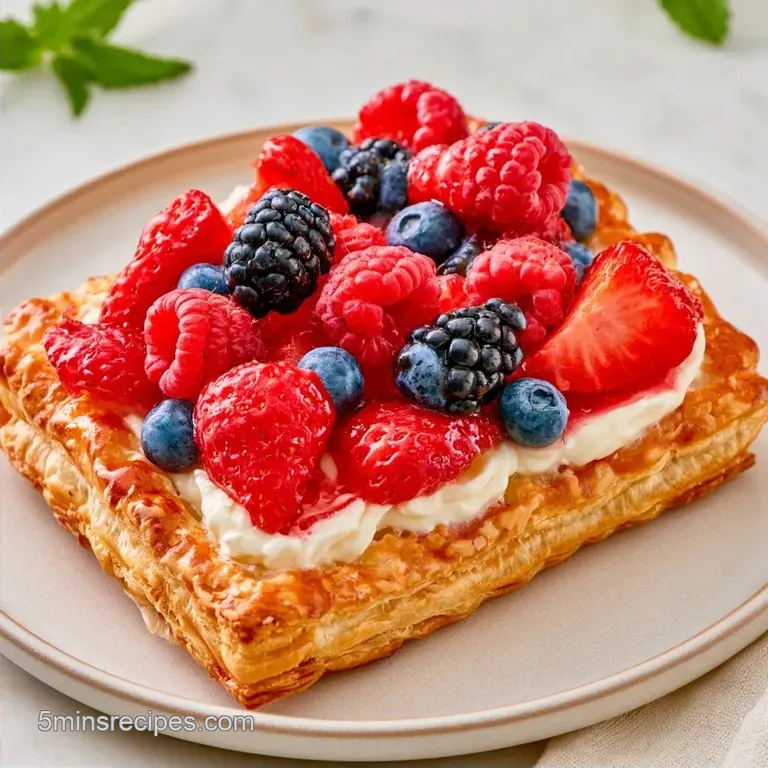
- Time: 30 min active + 15 min baking
- Flavor/Texture Hook: Shattering crust with a rich, airy cream
- Perfect for: Weekend brunch or a light dinner party dessert
Making a Crisp Puff Pastry Fruit Tart
I once tried to make a fruit tart for a bridal shower that ended in a complete mess. I didn't score the edges, so the center puffed up like a giant balloon, and when I tried to push it down, the whole thing cracked.
Then, the berries started weeping juice, turning the crust into a soggy, pale sponge within twenty minutes. It was a disaster that looked more like a fruit soup than a dessert.
The fix is actually pretty simple, and it's all about how you handle the dough and the filling. By scoring a border, you tell the pastry exactly where to rise and where to stay flat. Combining mascarpone with cream cheese also gives the filling enough body to support the berries without collapsing.
You can expect a tart that smells like toasted butter and lemon zest. It's a light treat that feels fancy but doesn't require you to spend four hours in the kitchen. This is the version that actually stays crisp on the plate.
Why the Texture Works
Cold Fat: Keeping the pastry chilled ensures the butter layers don't merge before they hit the heat. This creates steam that pushes the dough up into those flaky layers.
The Border Score: Cutting a shallow line around the edge prevents the middle from rising. It creates a sturdy "wall" that holds the cream filling in place.
Dual Cheese Base: Mixing mascarpone and cream cheese provides a stable yet airy structure. This stops the filling from becoming a puddle under the weight of the berries.
| Method | Time | Texture | Best For |
|---|---|---|---|
| Oven Bake | 15 mins | Shattering & Airy | Classic dinner parties |
| Air Fryer | 12 mins | Extra Crispy Edge | Small batches/Singles |
The oven method is usually better for a full sheet, but if you're making mini tarts, the air fryer hits that mahogany color faster. Just keep an eye on the sugar so it doesn't burn.
The Ingredient List
| Component | Purpose | Substitute Notes |
|---|---|---|
| Puff Pastry | Buttery base | store-bought chilled dough. Note: gluten-free options work but are denser |
| Mascarpone | Creamy lift | Heavy cream + lemon. Note: Less stable, may need more chilling |
| Apricot Preserves | Glossy glaze | Peach or Apricot jam. Note: Adds a slightly different fruit note |
| Mixed Berries | Fresh tartness | Sliced kiwi or mango. Note: Pat dry to prevent weeping |
The Full List:
- 1 sheet (17.3 oz / 490g) frozen puff pastry
- 1 large (50g) eggWhy this? Creates a golden, shiny finish
- 1 tbsp (8g) granulated sugar
- 4 oz (115g) low-fat cream cheeseWhy this? Adds a necessary tang
- 4 oz (115g) mascarpone cheese
- 2 tbsp (30ml) maple syrup
- 1 tsp (5ml) vanilla extract
- 1 tsp (2g) lemon zestWhy this? Cuts through the fat
- 2 cups (300g) mixed fresh berries
- 1 tbsp (15ml) apricot preserves
- 1 tbsp (15ml) water
Kitchen Tools Needed
You don't need much for this, just a few basics. A sharp knife or a pizza cutter is essential for scoring the dough. I prefer a small saucepan for the glaze because it's easier to control the heat than a microwave.
For the filling, a hand mixer or a stand mixer such as KitchenAid works best. You want to incorporate air into the cheeses to keep it light. A wide baking sheet and parchment paper are non negotiable here, as puff pastry loves to stick to metal.
Step by step Instructions
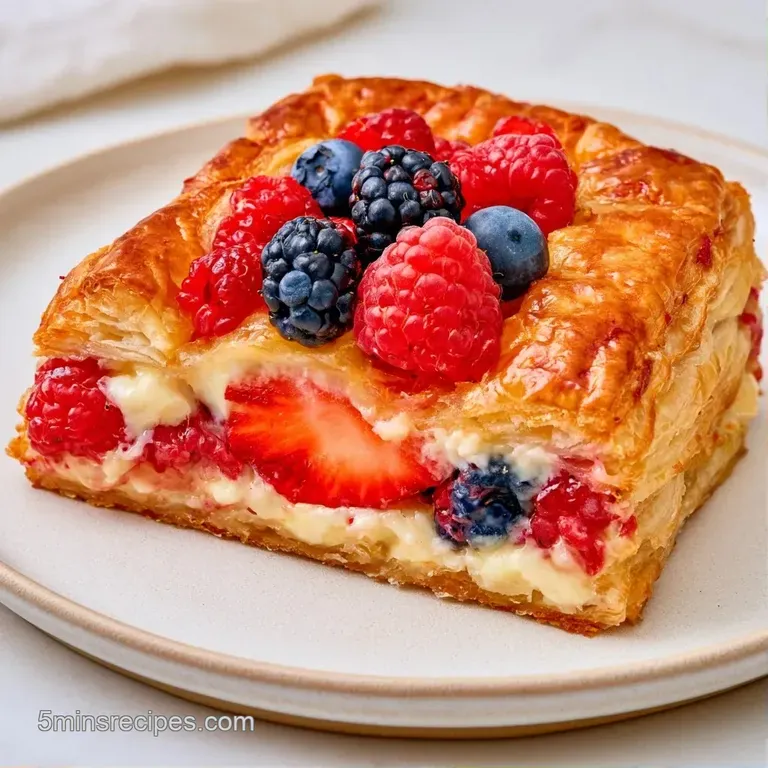
Phase 1: The Crust
- Set your oven to 400°F (200°C) and place parchment paper on a baking sheet.
- Gently roll out the puff pastry on the parchment. Using a knife, lightly score a 1 inch border around the perimeter without cutting through entirely. Note: This keeps the middle from puffing up.
- Apply beaten egg wash to the scored edges and dust with granulated sugar.
- Bake for 12–15 minutes until the sides are risen and mahogany in color.
- Allow the pastry to cool fully on the sheet. Note: If the center rose, flatten it gently with your hand.
Phase 2: The Filling
- Whisk the softened low-fat cream cheese in a bowl until it is creamy.
- Mix in the cold mascarpone, maple syrup, vanilla, and lemon zest. Beat on medium high for 2 minutes until soft peaks appear.
- Distribute the smooth cream filling evenly within the baked pastry rim.
Phase 3: The Topping
- Place a mosaic of fresh mixed berries atop the cream layer.
- Simmer the apricot preserves and water in a small pot until the liquid thins and begins to bubble.
- Apply the warm glaze over the fruit for a shiny look.
Solving Common Problems
Fixing Flat Crust
If your pastry doesn't rise, it's usually because the dough got too warm before it hit the oven. When the butter melts on the counter, it can't create those steam pockets. Keep the sheet in the fridge until the second you're ready to score it and put it in the oven.
Fixing Runny Filling
Over beating mascarpone can cause it to break and become grainy or liquid. Stop mixing the moment you hit those soft peaks. If it's already too runny, pop the filling in the fridge for 20 minutes before spreading it on the tart.
Stopping Berry Bleeding
Berries release juice the moment they hit the sugar or the glaze. To prevent a purple puddle, wash your berries and pat them completely dry with a paper towel. Don't glaze the tart more than an hour before serving, as the heat from the preserves can draw out moisture.
Flavor and Diet Tweaks
If you want to change the profile, try replacing the berries with sliced pears and a drizzle of honey. For something more savory sweet, a thin layer of goat cheese instead of cream cheese works brilliantly. If you enjoy other fruit based pastries, my apple puff tarts recipe uses a similar base but a cinnamon kick.
For a dairy-free version, you can find vegan puff pastry in most stores, but the rise is usually less dramatic. Swap the cream cheese and mascarpone for a cashew based cream or a thick coconut yogurt.
Since the coconut version is softer, I recommend chilling the assembled tart for 30 minutes before slicing.
If you're looking for a savory twist on the same dough, you might like these tomato tarts, which use the same scoring technique to hold the toppings.
| Goal | What to change |
|---|---|
| Lower Sugar | Swap syrup for stevia |
| More Tartness | Add more lemon zest |
| Nutty Flavor | Sprinkle almond slivers |
Trust me on the lemon zest; it's the only thing that stops the mascarpone from feeling too heavy.
Keeping It Fresh
While freshest on the day it's made, the tart lasts 2 days when stored in the refrigerator. Use a cardboard bakery box or a loosely covered container. Avoid using tight plastic wrap, otherwise the crust will absorb moisture and lose its crispness.
Freezing the fully assembled tart isn't advisable as the berries will turn to mush. You can, however, bake the crust and freeze it for up to a month. Simply wrap the cooled shell in foil and thaw it at room temperature for 20 minutes before adding the cream and fruit.
Put your pastry scraps to good use. Twist any leftover bits of dough into knots, sprinkle them with cinnamon sugar, and bake for 8 minutes. They're a perfect little snack for the chef.
What to Serve Beside
A tart like this pairs beautifully with something refreshing to balance the creamy cheese. A chilled glass of Prosecco or a dry sparkling cider is an ideal match, as the bubbles cleanse the palate between bites of the buttery crust.
If you're assembling a dessert platter, serve this with fresh mint leaves and a bowl of raspberries for dipping. It also goes wonderfully with a simple Earl Grey tea, as the bergamot notes complement the lemon zest in the filling.
Since this is a lighter treat, you can serve it alongside shards of dark chocolate for added bitterness and crunch. Just ensure the chocolate is at room temperature so it doesn't clash with the chilled cream.
Recipe FAQs
Can I use puff pastry for a tart?
Yes, it creates a light and flaky crust that works perfectly for fruit tarts. Just score a border to keep the filling contained.
Is it true that frozen berries work as well as fresh?
Actually, no. Frozen fruit releases too much moisture and will make the pastry soggy.
Do I need to bake the puff pastry before adding the filling?
Yes, bake it at 400°F for 12-15 minutes until mahogany colored. Adding filling to raw pastry prevents it from rising and crisping properly.
How to prevent the filling from spilling over the edges?
Score a 1 inch border around the edge of the pastry without cutting all the way through. This creates a natural wall for the cream cheese and berries.
Would shortcrust pastry work as a substitute?
Yes, though the texture will be denser and less airy. If you enjoyed mastering the light, flaky layers here, see how the same dough handling works in our Nutella toast pies.
Which method makes the berries look glossy?
Heat apricot preserves and water in a small saucepan until melted. Brush this glaze over the fresh berries for a professional shine.
Puff Pastry Fruit Tart